
Current Quote
£0.00
Your Quotation Summary
| Part Number | Description | Qty | Unit Price | Line Total |
|---|
Total: £0.00
Admin: Update Base List Prices & Layout
Note: Applying price updates or toggling the shortcut buttons changes the file permanently. Click “Download Updated File” to save the new HTML file to your computer.
Information & Updates
Notice: FOR RB1 LTD INTERNAL USE ONLY
Last Updated: 01/10/2025
Carriage (Mainland UK – Excludes Scottish Highlands/Islands):
Delivery costs are included; however, additional charges may apply for AM and specialised deliveries.
Enclosures supplied cream by default. Prices exclusive of VAT.
Pricing Calculator
Note: Apply the customers discount here, then select quantities in the tables below to build your PDF Quote.
32A-800A Isolator EMBS
32A-250A Isolator EMBS (Surge Protection)
32A-125A MCB EMBS
ATS Panels
Back Feed Protection
Castell EMBS
Dual Input EMBS
MTS Panels
Multi Load Output EMBS
N+1 EMBS + WIB Panels
Rack Mount EMBS
AC Panels▼
32A-800A Isolator EMBS▼
| RB1 Part Number | RB1 Product Description | Max Cable Size (SWA) | Dimensions WxHxD | List Price | Buy Price | Sample Photo | Qty |
|---|---|---|---|---|---|---|---|
| RB1-S-EMBS-32A-2P-ISO-222 | 32A 2P Slimline Bypass | 16mm | 300x400x200 | £648.30 | £648.30 | 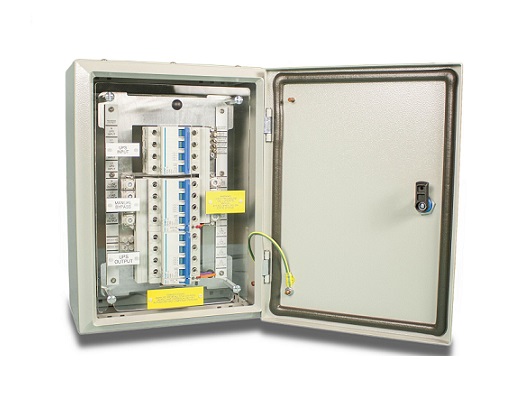 |
0
|
| RB1-S-EMBS-32A-31P-ISO-422 | 32A 3/1 Slimline Bypass | 16mm | 300x400x200 | £795.58 | £795.58 | |
0
|
| RB1-S-EMBS-32A-4P-ISO-344 | 32A 4P Slimline Bypass | 16mm | 300x400x200 | £829.68 | £829.68 | |
0
|
| RB1-S-EMBS-32A-4P-ISO-444 | 32A 4P Slimline Bypass | 16mm | 300x400x200 | £829.68 | £829.68 | |
0
|
| RB1-S-EMBS-63A-4P-ISO-444 | 63A 4P Slimline Bypass | 16mm | 300x400x200 | £829.68 | £829.68 | |
0
|
| RB1-S-EMBS-63A-2P-ISO-222 | 63A 2P Slimline Bypass | 16mm | 300x400x200 | £648.29 | £648.29 | |
0
|
| RB1-S-EMBS-63A-31P-ISO-422 | 63A 3/1 Slimline Bypass | 16mm | 300x400x200 | £795.58 | £795.58 | |
0
|
| RB1 Part Number | RB1 Product Description | Max Cable Size (SWA) | Dimensions WxHxD | List Price | Buy Price | Sample Photo | Qty |
|---|---|---|---|---|---|---|---|
| RB1-C-EMBS-63A-2P-ISO-222 | 63A 1/1 Compact Bypass | 25mm | 400x500x200 | £956.52 | £956.52 | 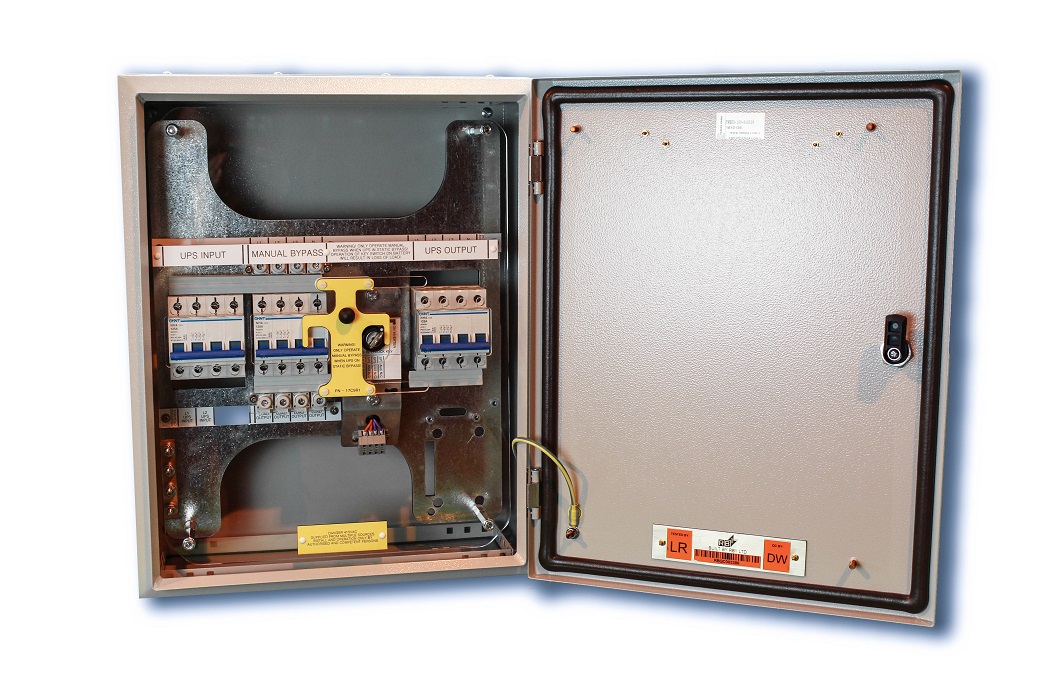 |
0
|
| RB1-C-EMBS-63A-31P-ISO-422 | 63A 3/1 Compact Bypass | 25mm | 400x500x200 | £1,071.08 | £1,071.08 | |
0
|
| RB1-C-EMBS-63A-4P-ISO-344 | 63A 3/3 Compact Bypass | 25mm | 400x500x200 | £985.17 | £985.17 | |
0
|
| RB1-C-EMBS-63A-4P-ISO-444 | 63A 3/3 Compact Bypass | 25mm | 400x500x200 | £985.16 | £985.16 | |
0
|
| RB1-C-EMBS-80A-2P-ISO-222 | 80A 1/1 Compact Bypass | 25mm | 400x500x200 | £1,071.08 | £1,071.08 | |
0
|
| RB1-C-EMBS-80A-31P-ISO-422 | 80A 3/1 Compact Bypass | 25mm | 400x500x200 | £1,128.37 | £1,128.37 | |
0
|
| RB1-C-EMBS-80A-4P-ISO-344 | 80A 3/3 Compact Bypass | 25mm | 400x500x200 | £1,157.01 | £1,157.01 | |
0
|
| RB1-C-EMBS-80A-4P-ISO-444 | 80A 3/3 Compact Bypass | 25mm | 400x500x200 | £1,157.01 | £1,157.01 | |
0
|
| RB1 Part Number | RB1 Product Description | Max Cable Size (SWA) | Dimensions WxHxD | List Price | Buy Price | Sample Photo | Qty |
|---|---|---|---|---|---|---|---|
| RB1-EMBS-63A-1P-ISO-111 | 63A 1/1 Bypass | 35mm | 500x500x200 | £1,089.49 | £1,089.49 | 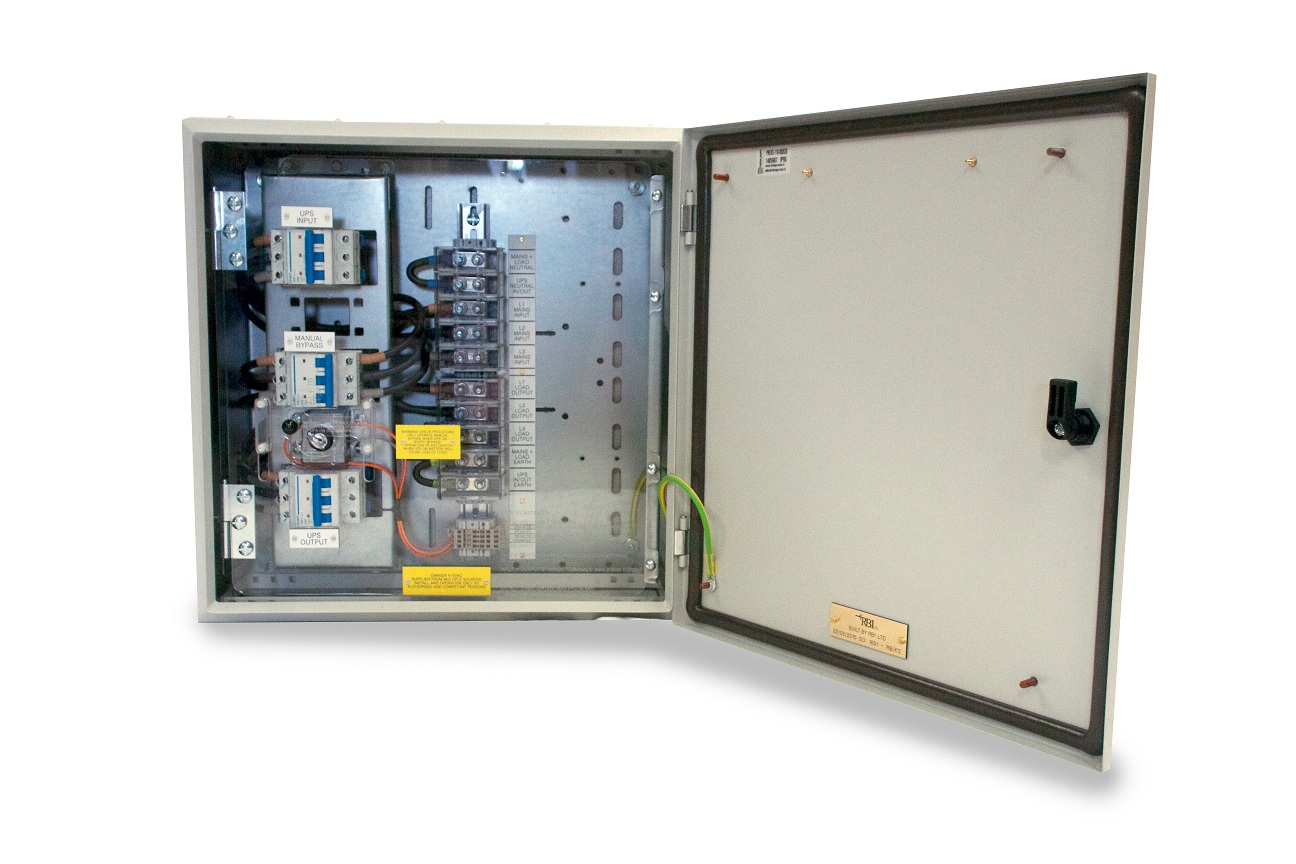 |
0
|
| RB1-EMBS-63A-2P-ISO-222 | 63A 1/1 Bypass | 35mm | 500x500x200 | £1,086.35 | £1,086.35 | No photo available |
0
|
| RB1-EMBS-63A-31P-ISO-3S-311 | 63A 3/1 Bypass | 35mm | 500x500x200 | £1,117.86 | £1,117.86 | |
0
|
| RB1-EMBS-63A-31P-ISO-3S-422 | 63A 3/1 Bypass | 35mm | 500x500x200 | £1,131.36 | £1,131.36 | No photo available |
0
|
| RB1-EMBS-63A-3P-ISO-333 | 63A 3/3 Bypass | 35mm | 500x500x200 | £1,146.23 | £1,146.23 | |
0
|
| RB1-EMBS-63A-4P-ISO-444 | 63A 3/3 Bypass | 35mm | 500x500x200 | £1,202.97 | £1,202.97 | |
0
|
| RB1-EMBS-125A-1P-ISO-111 | 125A 1/1 Bypass | 35mm | 500x500x200 | £1,277.08 | £1,277.08 | |
0
|
| RB1-EMBS-125A-2P-ISO-222 | 125A 1/1 Bypass | 35mm | 500x500x200 | £1,281.31 | £1,281.31 | No photo available |
0
|
| RB1-EMBS-125A-31P-ISO-311 | 125A 3/1 Bypass | 35mm | 500x500x200 | £1,316.43 | £1,316.43 | |
0
|
| RB1-EMBS-125A-31P-ISO-422 | 125A 3/1 Bypass | 35mm | 500x500x200 | £1,358.31 | £1,358.31 | No photo available |
0
|
| RB1-EMBS-125A-3P-ISO-333 | 125A 3/3 Bypass | 35mm | 500x500x200 | £1,316.43 | £1,316.43 | |
0
|
| RB1-EMBS-125A-4P-ISO-444 | 125A 3/3 Bypass | 35mm | 500x500x200 | £1,432.85 | £1,432.85 | |
0
|
| RB1 Part Number | RB1 Product Description | Max Cable Size (SWA) | Dimensions WxHxD | List Price | Buy Price | Sample Photo | Qty |
|---|---|---|---|---|---|---|---|
| RB1-EMBS-160A-2P-ISO-222 | 160A 1/1 Bypass | 95mm | 600x1000x300 | £2,681.51 | £2,681.51 | 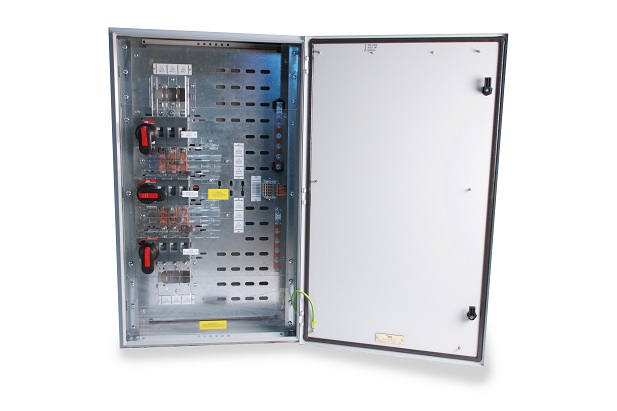 |
0
|
| RB1-EMBS-160A-31P-ISO-311 | 160A 3/1 Bypass | 95mm | 600x1000x300 | £2,681.51 | £2,681.51 | |
0
|
| RB1-EMBS-160A-31P-ISO-422 | 160A 3/1 Bypass | 95mm | 600x1000x300 | £3,082.74 | £3,082.74 | No photo available |
0
|
| RB1-EMBS-160A-3P-ISO-333 | 160A 3/3 Bypass | 95mm | 600x1000x300 | £2,681.51 | £2,681.51 | |
0
|
| RB1-EMBS-160A-4P-ISO-444 | 160A 3/3 Bypass | 95mm | 600x1000x300 | £3,230.96 | £3,230.96 | |
0
|
| RB1-EMBS-200A-2P-ISO-222 | 200A 1/1 Bypass | 95mm | 600x1000x300 | £2,680.02 | £2,680.02 | |
0
|
| RB1-EMBS-200A-31P-ISO-311 | 200A 3/1 Bypass | 95mm | 600x1000x300 | £2,681.51 | £2,681.51 | |
0
|
| RB1-EMBS-200A-31P-ISO-422 | 200A 3/1 Bypass | 95mm | 600x1000x300 | £3,082.75 | £3,082.75 | No photo available |
0
|
| RB1-EMBS-200A-3P-ISO-333 | 200A 3/3 Bypass | 95mm | 600x1000x300 | £2,681.51 | £2,681.51 | |
0
|
| RB1-EMBS-200A-4P-ISO-444 | 200A 3/3 Bypass | 95mm | 600x1000x300 | £3,230.96 | £3,230.96 | |
0
|
| RB1-EMBS-250A-2P-ISO-222 | 250A 1/1 Bypass | 95mm | 600x1000x300 | £3,082.75 | £3,082.75 | |
0
|
| RB1-EMBS-250A-31P-ISO-311 | 250A 3/1 Bypass | 95mm | 600x1000x300 | £3,082.75 | £3,082.75 | |
0
|
| RB1-EMBS-250A-31P-ISO-422 | 250A 3/1 Bypass | 95mm | 600x1000x300 | £3,545.36 | £3,545.36 | No photo available |
0
|
| RB1-EMBS-250A-3P-ISO-333 | 250A 3/3 Bypass | 95mm | 600x1000x300 | £3,082.75 | £3,082.75 | |
0
|
| RB1-EMBS-250A-4P-ISO-444 | 250A 3/3 Bypass | 95mm | 600x1000x300 | £3,545.36 | £3,545.36 | |
0
|
| RB1-EMBS-315A-2P-ISO-222 | 315A 1/1 Bypass | 150mm | 800x1200x300 | £4,700.83 | £4,700.83 | No photo available |
0
|
| RB1-EMBS-315A-31P-ISO-311 | 315A 3/1 Bypass | 150mm | 800x1200x300 | £4,700.83 | £4,700.83 | No photo available |
0
|
| RB1-EMBS-315A-31P-ISO-422 | 315A 3/1 Bypass | 150mm | 800x1200x300 | £5,422.00 | £5,422.00 | No photo available |
0
|
| RB1-EMBS-315A-3P-ISO-333 | 315A 3/3 Bypass | 150mm | 800x1200x300 | £4,700.83 | £4,700.83 | No photo available |
0
|
| RB1-EMBS-315A-4P-ISO-444 | 315A 3/3 Bypass | 150mm | 800x1200x300 | £5,422.00 | £5,422.00 | No photo available |
0
|
| RB1-EMBS-400A-2P-ISO-222 | 400A 1/1 Bypass | 150mm | 800x1200x300 | £4,872.78 | £4,872.78 | No photo available |
0
|
| RB1-EMBS-400A-31P-ISO-311 | 400A 3/1 Bypass | 150mm | 800x1200x300 | £4,872.78 | £4,872.78 | No photo available |
0
|
| RB1-EMBS-400A-31P-ISO-422 | 400A 3/1 Bypass | 150mm | 800x1200x300 | £5,525.50 | £5,525.50 | No photo available |
0
|
| RB1-EMBS-400A-3P-ISO-333 | 400A 3/3 Bypass | 150mm | 800x1200x300 | £4,872.78 | £4,872.78 | No photo available |
0
|
| RB1-EMBS-400A-4P-ISO-444 | 400A 3/3 Bypass | 150mm | 800x1200x300 | £5,525.50 | £5,525.50 | No photo available |
0
|
| RB1-EMBS-630A-3P-ISO-333 | 630A 3/3 Bypass | 240mm | 800x2000x600 | £8,714.00 | £8,714.00 | 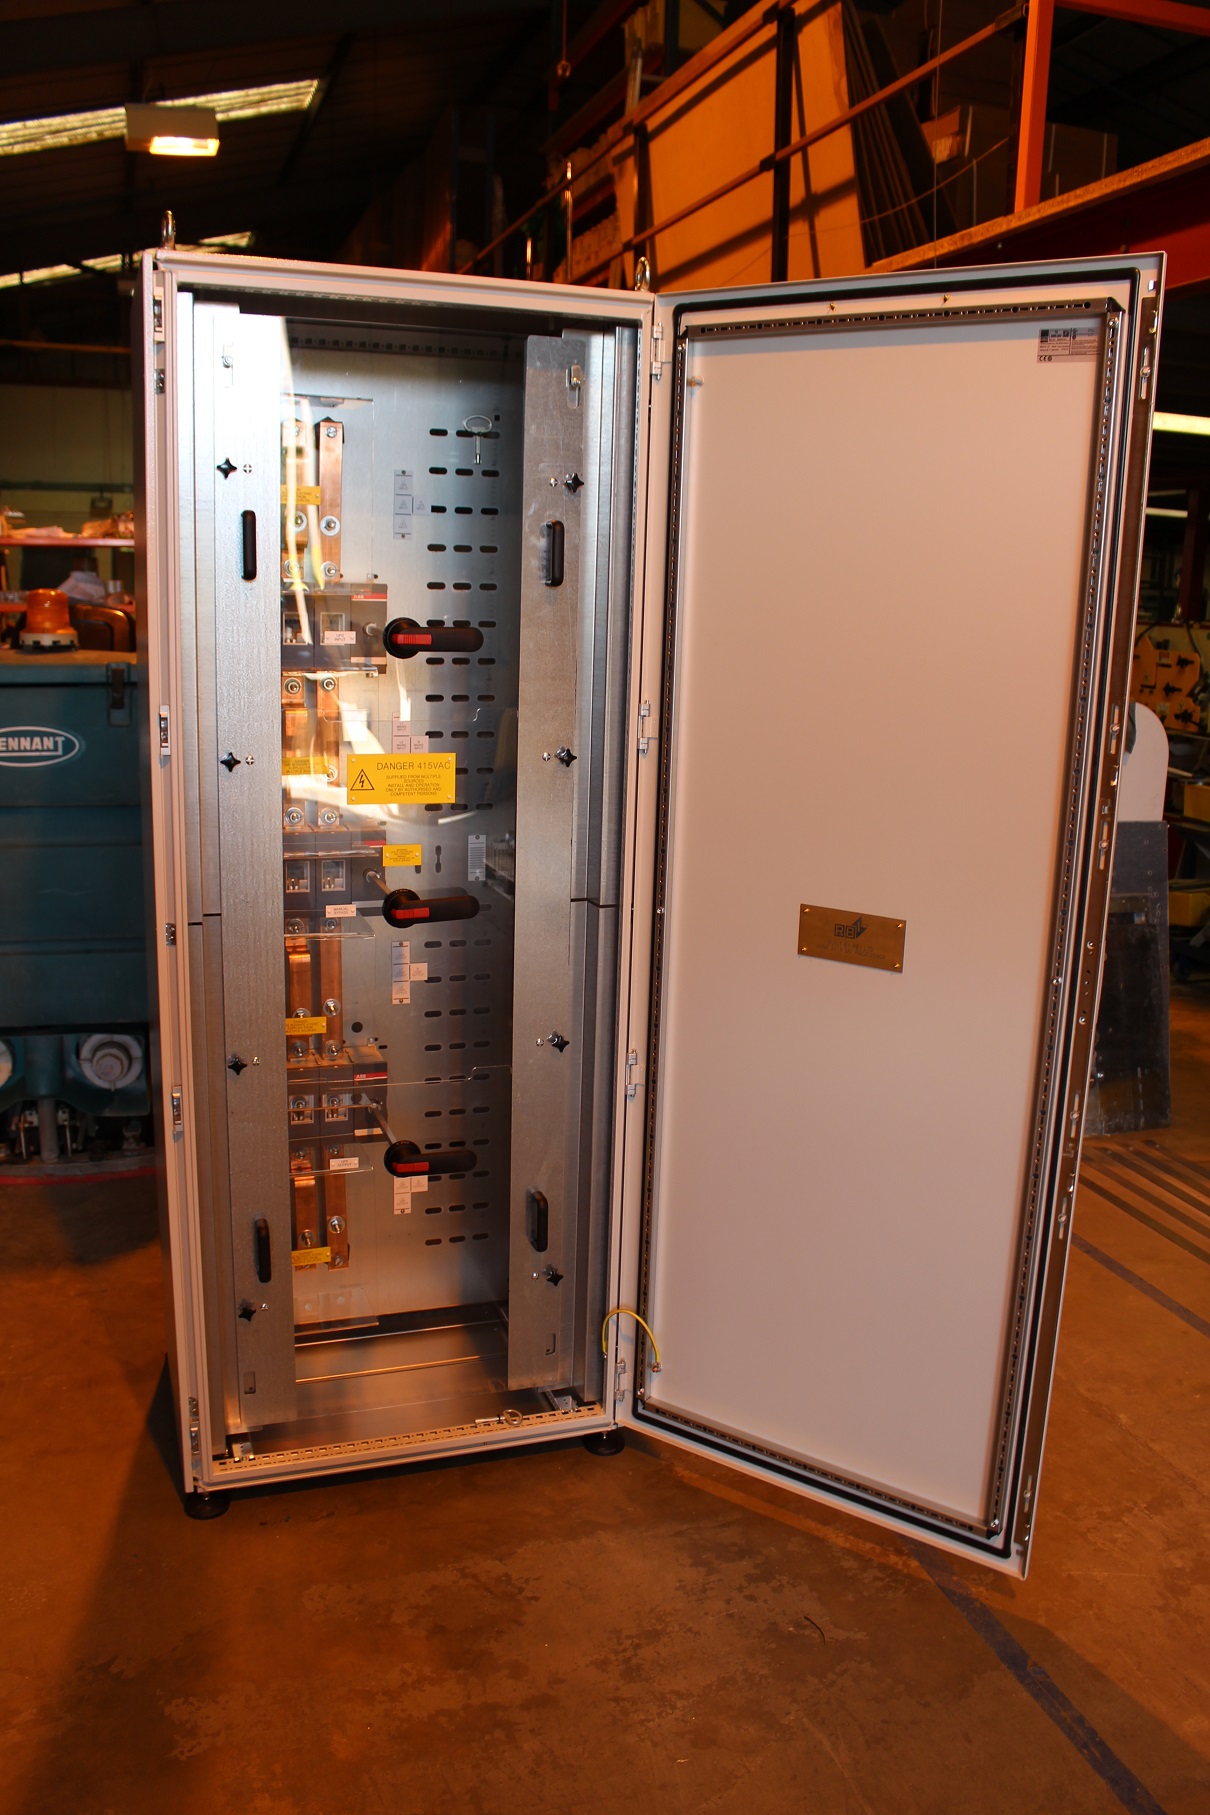 |
0
|
| RB1-EMBS-630A-4P-ISO-444 | 630A 3/3 Bypass | 240mm | 800x2000x600 | £10,085.27 | £10,085.27 | |
0
|
| RB1-EMBS-800A-4P-ISO-444 | 800A 3/3 Bypass | 240mm | 800x2000x600 | £14,336.21 | £14,336.21 | No photo available |
0
|
| RB1 Part Number | RB1 Product Description | Max Cable Size (SWA) | Dimensions WxHxD | List Price | Buy Price | Sample Photo | Qty |
|---|---|---|---|---|---|---|---|
| RB1-EMBS-RIELLO-MPW-AUX-MOD | N/O and N/C Aux Contact on UPS Input, Manual Bypass and UPS Output | £610.60 | £610.60 | No photo available |
0
|
32A-250A Isolator EMBS (Surge Protection)▼
| RB1 Part Number | RB1 Product Description | Max Cable Size (SWA) | Dimensions WxHxD | List Price | Buy Price | Sample Photo | Qty |
|---|---|---|---|---|---|---|---|
| RB1-S-EMBS-32A-2P-ISO-222-SPD | 32A 2P Slimline Bypass With Surge Protection | 16mm | 300x400x200 | £851.58 | £851.58 | No photo available |
0
|
| RB1-S-EMBS-63A-2P-ISO-222-SPD | 32A 3/1 Slimline Bypass With Surge Protection | 16mm | 300x400x200 | £851.58 | £851.58 | No photo available |
0
|
| RB1-C-EMBS-63A-2P-ISO-222-SPD | 63A 1/1 Compact Bypass With Surge Protection | 25mm | 400x500x200 | £1,169.04 | £1,169.04 | No photo available |
0
|
| RB1-C-EMBS-63A-31P-ISO-422-SPD | 63A 3/1 Compact Bypass With Surge Protection | 25mm | 500x500x200 | £1,517.60 | £1,517.60 | No photo available |
0
|
| RB1-C-EMBS-63A-4P-ISO-444-SPD | 63A 3/3 Compact Bypass With Surge Protection | 25mm | 500x500x200 | £1,547.47 | £1,547.47 | No photo available |
0
|
| RB1-C-EMBS-80A-2P-ISO-222-SPD | 63A 3/3 Compact Bypass With Surge Protection | 25mm | 500x500x200 | £1,312.71 | £1,312.71 | No photo available |
0
|
| RB1-C-EMBS-80A-31P-ISO-422-SPD | 80A 1/1 Compact Bypass With Surge Protection | 25mm | 500x500x200 | £1,576.61 | £1,576.61 | No photo available |
0
|
| RB1-C-EMBS-80A-4P-ISO-444-SPD | 80A 3/1 Compact Bypass With Surge Protection | 25mm | 500x500x200 | £1,606.11 | £1,606.11 | No photo available |
0
|
| RB1-EMBS-125A-2P-ISO-222-SPD | 63A 1/1 Bypass With Surge Protection | 35mm | 500x500x200 | £1,529.33 | £1,529.33 | No photo available |
0
|
| RB1-EMBS-125A-31P-ISO-422-SPD | 63A 1/1 Bypass With Surge Protection | 35mm | 500x700x200 | £1,863.45 | £1,863.45 | No photo available |
0
|
| RB1-EMBS-125A-4P-ISO-444-SPD | 63A 3/1 Bypass With Surge Protection | 35mm | 500x700x200 | £1,940.23 | £1,940.23 | No photo available |
0
|
| RB1-EMBS-160A-2P-ISO-222-SPD | 160A 1/1 Bypass With Surge Protection | 95mm | 600x1000x300 | £2,944.28 | £2,944.28 | No photo available |
0
|
| RB1-EMBS-160A-31P-ISO-422-SPD | 160A 3/1 Bypass With Surge Protection | 95mm | 600x1000x300 | £3,562.36 | £3,562.36 | No photo available |
0
|
| RB1-EMBS-160A-4P-ISO-444-SPD | 160A 3/1 Bypass With Surge Protection | 95mm | 600x1000x300 | £3,715.03 | £3,715.03 | No photo available |
0
|
| RB1-EMBS-200A-2P-ISO-222-SPD | 160A 3/3 Bypass With Surge Protection | 95mm | 600x1000x300 | £2,942.75 | £2,942.75 | No photo available |
0
|
| RB1-EMBS-200A-31P-ISO-422-SPD | 160A 3/3 Bypass With Surge Protection | 95mm | 600x1000x300 | £3,562.37 | £3,562.37 | No photo available |
0
|
| RB1-EMBS-200A-4P-ISO-444-SPD | 200A 1/1 Bypass With Surge Protection | 95mm | 600x1000x300 | £3,715.03 | £3,715.03 | No photo available |
0
|
| RB1-EMBS-250A-2P-ISO-222-SPD | 200A 3/1 Bypass With Surge Protection | 95mm | 600x1000x300 | £3,357.56 | £3,357.56 | No photo available |
0
|
| RB1-EMBS-250A-31P-ISO-422-SPD | 200A 3/1 Bypass With Surge Protection | 95mm | 600x1000x300 | £4,038.86 | £4,038.86 | No photo available |
0
|
| RB1-EMBS-250A-4P-ISO-444-SPD | 200A 3/3 Bypass With Surge Protection | 95mm | 600x1000x300 | £4,038.86 | £4,038.86 | No photo available |
0
|
| RB1-EMBS-RIELLO-MPW-AUX-MOD | N/O and N/C Aux Contact on UPS Input, Manual Bypass and UPS Output | £647.79 | £647.79 | No photo available |
0
|
32A-125A MCB EMBS Panels▼
| RB1 Part Number | RB1 Product Description | Max Cable Size (SWA) | Dimensions WxHxD | List Price | Buy Price | Sample Photo | Qty |
|---|---|---|---|---|---|---|---|
| RB1-EMBS-32A-1P-MCB-111 | 32A 1/1 MCB Bypass | 35mm | 500x500x200 | £1,083.64 | £1,083.64 | |
0
|
| RB1-EMBS-32A-31P-MCB-311 | 32A 3/1 MCB Bypass | 35mm | 500x500x200 | £1,111.85 | £1,111.85 | |
0
|
| RB1-EMBS-32A-3P-MCB-333 | 32A 3/3 MCB Bypass | 35mm | 500x500x200 | £1,168.28 | £1,168.28 | |
0
|
| RB1-EMBS-32A-4P-MCB-444 | 32A 3/3 MCB Bypass | 35mm | 500x500x200 | £1,196.49 | £1,196.49 | |
0
|
| RB1-EMBS-63A-1P-MCB-111 | 63A 1/1 MCB Bypass | 35mm | 500x500x200 | £1,083.64 | £1,083.64 | |
0
|
| RB1-EMBS-63A-31P-MCB-311 | 63A 3/1 MCB Bypass | 35mm | 500x500x200 | £1,111.85 | £1,111.85 | |
0
|
| RB1-EMBS-63A-3P-MCB-333 | 63A 3/3 MCB Bypass | 35mm | 500x500x200 | £1,168.28 | £1,168.28 | |
0
|
| RB1-EMBS-63A-4P-MCB-444 | 63A 3/3 MCB Bypass | 35mm | 500x500x200 | £1,196.49 | £1,196.49 | |
0
|
| RB1-EMBS-80A-1P-MCB-111 | 80A 1/1 MCB Bypass | 35mm | 500x500x200 | £1,181.71 | £1,181.71 | |
0
|
| RB1-EMBS-80A-31P-MCB-311 | 80A 3/1 MCB Bypass | 35mm | 500x500x200 | £1,209.93 | £1,209.93 | |
0
|
| RB1-EMBS-80A-3P-MCB-333 | 80A 3/3 MCB Bypass | 35mm | 500x500x200 | £1,252.92 | £1,252.92 | |
0
|
| RB1-EMBS-100A-1P-MCB-111 | 100A 1/1 MCB Bypass | 35mm | 500x500x200 | £1,294.56 | £1,294.56 | |
0
|
| RB1-EMBS-100A-31P-MCB-311 | 100A 3/1 MCB Bypass | 35mm | 500x500x200 | £1,365.77 | £1,365.77 | |
0
|
| RB1-EMBS-100A-3P-MCB-333 | 100A 3/3 MCB Bypass | 35mm | 500x500x200 | £1,365.77 | £1,365.77 | |
0
|
| RB1-EMBS-125A-1P-MCB-111 | 125A 1/1 MCB Bypass | 35mm | 500x500x200 | £1,294.56 | £1,294.56 | |
0
|
| RB1-EMBS-125A-31P-MCB-311 | 125A 3/1 MCB Bypass | 35mm | 500x500x200 | £1,365.77 | £1,365.77 | |
0
|
| RB1-EMBS-125A-3P-MCB-333 | 125A 3/3 MCB Bypass | 35mm | 500x500x200 | £1,365.77 | £1,365.77 | |
0
|
| RB1 Part Number | RB1 Product Description | Max Cable Size (SWA) | Dimensions WxHxD | List Price | Buy Price | Sample Photo | Qty |
|---|---|---|---|---|---|---|---|
| RB1-EMBS-RIELLO-MPW-AUX-MOD | N/O and N/C Aux Contact on UPS Input, Manual Bypass and UPS Output | £610.60 | £610.60 | No photo available |
0
|
ATS Panels▼
| RB1 Part Number | RB1 Product Description | Max Cable Size (SWA) | Dimensions WxHxD | List Price | Buy Price | Sample Photo | Qty |
|---|---|---|---|---|---|---|---|
| RB1-ATS-63A-2P-MCCB | 63A 2P ATS Panel | 35mm | 600x600x300 | £1,874.94 | £1,874.94 |  |
0
|
| RB1-ATS-100A-2P-MCCB | 100A 2P ATS Panel | 35mm | 600x600x300 | £1,959.06 | £1,959.06 |
|
0
|
| RB1-ATS-125A-2P-MCCB | 125A 2P ATS Panel | 35mm | 600x600x300 | £2,400.69 | £2,400.69 |
|
0
|
| RB1-ATS-63A-4P-MCCB | 63A 4P ATS Panel | 35mm | 600x600x300 | £1,874.94 | £1,874.94 |
|
0
|
| RB1-ATS-100A-4P-MCCB | 100A 4P ATS Panel | 35mm | 600x600x300 | £2,516.98 | £2,516.98 |
|
0
|
| RB1-ATS-125A-4P-MCCB | 125A 4P ATS Panel | 35mm | 600x600x300 | £2,516.98 | £2,516.98 |
|
0
|
| RB1-ATS-160A-4P-MCCB | 160A 4P ATS Panel | 50mm | 600x600x300 | £3,621.05 | £3,621.05 | No photo available |
0
|
| RB1-ATS-250A-4P-MCCB | 250A 4P ATS Panel | 95mm | TBC | £4,531.59 | £4,531.59 | No photo available |
0
|
| RB1-AC-BAYING-63A | Cost to Bay a 63A ATS or MTS to an EMBS | 35mm | £604.05 | £604.05 | No photo available |
0
| |
| RB1-AC-BAYING-100A | Cost to Bay a 100A ATS or MTS to an EMBS | 35mm | £730.49 | £730.49 | No photo available |
0
| |
| RB1-AC-BAYING-125A | Cost to Bay a 125A ATS or MTS to an EMBS | 35mm | £772.63 | £772.63 | No photo available |
0
| |
| RB1-AC-BAYING-160A | Cost to Bay a 160A ATS or MTS to an EMBS | 50mm | £1011.44 | £1,011.44 | No photo available |
0
|
Back Feed Protection Panels▼
| RB1 Part Number | RB1 Product Description | Max Cable Size (SWA) | Dimensions WxHxD | List Price | Buy Price | Sample Photo | Qty |
|---|---|---|---|---|---|---|---|
| RB1-C-BFP-80A | 80A Back Feed Protection Panel | 35mm | 400x500x200 | £1,029.06 | £1,029.06 | No photo available |
0
|
| RB1-BFP-125A | 125A Back Feed Protection Panel | 35mm | 500x500x200 | £1,292.42 | £1,292.42 | No photo available |
0
|
Castell EMBS Panels▼
| RB1 Part Number | RB1 Product Description | Max Cable Size (SWA) | Dimensions WxHxD | List Price | Buy Price | Sample Photo | Qty |
|---|---|---|---|---|---|---|---|
| RB1-K-EMBS-63A-31P-ISO-KS20 | 63A 31P EMBS With Castell KS20 | 35mm | 500x700x200 | £2,458.96 | £2,458.96 | 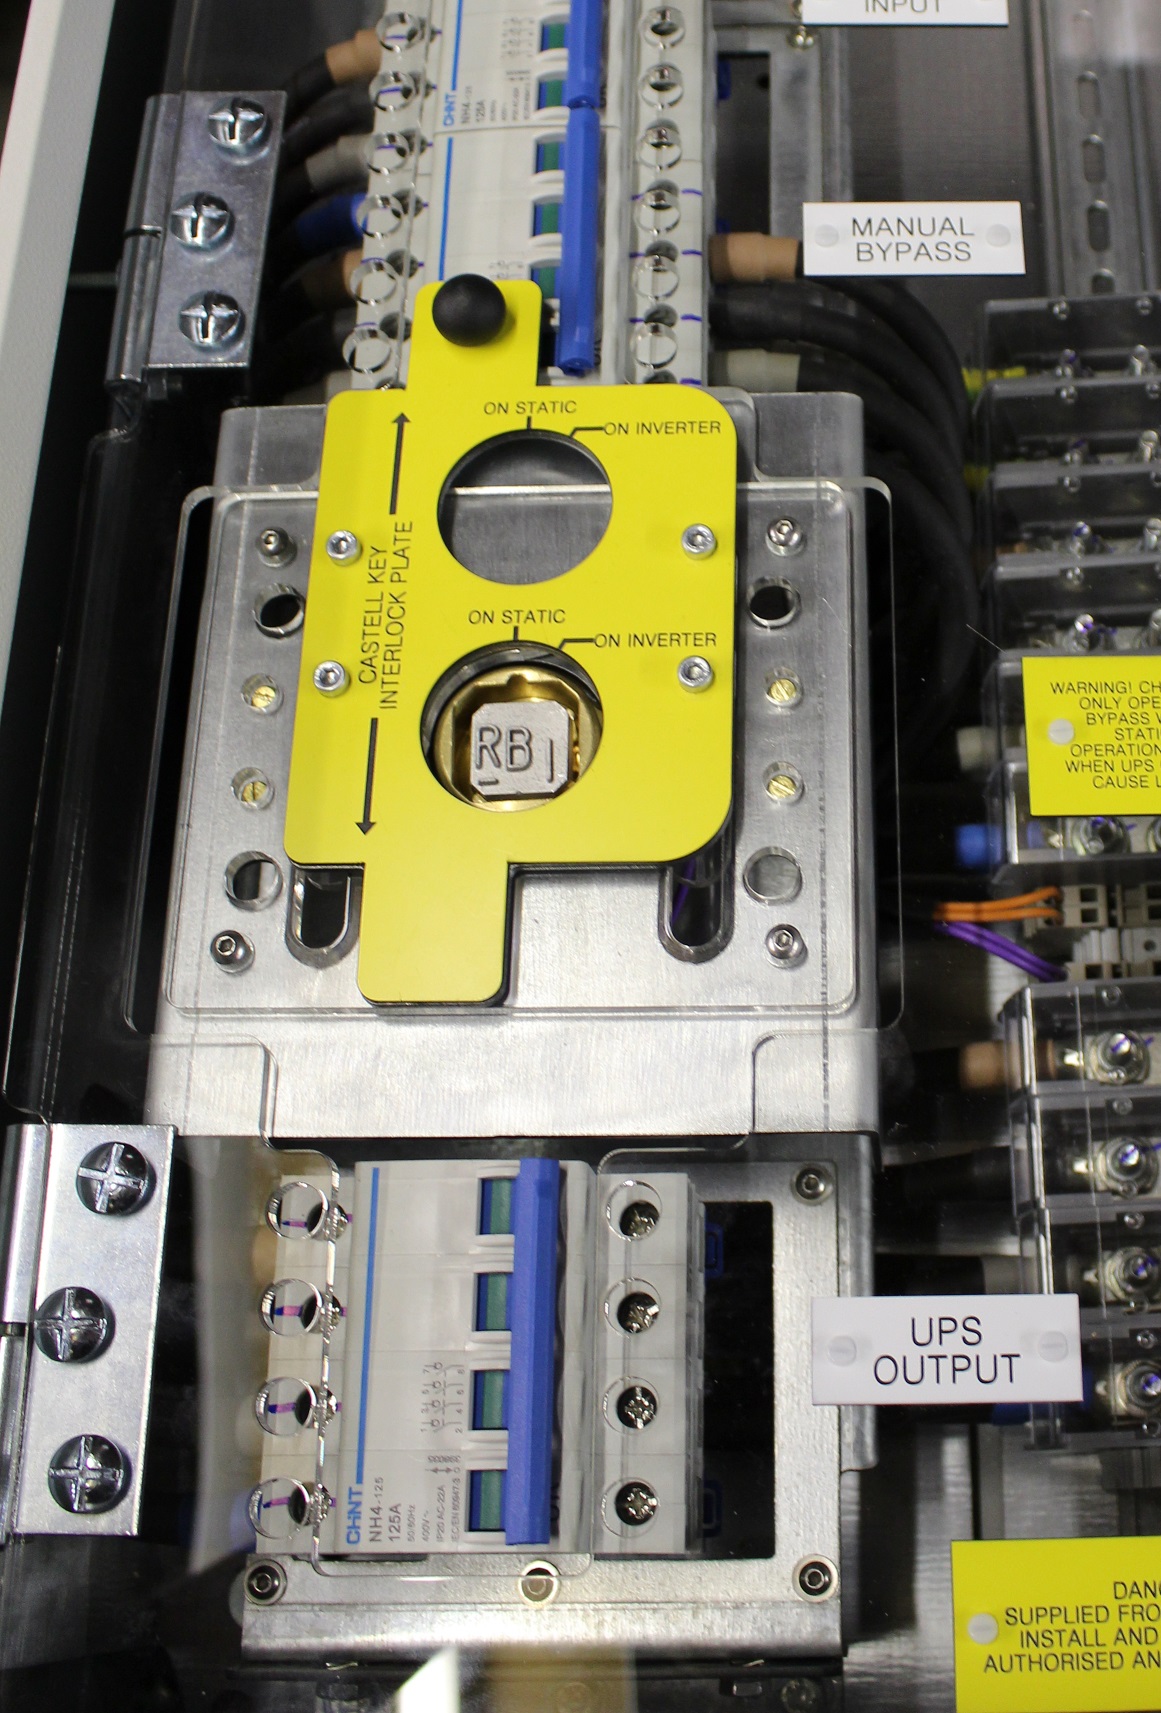 |
0
|
| RB1-K-EMBS-63A-4P-ISO-KS20 | 63A 4P EMBS With Castell KS20 | 35mm | 500x700x200 | £2,458.96 | £2,458.96 | |
0
|
| RB1-K-EMBS-125A-31P-ISO-KS20 | 125A 31P EMBS With Castell KS20 | 35mm | 500x700x200 | £2,712.87 | £2,712.87 | |
0
|
| RB1-K-EMBS-125A-4P-ISO-KS20 | 125A 4P EMBS With Castell KS20 | 35mm | 500x700x200 | £2,712.87 | £2,712.87 | |
0
|
| RB1 Part Number | RB1 Product Description | Max Cable Size (SWA) | Dimensions WxHxD | List Price | Buy Price | Sample Photo | Qty |
|---|---|---|---|---|---|---|---|
| RB1-K-EMBS-63A-4P-ISO-KS20-KBOLT | 63A 4P EMBS With Castell KS20 + 2xKBOLT | 35mm | 600x1000x300 | £7,551.33 | £7,551.33 | No photo available |
0
|
| RB1-K-EMBS-125A-4P-ISO-KS20-KBOLT | 125A 4P EMBS With Castell KS20 + 2xKBOLT | 35mm | 600x1000x300 | £7,551.33 | £7,551.33 | No photo available |
0
|
| RB1-K-EMBS-160A-4P-ISO-KS20-KBOLT | 160A 4P EMBS With Castell KS20 + 2xKBOLT | 95mm | 600x1000x300 | £7,700.85 | £7,700.85 | No photo available |
0
|
| RB1-K-EMBS-200A-4P-ISO-KS20-KBOLT | 200A 4P EMBS With Castell KS20 + 2xKBOLT | 95mm | 600x1000x300 | £7,700.85 | £7,700.85 | No photo available |
0
|
| RB1-K-EMBS-250A-4P-ISO-KS20-KBOLT | 250A 4P EMBS With Castell KS20 + 2xKBOLT | 95mm | 600x1000x300 | £7,844.74 | £7,844.74 | No photo available |
0
|
| RB1-K-EMBS-315A-4P-ISO-KS20-KBOLT | 315A 4P EMBS With Castell KS20 + 2xKBOLT | 120mm | 800x1200x300 | £9,375.79 | £9,375.79 | No photo available |
0
|
| RB1-K-EMBS-400A-4P-ISO-KS20-KBOLT | 400A 4P EMBS With Castell KS20 + 2xKBOLT | 150mm | 800x1200x300 | £9,513.58 | £9,513.58 | No photo available |
0
|
| RB1-K-EMBS-630A-4P-ISO-KS20-KBOLT | 630A 4P EMBS With Castell KS20 + 2xKBOLT | 185mm | 800x2000x600 | £12,338.26 | £12,338.26 | No photo available |
0
|
| RB1-K-EMBS-800A-4P-ISO-KS20-KBOLT | 800A 4P EMBS With Castell KS20 + 2xKBOLT | 240mm | 1200x2000x600 | £13,165.00 | £13,165.00 | No photo available |
0
|
| RB1 Part Number | RB1 Product Description | Max Cable Size (SWA) | Dimensions WxHxD | List Price | Buy Price | Sample Photo | Qty |
|---|---|---|---|---|---|---|---|
| RB1-K-EMBS-63A-4P-ISO-KSUPS-KBOLT | 63A 4P EMBS With Castell KS_UPS + 2xKBOLT | 35mm | 600x1000x300 | £8,115.58 | £8,115.58 | 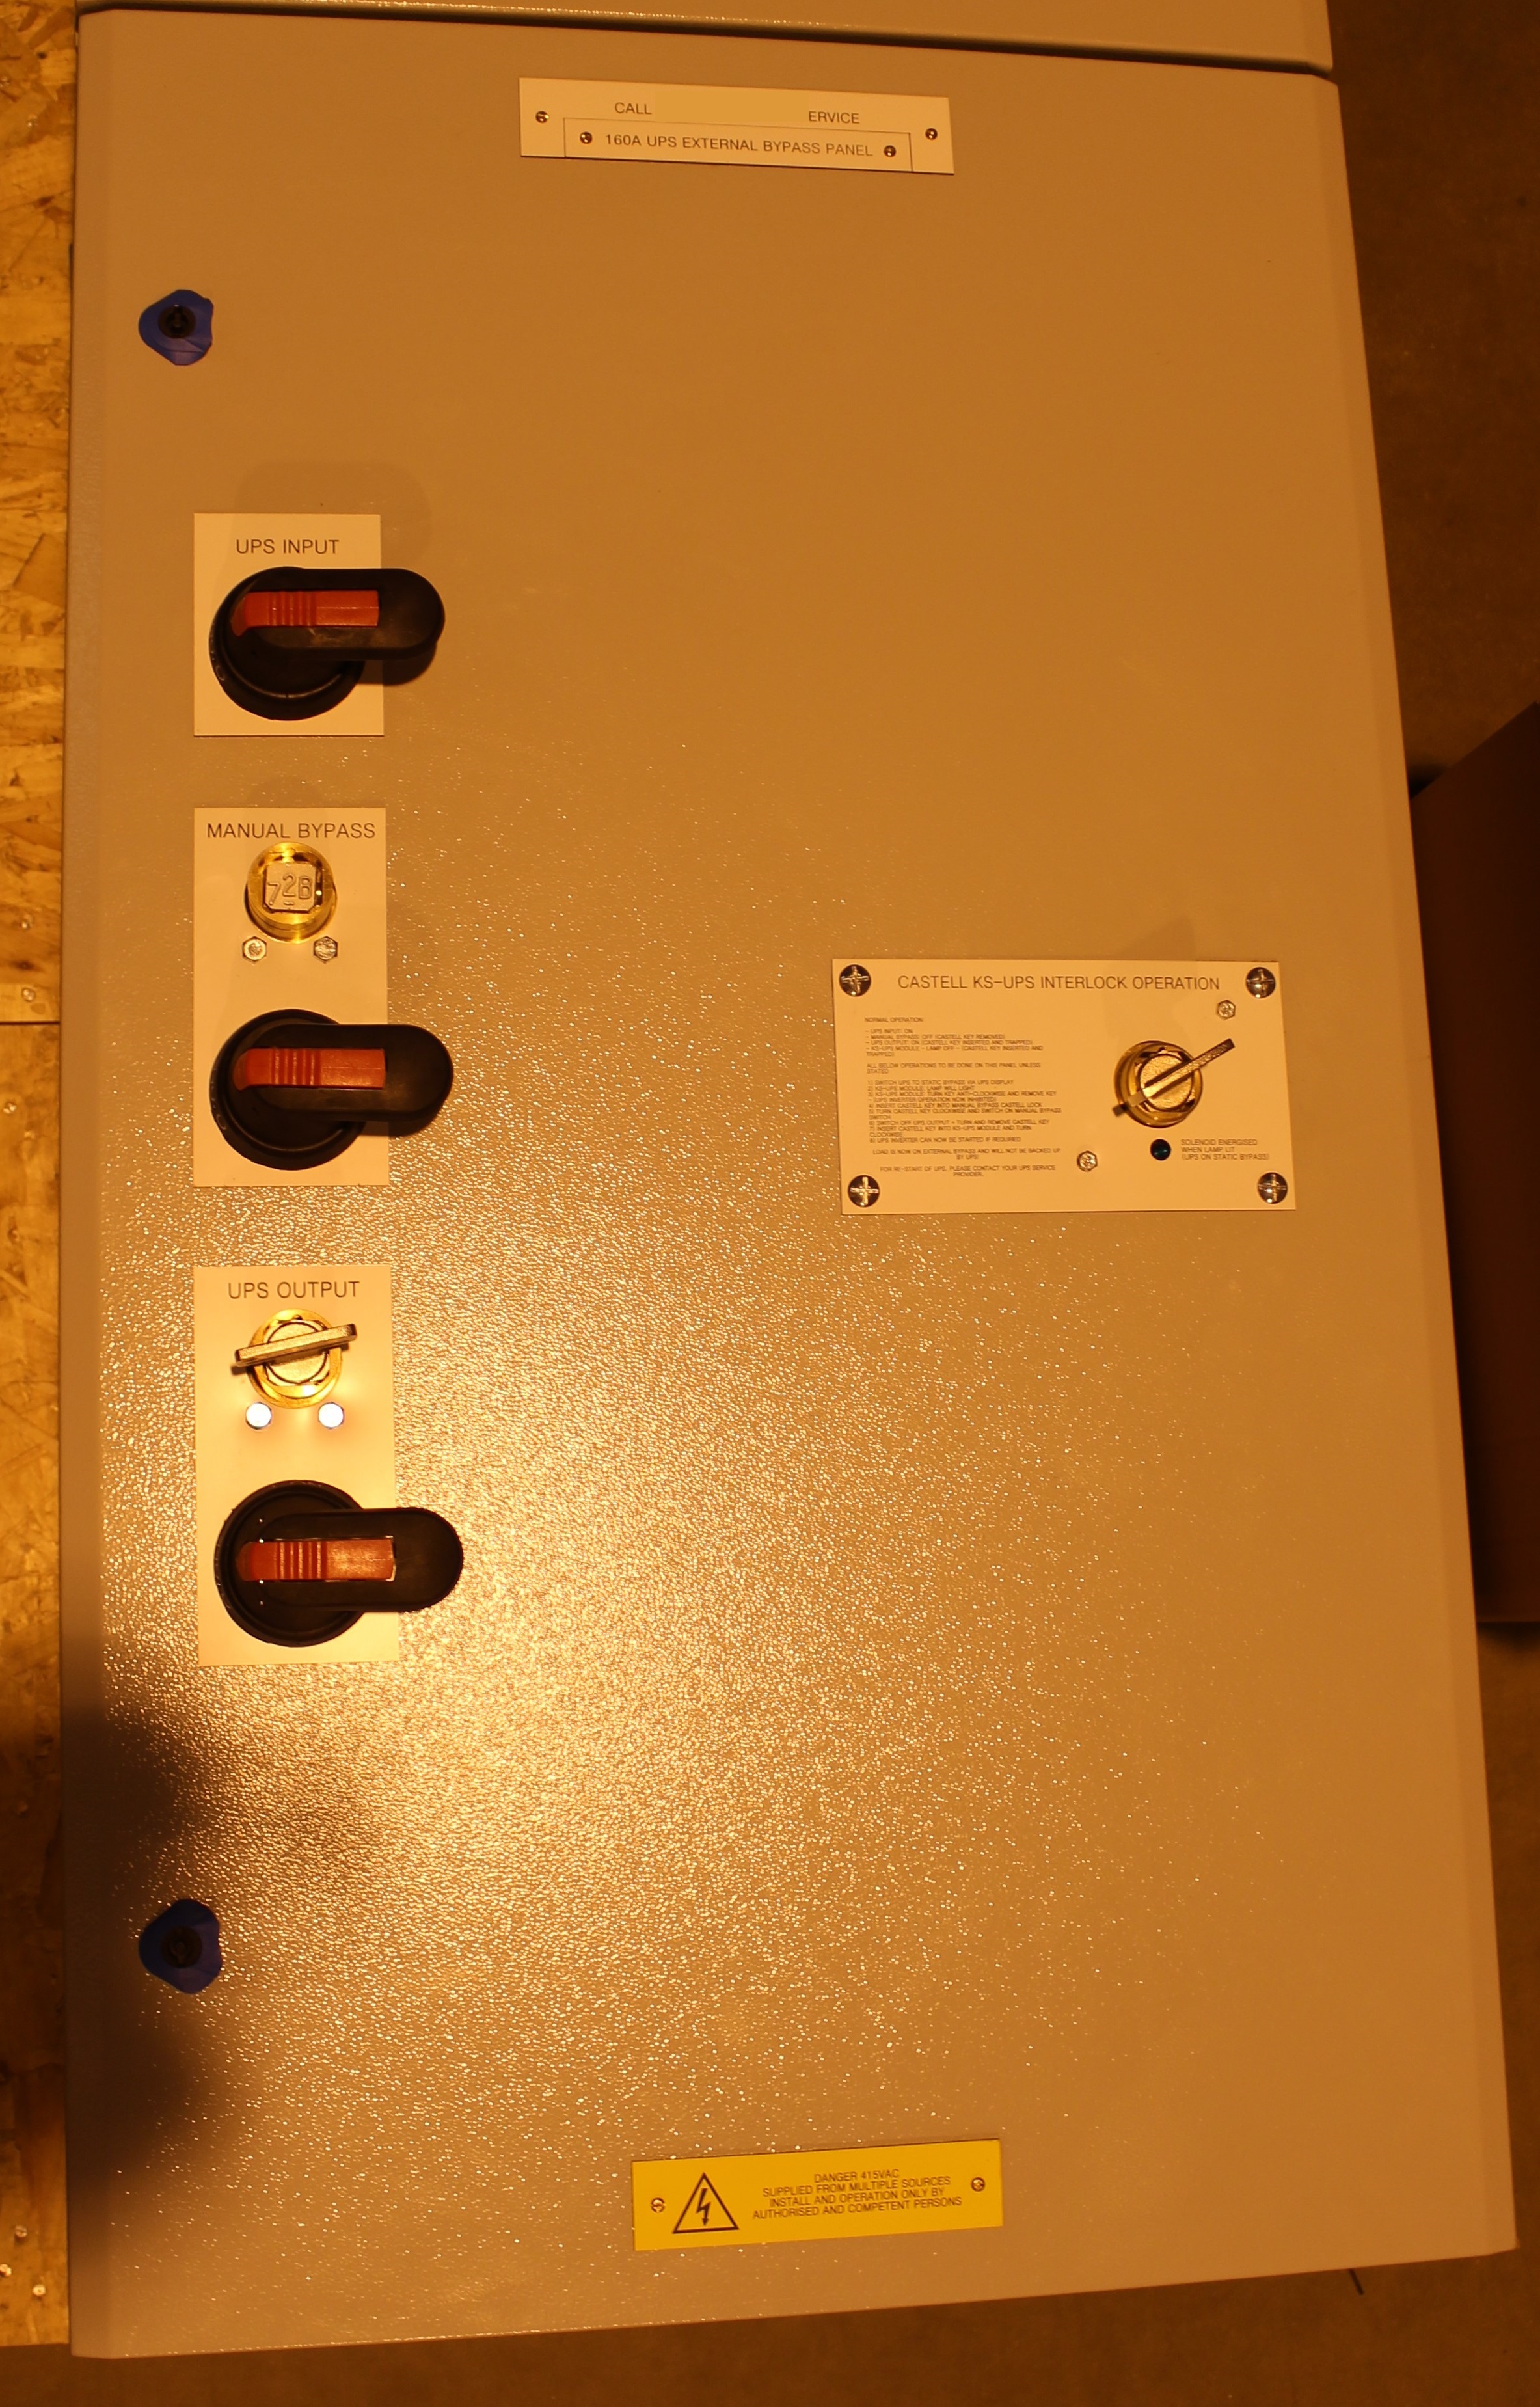 |
0
|
| RB1-K-EMBS-125A-4P-ISO-KSUPS-KBOLT | 125A 4P EMBS With Castell KS_UPS + 2xKBOLT | 35mm | 600x1000x300 | £8,115.58 | £8,115.58 | |
0
|
| RB1-K-EMBS-160A-4P-ISO-KSUPS-KBOLT | 160A 4P EMBS With Castell KS_UPS + 2xKBOLT | 95mm | 600x1000x300 | £8,276.39 | £8,276.39 | |
0
|
| RB1-K-EMBS-200A-4P-ISO-KSUPS-KBOLT | 200A 4P EMBS With Castell KS_UPS + 2xKBOLT | 95mm | 600x1000x300 | £8,276.39 | £8,276.39 | |
0
|
| RB1-K-EMBS-250A-4P-ISO-KSUPS-KBOLT | 250A 4P EMBS With Castell KS_UPS + 2xKBOLT | 95mm | 600x1000x300 | £8,564.16 | £8,564.16 | |
0
|
| RB1-K-EMBS-315A-4P-ISO-KSUPS-KBOLT | 315A 4P EMBS With Castell KS_UPS + 2xKBOLT | 120mm | 800x1200x300 | £9,481.78 | £9,481.78 | No photo available |
0
|
| RB1-K-EMBS-400A-4P-ISO-KSUPS-KBOLT | 400A 4P EMBS With Castell KS_UPS + 2xKBOLT | 150mm | 800x1200x300 | £9,995.84 | £9,995.84 | No photo available |
0
|
| RB1-K-EMBS-630A-4P-ISO-KSUPS-KBOLT | 630A 4P EMBS With Castell KS_UPS + 2xKBOLT | 185mm | 800x2000x600 | £12,889.42 | £12,889.42 | No photo available |
0
|
| RB1-K-EMBS-800A-4P-ISO-KSUPS-KBOLT | 800A 4P EMBS With Castell KS_UPS + 2xKBOLT | 240mm | 1200x2000x600 | £13,647.26 | £13,647.26 | No photo available |
0
|
| RB1 Part Number | RB1 Product Description | Max Cable Size (SWA) | Dimensions WxHxD | List Price | Buy Price | Sample Photo | Qty |
|---|---|---|---|---|---|---|---|
| RB1-K-EMBS-63A-4P-ISO-KSUPS-KBOLT-LBANK | 63A 4P EMBS With Castell KS_UPS + 2xKBOLT + Load Bank Point | 35mm | 600x1600x300 | £9,244.08 | £9,244.08 | No photo available |
0
|
| RB1-K-EMBS-125A-4P-ISO-KSUPS-KBOLT-LBANK | 125A 4P EMBS With Castell KS_UPS + 2xKBOLT + Load Bank Point | 35mm | 600x1600x300 | £9,244.08 | £9,244.08 | No photo available |
0
|
| RB1-K-EMBS-160A-4P-ISO-KSUPS-KBOLT-LBANK | 160A 4P EMBS With Castell KS_UPS + 2xKBOLT + Load Bank Point | 95mm | 600x1600x300 | £9,427.46 | £9,427.46 | No photo available |
0
|
| RB1-K-EMBS-200A-4P-ISO-KSUPS-KBOLT-LBANK | 200A 4P EMBS With Castell KS_UPS + 2xKBOLT + Load Bank Point | 95mm | 600x1600x300 | £9,427.46 | £9,427.46 | No photo available |
0
|
| RB1-K-EMBS-250A-4P-ISO-KSUPS-KBOLT-LBANK | 250A 4P EMBS With Castell KS_UPS + 2xKBOLT + Load Bank Point | 95mm | 600x1600x300 | £9,715.23 | £9,715.23 | No photo available |
0
|
| RB1-K-EMBS-315A-4P-ISO-KSUPS-KBOLT-LBANK | 315A 4P EMBS With Castell KS_UPS + 2xKBOLT + Load Bank Point | 120mm | 800x1800x300 | £11,649.32 | £11,649.32 | No photo available |
0
|
| RB1-K-EMBS-400A-4P-ISO-KSUPS-KBOLT-LBANK | 400A 4P EMBS With Castell KS_UPS + 2xKBOLT + Load Bank Point | 150mm | 800x1800x300 | £11,649.32 | £11,649.32 | No photo available |
0
|
Dual Input EMBS Panels▼
| RB1 Part Number | RB1 Product Description | Max Cable Size (SWA) | Dimensions WxHxD | List Price | Buy Price | Sample Photo | Qty |
|---|---|---|---|---|---|---|---|
| RB1-S-EMBS-32A-2P-ISO-2222-2M | 32A 2P Slimline Bypass – Dual Input | 16mm | 300x400x200 | £877.42 | £877.42 | No photo available |
0
|
| RB1-S-EMBS-63A-2P-ISO-2222-2M | 63A 2P Slimline Bypass – Dual Input | 16mm | 300x400x200 | £877.42 | £877.42 | No photo available |
0
|
| RB1-C-EMBS-63A-31P-ISO-4222-2M | 63A 3/1 Compact Bypass – Dual Input | 25mm | 400x500x200 | £1,091.54 | £1,091.54 | No photo available |
0
|
| RB1-C-EMBS-63A-4P-ISO-4444-2M | 63A 3/3 Compact Bypass – Dual Input | 25mm | 500x500x200 | £1,091.54 | £1,091.54 | No photo available |
0
|
| RB1-EMBS-125A-2P-ISO-2222-2M | 125A 1/1 Bypass – Dual Input | 35mm | 500x500x200 | £1,432.81 | £1,432.81 | No photo available |
0
|
| RB1-EMBS-125A-31P-ISO-4222-2M | 125A 3/1 Bypass – Dual Input | 35mm | 500x500x200 | £1,446.91 | £1,446.91 | No photo available |
0
|
| RB1-EMBS-125A-4P-ISO-3344-2M | 125A 3/3 Bypass – Dual Input | 35mm | 500x700x200 | £1,630.92 | £1,630.92 | No photo available |
0
|
| RB1-EMBS-125A-4P-ISO-4444-2M | 125A 3/3 Bypass – Dual Input | 35mm | 500x700x200 | £1,630.92 | £1,630.92 | No photo available |
0
|
| RB1-EMBS-160A-2P-ISO-2222-2M | 160A 1/1 Bypass – Dual Input | 95mm | 600x1600x300 | £4,192.12 | £4,192.12 | No photo available |
0
|
| RB1-EMBS-160A-31P-ISO-4222-2M | 160A 3/1 Bypass – Dual Input | 95mm | 600x1600x300 | £4,476.58 | £4,476.58 | No photo available |
0
|
| RB1-EMBS-160A-4P-ISO-4444-2M | 160A 3/3 Bypass – Dual Input | 95mm | 600x1600x300 | £4,476.58 | £4,476.58 | No photo available |
0
|
| RB1-EMBS-200A-2P-ISO-2222-2M | 200A 1/1 Bypass – Dual Input | 95mm | 600x1600x300 | £4,192.12 | £4,192.12 | No photo available |
0
|
| RB1-EMBS-200A-31P-ISO-4222-2M | 200A 3/1 Bypass – Dual Input | 95mm | 600x1600x300 | £4,476.58 | £4,476.58 | No photo available |
0
|
| RB1-EMBS-200A-4P-ISO-4444-2M | 200A 3/3 Bypass – Dual Input | 95mm | 600x1600x300 | £4,476.58 | £4,476.58 | No photo available |
0
|
| RB1-EMBS-250A-31P-ISO-4222-2M | 250A 3/1 Bypass – Dual Input | 95mm | 600x1600x300 | £5,000.58 | £5,000.58 | No photo available |
0
|
| RB1-EMBS-250A-4P-ISO-4444-2M | 250A 3/3 Bypass – Dual Input | 95mm | 600x1600x300 | £5,000.58 | £5,000.58 | No photo available |
0
|
| RB1-EMBS-315A-31P-ISO-4222-2M | 315A 3/1 Bypass – Dual Input | 185mm | 800x1800x300 | £7,994.98 | £7,994.98 | No photo available |
0
|
| RB1-EMBS-315A-4P-ISO-4444-2M | 315A 3/3 Bypass – Dual Input | 185mm | 800x1800x300 | £7,994.98 | £7,994.98 | No photo available |
0
|
| RB1-EMBS-400A-31P-ISO-4222-2M | 400A 3/1 Bypass – Dual Input | 185mm | 800x1800x300 | £8,188.15 | £8,188.15 | No photo available |
0
|
| RB1-EMBS-400A-4P-ISO-4444-2M | 400A 3/3 Bypass – Dual Input | 185mm | 800x1800x300 | £8,188.15 | £8,188.15 | No photo available |
0
|
| RB1 Part Number | RB1 Product Description | Max Cable Size (SWA) | Dimensions WxHxD | List Price | Buy Price | Sample Photo | Qty |
|---|---|---|---|---|---|---|---|
| RB1-S-EMBS-32A-2P-ISO-2222-1M | 32A 2P Slimline Bypass – Dual Input | 16mm | 300x400x200 | £877.42 | £877.42 | No photo available |
0
|
| RB1-S-EMBS-32A-31P-ISO-4222-1M | 32A 3/1 Slimline Bypass – Dual Input | 16mm | 400x500x200 | £998.80 | £998.80 | No photo available |
0
|
| RB1-S-EMBS-32A-4P-ISO-4444-1M | 32A 3/3 Slimline Bypass – Dual Input | 16mm | 400X500X200 | £1,091.54 | £1,091.54 | No photo available |
0
|
| RB1-S-EMBS-63A-2P-ISO-2222-1M | 63A 2P Slimline Bypass – Dual Input | 16mm | 300x400x200 | £877.42 | £877.42 | No photo available |
0
|
| RB1-S-EMBS-63A-31P-ISO-4222-1M | 63A 3/1 Slimline Bypass – Dual Input | 16mm | 400x500x200 | £998.80 | £998.80 | No photo available |
0
|
| RB1-C-EMBS-63A-3P-ISO-4222-1M | 63A 3/1 Compact Bypass – Dual Input | 25mm | 400x500x200 | £1,091.54 | £1,091.54 | No photo available |
0
|
| RB1-C-EMBS-63A-4P-ISO-4444-1M | 63A 3/3 Compact Bypass – Dual Input | 25mm | 500x500x200 | £1,091.54 | £1,091.54 | No photo available |
0
|
| RB1-EMBS-125A-2P-ISO-2222-1M | 125A 1/1 Bypass – Dual Input | 35mm | 500x500x200 | £1,432.81 | £1,432.81 | No photo available |
0
|
| RB1-EMBS-125A-31P-ISO-4222-1M | 125A 3/1 Bypass – Dual Input | 35mm | 500x500x200 | £1,446.91 | £1,446.91 | No photo available |
0
|
| RB1-EMBS-125A-4P-ISO-4444-1M | 125A 3/3 Bypass – Dual Input | 35mm | 500x700x200 | £1,630.92 | £1,630.92 | No photo available |
0
|
| RB1-EMBS-160A-2P-ISO-2222-1M | 160A 1/1 Bypass – Dual Input | 95mm | 600x1600x300 | £4,476.58 | £4,476.58 | No photo available |
0
|
| RB1-EMBS-160A-31P-ISO-3111-1M | 160A 3/1 Bypass – Dual Input | 95mm | 600x1600x300 | £4,476.58 | £4,476.58 | No photo available |
0
|
| RB1-EMBS-160A-31P-ISO-4222-1M | 160A 3/1 Bypass – Dual Input | 95mm | 600x1600x300 | £4,476.58 | £4,476.58 | No photo available |
0
|
| RB1-EMBS-160A-4P-ISO-4444-1M | 160A 3/3 Bypass – Dual Input | 95mm | 600x1600x300 | £5,539.54 | £5,539.54 | No photo available |
0
|
| RB1-EMBS-200A-2P-ISO-2222-1M | 200A 3/1 Bypass – Dual Input | 95mm | 600x1600x300 | £4,476.58 | £4,476.58 | No photo available |
0
|
| RB1-EMBS-200A-31P-ISO-4222-1M | 200A 3/1 Bypass – Dual Input | 95mm | 600x1600x300 | £4,476.58 | £4,476.58 | No photo available |
0
|
| RB1-EMBS-200A-4P-ISO-4444-1M | 200A 3/3 Bypass – Dual Input | 95mm | 600x1600x300 | £5,898.86 | £5,898.86 | No photo available |
0
|
| RB1-EMBS-250A-31P-ISO-4222-1M | 250A 3/1 Bypass – Dual Input | 95mm | 600x1600x300 | £5,898.86 | £5,898.86 | No photo available |
0
|
| RB1-EMBS-250A-4P-ISO-4444-1M | 250A 3/3 Bypass – Dual Input | 95mm | 600x1600x300 | £6,033.60 | £6,033.60 | No photo available |
0
|
| RB1-EMBS-315A-31P-ISO-4222-1M | 315A 3/1 Bypass – Dual Input | 185mm | 800x1800x300 | £9,006.14 | £9,006.14 | No photo available |
0
|
| RB1-EMBS-315A-4P-ISO-4444-1M | 315A 3/3 Bypass – Dual Input | 185mm | 800x1800x300 | £9,006.14 | £9,006.14 | No photo available |
0
|
| RB1-EMBS-400A-31P-ISO-4222-1M | 400A 3/1 Bypass – Dual Input | 185mm | 800x1800x300 | £9,006.14 | £9,006.14 | No photo available |
0
|
| RB1-EMBS-400A-4P-ISO-4444-1M | 400A 3/3 Bypass – Dual Input | 185mm | 800x1800x300 | £9,006.14 | £9,006.14 | No photo available |
0
|
MTS Panels▼
| RB1 Part Number | RB1 Product Description | Max Cable Size (SWA) | Dimensions WxHxD | List Price | Buy Price | Sample Photo | Qty |
|---|---|---|---|---|---|---|---|
| RB1-MTS-63A-2P-ISO | 63A 2P Break Before Make Manual Transfer Panel | 25mm | 500x700x200 | £1,875.30 | £1,875.30 | 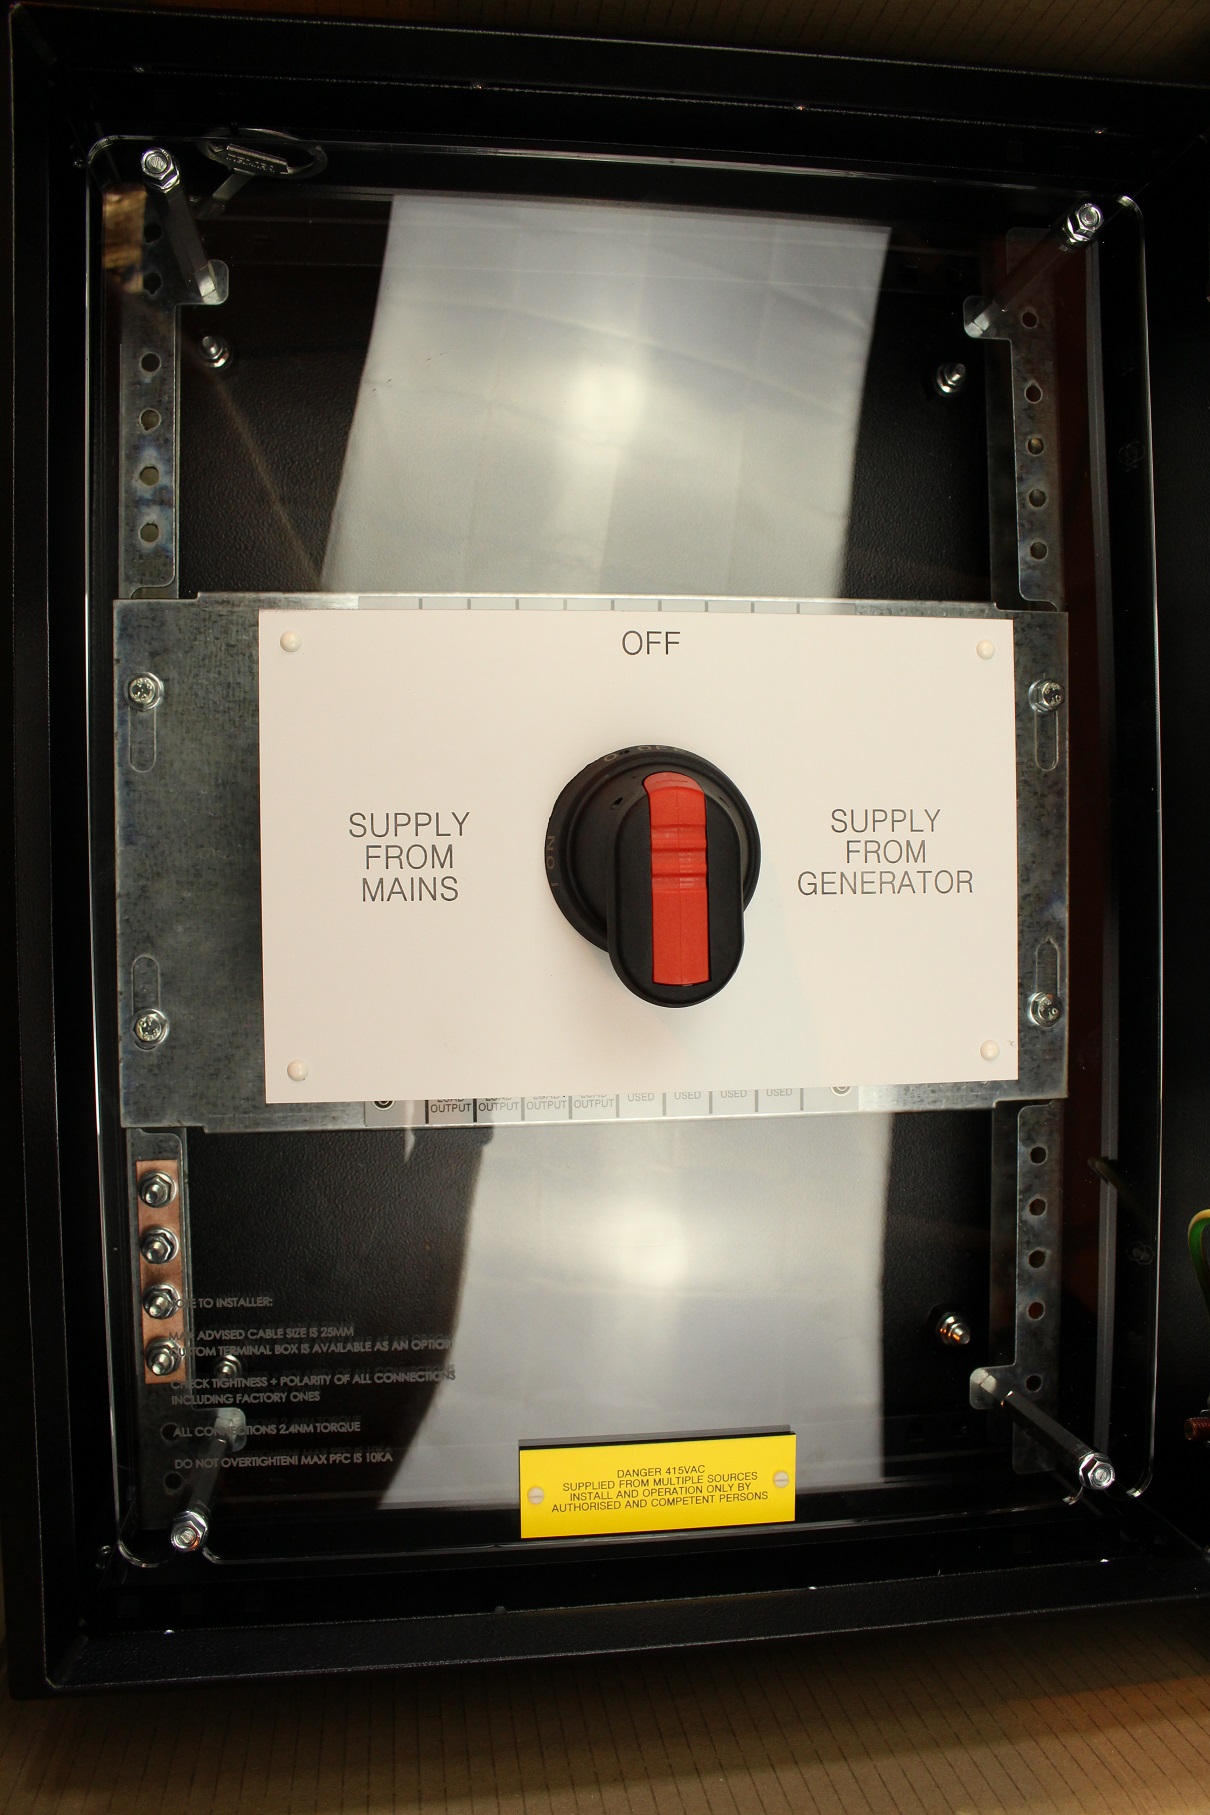 |
0
|
| RB1-MTS-100A-2P-ISO | 100A 2P Break Before Make Manual Transfer Panel | 35mm | 500x700x200 | £1,970.77 | £1,970.77 | No photo available |
0
|
| RB1-MTS-125A-2P-ISO | 125A 2P Break Before Make Manual Transfer Panel | 35mm | 500x700x200 | £2,379.93 | £2,379.93 | No photo available |
0
|
| RB1-MTS-63A-4P-ISO | 63A 4P Break Before Make Manual Transfer Panel | 25mm | 500x700x200 | £1,875.30 | £1,875.30 | |
0
|
| RB1-MTS-100A-4P-ISO | 100A 4P Break Before Make Manual Transfer Panel | 35mm | 500x700x200 | £1,970.77 | £1,970.77 | No photo available |
0
|
| RB1-MTS-125A-4P-ISO | 125A 4P Break Before Make Manual Transfer Panel | 35mm | 500x700x200 | £2,379.93 | £2,379.93 | No photo available |
0
|
| RB1-MTS-160A-4P-ISO | 160A 4P Break Before Make Manual Transfer Panel | 50mm | 600x600x300 | £3,484.67 | £3,484.67 | No photo available |
0
|
| RB1-MTS-250A-4P-ISO | 250A 4P Break Before Make Manual Transfer Panel | 95mm | 600x1000x300 | £4,398.46 | £4,398.46 | No photo available |
0
|
| RB1-MTS-400A-4P-ISO | 400A 4P Break Before Make Manual Transfer Panel | 150mm | 600x1000x300 | £5,467.85 | £5,467.85 | No photo available |
0
|
| RB1-AC-BAYING-63A | Cost to Bay a 63A ATS or MTS to an EMBS | 35mm | £604.05 | £604.05 | No photo available |
0
| |
| RB1-AC-BAYING-100A | Cost to Bay a 100A ATS or MTS to an EMBS | 35mm | £730.49 | £730.49 | No photo available |
0
| |
| RB1-AC-BAYING-125A | Cost to Bay a 125A ATS or MTS to an EMBS | 35mm | £772.63 | £772.63 | No photo available |
0
| |
| RB1-AC-BAYING-160A | Cost to Bay a 160A ATS or MTS to an EMBS | 50mm | £1011.44 | £1,011.44 | No photo available |
0
|
Multi Load Output EMBS Panels▼
| RB1 Part Number | RB1 Product Description | Max Cable Size (SWA) | Dimensions WxHxD | List Price | Buy Price | Sample Photo | Qty |
|---|---|---|---|---|---|---|---|
| RB1-S-EMBS-32A-2P-ISO-2XLOAD | 32A 2P Slimline Bypass With 2 x Load Outputs | 16mm | 300x800x200 | £1,211.56 | £1,211.56 | |
0
|
| RB1-S-EMBS-32A-2P-ISO-3XLOAD | 32A 2P Slimline Bypass With 3 x Load Outputs | 16mm | 300x800x200 | £1,245.66 | £1,245.66 | |
0
|
| RB1-S-EMBS-32A-4P-ISO-2XLOAD | 32A 4P Slimline Bypass With 2 x Load Outputs | 16mm | 300x800x200 | £1,557.99 | £1,557.99 | |
0
|
| RB1-S-EMBS-32A-4P-ISO-3XLOAD | 32A 4P Slimline Bypass With 3 x Load Outputs | 16mm | 300x800x200 | £1,557.99 | £1,557.99 | |
0
|
| RB1-S-EMBS-63A-2P-ISO-2XLOAD | 63A 2P Slimline Bypass With 2 x Load Outputs | 16mm | 300x800x200 | £1,211.56 | £1,211.56 | |
0
|
| RB1-S-EMBS-63A-2P-ISO-3XLOAD | 63A 2P Slimline Bypass With 3 x Load Outputs | 16mm | 300x800x200 | £1,245.66 | £1,245.66 | |
0
|
| RB1-S-EMBS-63A-4P-ISO-2XLOAD | 63A 4P Slimline Bypass With 2 x Load Outputs | 16mm | 300x800x200 | £1,557.99 | £1,557.99 | |
0
|
| RB1-S-EMBS-63A-4P-ISO-3XLOAD | 63A 4P Slimline Bypass With 3 x Load Outputs | 16mm | 300x800x200 | £1,557.99 | £1,557.99 | |
0
|
| RB1 Part Number | RB1 Product Description | Max Cable Size (SWA) | Dimensions WxHxD | List Price | Buy Price | Sample Photo | Qty |
|---|---|---|---|---|---|---|---|
| RB1-C-EMBS-32A-2P-ISO-2XLOAD | 32A 2P Compact EMBS With 2 x Load Outputs | 25mm | 400x1000x200 | £1,848.03 | £1,848.03 | No photo available |
0
|
| RB1-C-EMBS-32A-2P-ISO-4XLOAD | 32A 2P Compact EMBS With 4 x Load Outputs | 25mm | 400x1000x200 | £1,984.41 | £1,984.41 | No photo available |
0
|
| RB1-C-EMBS-32A-4P-ISO-2XLOAD | 32A 4P Compact EMBS With 2 x Load Outputs | 25mm | 400x1000x200 | £2,038.97 | £2,038.97 | No photo available |
0
|
| RB1-C-EMBS-32A-4P-ISO-4XLOAD | 32A 4P Compact EMBS With 4 x Load Outputs | 25mm | 400x1000x200 | £2,229.91 | £2,229.91 | No photo available |
0
|
| RB1-C-EMBS-63A-2P-ISO-2XLOAD | 63A 2P Compact EMBS With 2 x Load Outputs | 25mm | 400x1000x200 | £1,848.03 | £1,848.03 | No photo available |
0
|
| RB1-C-EMBS-63A-2P-ISO-4XLOAD | 63A 2P Compact EMBS With 4 x Load Outputs | 25mm | 400x1000x200 | £2,038.97 | £2,038.97 | No photo available |
0
|
| RB1-C-EMBS-63A-4P-ISO-2XLOAD | 63A 4P Compact EMBS With 2 x Load Outputs | 25mm | 400x1000x200 | £2,093.52 | £2,093.52 | No photo available |
0
|
| RB1-C-EMBS-63A-4P-ISO-4XLOAD | 63A 4P Compact EMBS With 4 x Load Outputs | 25mm | 400x1000x200 | £2,229.91 | £2,229.91 | No photo available |
0
|
| RB1 Part Number | RB1 Product Description | Max Cable Size (SWA) | Dimensions WxHxD | List Price | Buy Price | Sample Photo | Qty |
|---|---|---|---|---|---|---|---|
| RB1-EMBS-63A-1P-ISO-2XLOAD | 63A 1P EMBS With 2 x Load Outputs | 35mm | 500x1000x200 | £2,261.47 | £2,261.47 | No photo available |
0
|
| RB1-EMBS-63A-1P-ISO-4XLOAD | 63A 1P EMBS With 4 x Load Outputs | 35mm | 500x1000x200 | £2,444.85 | £2,444.85 | No photo available |
0
|
| RB1-EMBS-63A-4P-ISO-2XLOAD | 63A 4P EMBS With 2 x Load Outputs | 35mm | 500x1000x200 | £2,543.60 | £2,543.60 | No photo available |
0
|
| RB1-EMBS-63A-4P-ISO-4XLOAD | 63A 4P EMBS With 4 x Load Outputs | 35mm | 500x1000x200 | £2,649.40 | £2,649.40 | No photo available |
0
|
| RB1-EMBS-125A-1P-ISO-2XLOAD | 125A 1P EMBS With 2 x Load Outputs | 35mm | 500x1000x200 | £2,458.96 | £2,458.96 | No photo available |
0
|
| RB1-EMBS-125A-1P-ISO-4XLOAD | 125A 1P EMBS With 4 x Load Outputs | 35mm | 500x1000x200 | £2,684.66 | £2,684.66 | No photo available |
0
|
| RB1-EMBS-125A-4P-ISO-2XLOAD | 125A 4P EMBS With 2 x Load Outputs | 35mm | 500x1000x200 | £2,825.72 | £2,825.72 | No photo available |
0
|
| RB1-EMBS-125A-4P-ISO-4XLOAD | 125A 4P EMBS With 4 x Load Outputs | 35mm | 500x1000x200 | £2,882.15 | £2,882.15 | No photo available |
0
|
| RB1 Part Number | RB1 Product Description | Max Cable Size (SWA) | Dimensions WxHxD | List Price | Buy Price | Sample Photo | Qty |
|---|---|---|---|---|---|---|---|
| RB1-EMBS-160A-4P-ISO-2XLOAD | 160A 4P EMBS With 2 x Load Outputs | 50mm | 600x1600x300 | £4,103.75 | £4,103.75 | No photo available |
0
|
| RB1-EMBS-160A-4P-ISO-4XLOAD | 160A 4P EMBS With 4 x Load Outputs | 50mm | 600x1600x300 | £4,823.17 | £4,823.17 | No photo available |
0
|
| RB1-EMBS-200A-4P-ISO-2XLOAD | 200A 4P EMBS With 2 x Load Outputs | 70mm | 600x1600x300 | £4,751.23 | £4,751.23 | No photo available |
0
|
| RB1-EMBS-200A-4P-ISO-3XLOAD | 200A 4P EMBS With 3 x Load Outputs | 70mm | 600x1600x300 | £5,039.00 | £5,039.00 | No photo available |
0
|
| RB1-EMBS-250A-4P-ISO-2XLOAD | 250A 4P EMBS With 2 x Load Outputs | 70mm | 600x1600x300 | £5,801.58 | £5,801.58 | No photo available |
0
|
| RB1-EMBS-250A-4P-ISO-3XLOAD | 250A 4P EMBS With 3 x Load Outputs | 70mm | 600x1600x300 | £6,190.07 | £6,190.07 | No photo available |
0
|
| RB1-EMBS-400A-4P-ISO-2XLOAD | 400A 4P EMBS With 2 x Load Outputs | 185mm | 800x1800x300 | £9,283.58 | £9,283.58 | No photo available |
0
|
N+1 EMBS + WIB Panels▼
| RB1 Part Number | RB1 Product Description | Max Cable Size (SWA) | Dimensions WxHxD | List Price | Buy Price | Sample Photo | Qty |
|---|---|---|---|---|---|---|---|
| RB1-WIB-2-63A-63A-2P-ISO | N+1 Splitter Panel 63A 2P 2 x UPS | 25mm | 500x500x200 | £1,565.00 | £1,565.00 | No photo available |
0
|
| RB1-WIB-3-63A-63A-2P-ISO | N+1 Splitter Panel 63A 2P 3 x UPS | 25mm | TBC | £2,033.77 | £2,033.77 | No photo available |
0
|
| RB1-WIB-2-125A-125A-2P-ISO | N+1 Splitter Panel 125A 2P 2 x UPS | 35mm | 500x500x200 | £1,740.61 | £1,740.61 | No photo available |
0
|
| RB1-WIB-3-125A-125A-2P-ISO | N+1 Splitter Panel 125A 2P 3 x UPS | 35mm | TBC | £2,303.95 | £2,303.95 | No photo available |
0
|
| RB1-WIB-2-32A-32A-4P-ISO | N+1 Splitter Panel 32A 4P 2 x UPS | 25mm | 500x500x200 | £1,713.60 | £1,713.60 | No photo available |
0
|
| RB1-WIB-3-32A-32A-4P-ISO | N+1 Splitter Panel 32A 4P 3 x UPS | 25mm | TBC | £2,439.04 | £2,439.04 | No photo available |
0
|
| RB1-WIB-2-63A-63A-4P-ISO | N+1 Splitter Panel 63A 4P 2 x UPS | 25mm | 500x500x200 | £1,848.68 | £1,848.68 | No photo available |
0
|
| RB1-WIB-3-63A-63A-4P-ISO | N+1 Splitter Panel 63A 4P 3 x UPS | 25mm | TBC | £2,439.04 | £2,439.04 | No photo available |
0
|
| RB1-WIB-2-125A-125A-4P-ISO | N+1 Splitter Panel 125A 4P 2 x UPS | 35mm | 500x700x200 | £2,357.98 | £2,357.98 | No photo available |
0
|
| RB1-WIB-3-125A-125A-4P-ISO | N+1 Splitter Panel 125A 4P 3 x UPS | 35mm | TBC | £2,911.84 | £2,911.84 | No photo available |
0
|
| RB1-WIB-2-160A-160A-4P-ISO | N+1 Splitter Panel 160A 4P 2 x UPS | 50mm | 600x600x300 | £3,587.28 | £3,587.28 | No photo available |
0
|
| RB1-WIB-3-160A-160A-4P-ISO | N+1 Splitter Panel 160A 4P 3 x UPS | 50mm | TBC | £4,397.81 | £4,397.81 | No photo available |
0
|
| RB1-WIB-2-200A-200A-4P-ISO | N+1 Splitter Panel 200A 4P 2 x UPS | 70mm | TBC | £4,803.07 | £4,803.07 | No photo available |
0
|
| RB1-WIB-3-200A-200A-4P-ISO | N+1 Splitter Panel 200A 4P 3 x UPS | 70mm | TBC | £5,748.68 | £5,748.68 | No photo available |
0
|
| RB1 Part Number | RB1 Product Description | Max Cable Size (SWA) | Dimensions WxHxD | List Price | Buy Price | Sample Photo | Qty |
|---|---|---|---|---|---|---|---|
| RB1-PR2-EMBS-32A-32A-2P | 32A 2P N+1 EMBS – New Design | 25mm | 500x500x200 | £1,985.77 | £1,985.77 |
0
| |
| RB1-PR2-EMBS-63A-63A-2P | 63A 2P N+1 EMBS – New Design | 25mm | 500x500x200 | £2,267.90 | £2,267.90 |
0
| |
| RB1-PR2-EMBS-80A-80A-2P | 80A 2P N+1 EMBS – New Design | 25mm | 500x500x200 | £2,267.90 | £2,267.90 |
0
| |
| RB1-PR2-EMBS-125A-125A-2P | 125A 2P N+1 EMBS – New Design | 35mm | 500x700x200 | £2,600.02 | £2,600.02 | 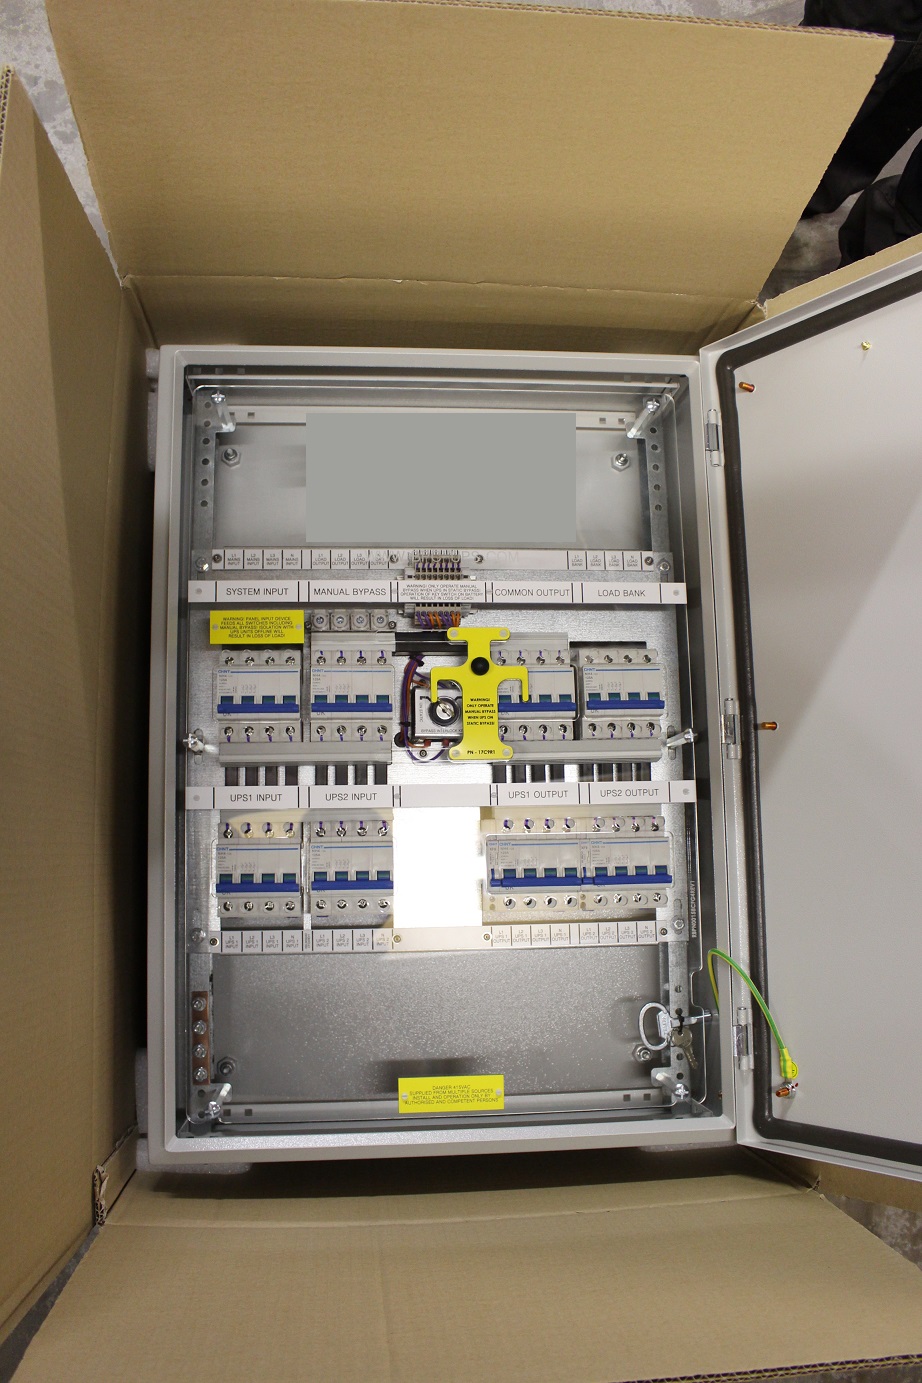 |
0
|
| RB1-PR2-EMBS-32A-32A-31P | 32A 31P N+1 EMBS – New Design | 25mm | 500x700x200 | £2,600.02 | £2,600.02 | |
0
|
| RB1-PR2-EMBS-63A-63A-31P | 63A 31P N+1 EMBS – New Design | 25mm | 500x700x200 | £2,882.15 | £2,882.15 | |
0
|
| RB1-PR2-EMBS-80A-80A-31P | 80A 31P N+1 EMBS – New Design | 25mm | 500x700x200 | £3,389.97 | £3,389.97 | |
0
|
| RB1-PR2-EMBS-125A-125A-31P | 125A 31P N+1 EMBS – New Design | 35mm | 500x700x200 | £3,601.57 | £3,601.57 | |
0
|
| RB1-PR2-EMBS-32A-32A-4P | 32A 4P N+1 EMBS – New Design | 25mm | 500x700x200 | £2,600.02 | £2,600.02 | |
0
|
| RB1-PR2-EMBS-63A-63A-4P | 63A 4P N+1 EMBS – New Design | 25mm | 500x700x200 | £2,999.60 | £2,999.60 | |
0
|
| RB1-PR2-EMBS-80A-80A-4P | 80A 4P N+1 EMBS – New Design | 25mm | 500x700x200 | £3,601.57 | £3,601.57 | |
0
|
| RB1-PR2-EMBS-125A-125A-4P | 125A 4P N+1 EMBS – New Design | 35mm | 500x700x200 | £3,836.47 | £3,836.47 | |
0
|
| RB1-PR2-EMBS-160A-160A-3P | 160A 3P N+1 EMBS – New Design | 50mm | 600x1600x300 | £8,480.16 | £8,480.16 | No photo available |
0
|
| RB1-PR2-EMBS-160A-160A-4P | 160A 4P N+1 EMBS – New Design | 50mm | 600x1600x300 | £10,202.53 | £10,202.53 | No photo available |
0
|
| RB1-PR2-EMBS-200A-200A-3P | 200A 3P N+1 EMBS – New Design | 70mm | 600x1600x300 | £8,755.74 | £8,755.74 | No photo available |
0
|
| RB1-PR2-EMBS-200A-200A-4P | 200A 4P N+1 EMBS – New Design | 70mm | 600x1600x300 | £10,478.11 | £10,478.11 | No photo available |
0
|
| RB1-PR2-EMBS-250A-250A-3P | 250A 3P N+1 EMBS – New Design | 95mm | 600x1600x300 | £9,031.32 | £9,031.32 | No photo available |
0
|
| RB1-PR2-EMBS-250A-250A-4P | 250A 4P N+1 EMBS – New Design | 95mm | 600x1600x300 | £10,891.47 | £10,891.47 | No photo available |
0
|
| RB1-PR2-EMBS-315A-315A-3P | 315A 3P N+1 EMBS – New Design | 150mm | 800x1800x300 | £19,693.60 | £19,693.60 | No photo available |
0
|
| RB1-PR2-EMBS-315A-315A-4P | 315A 4P N+1 EMBS – New Design | 150mm | 800x1800x300 | £21,005.88 | £21,005.88 | No photo available |
0
|
| RB1-PR2-EMBS-400A-400A-3P | 400A 3P N+1 EMBS – New Design | 185mm | 800x1800x300 | £21,727.63 | £21,727.63 | No photo available |
0
|
| RB1-PR2-EMBS-400A-400A-4P | 400A 4P N+1 EMBS – New Design | 185mm | 800x1800x300 | £22,252.54 | £22,252.54 | No photo available |
0
|
Rack Mount EMBS▼
| RB1 Part Number | RB1 Product Description | Max Cable Size (SWA) | Dimensions WxHxD | List Price | Buy Price | Sample Photo | Qty |
|---|---|---|---|---|---|---|---|
| RB1-R-EMBS-32A-2P-RTY | 32A 2P Rackmount Bypass | 16mm | 3U | £1,070.50 | £1,070.50 | 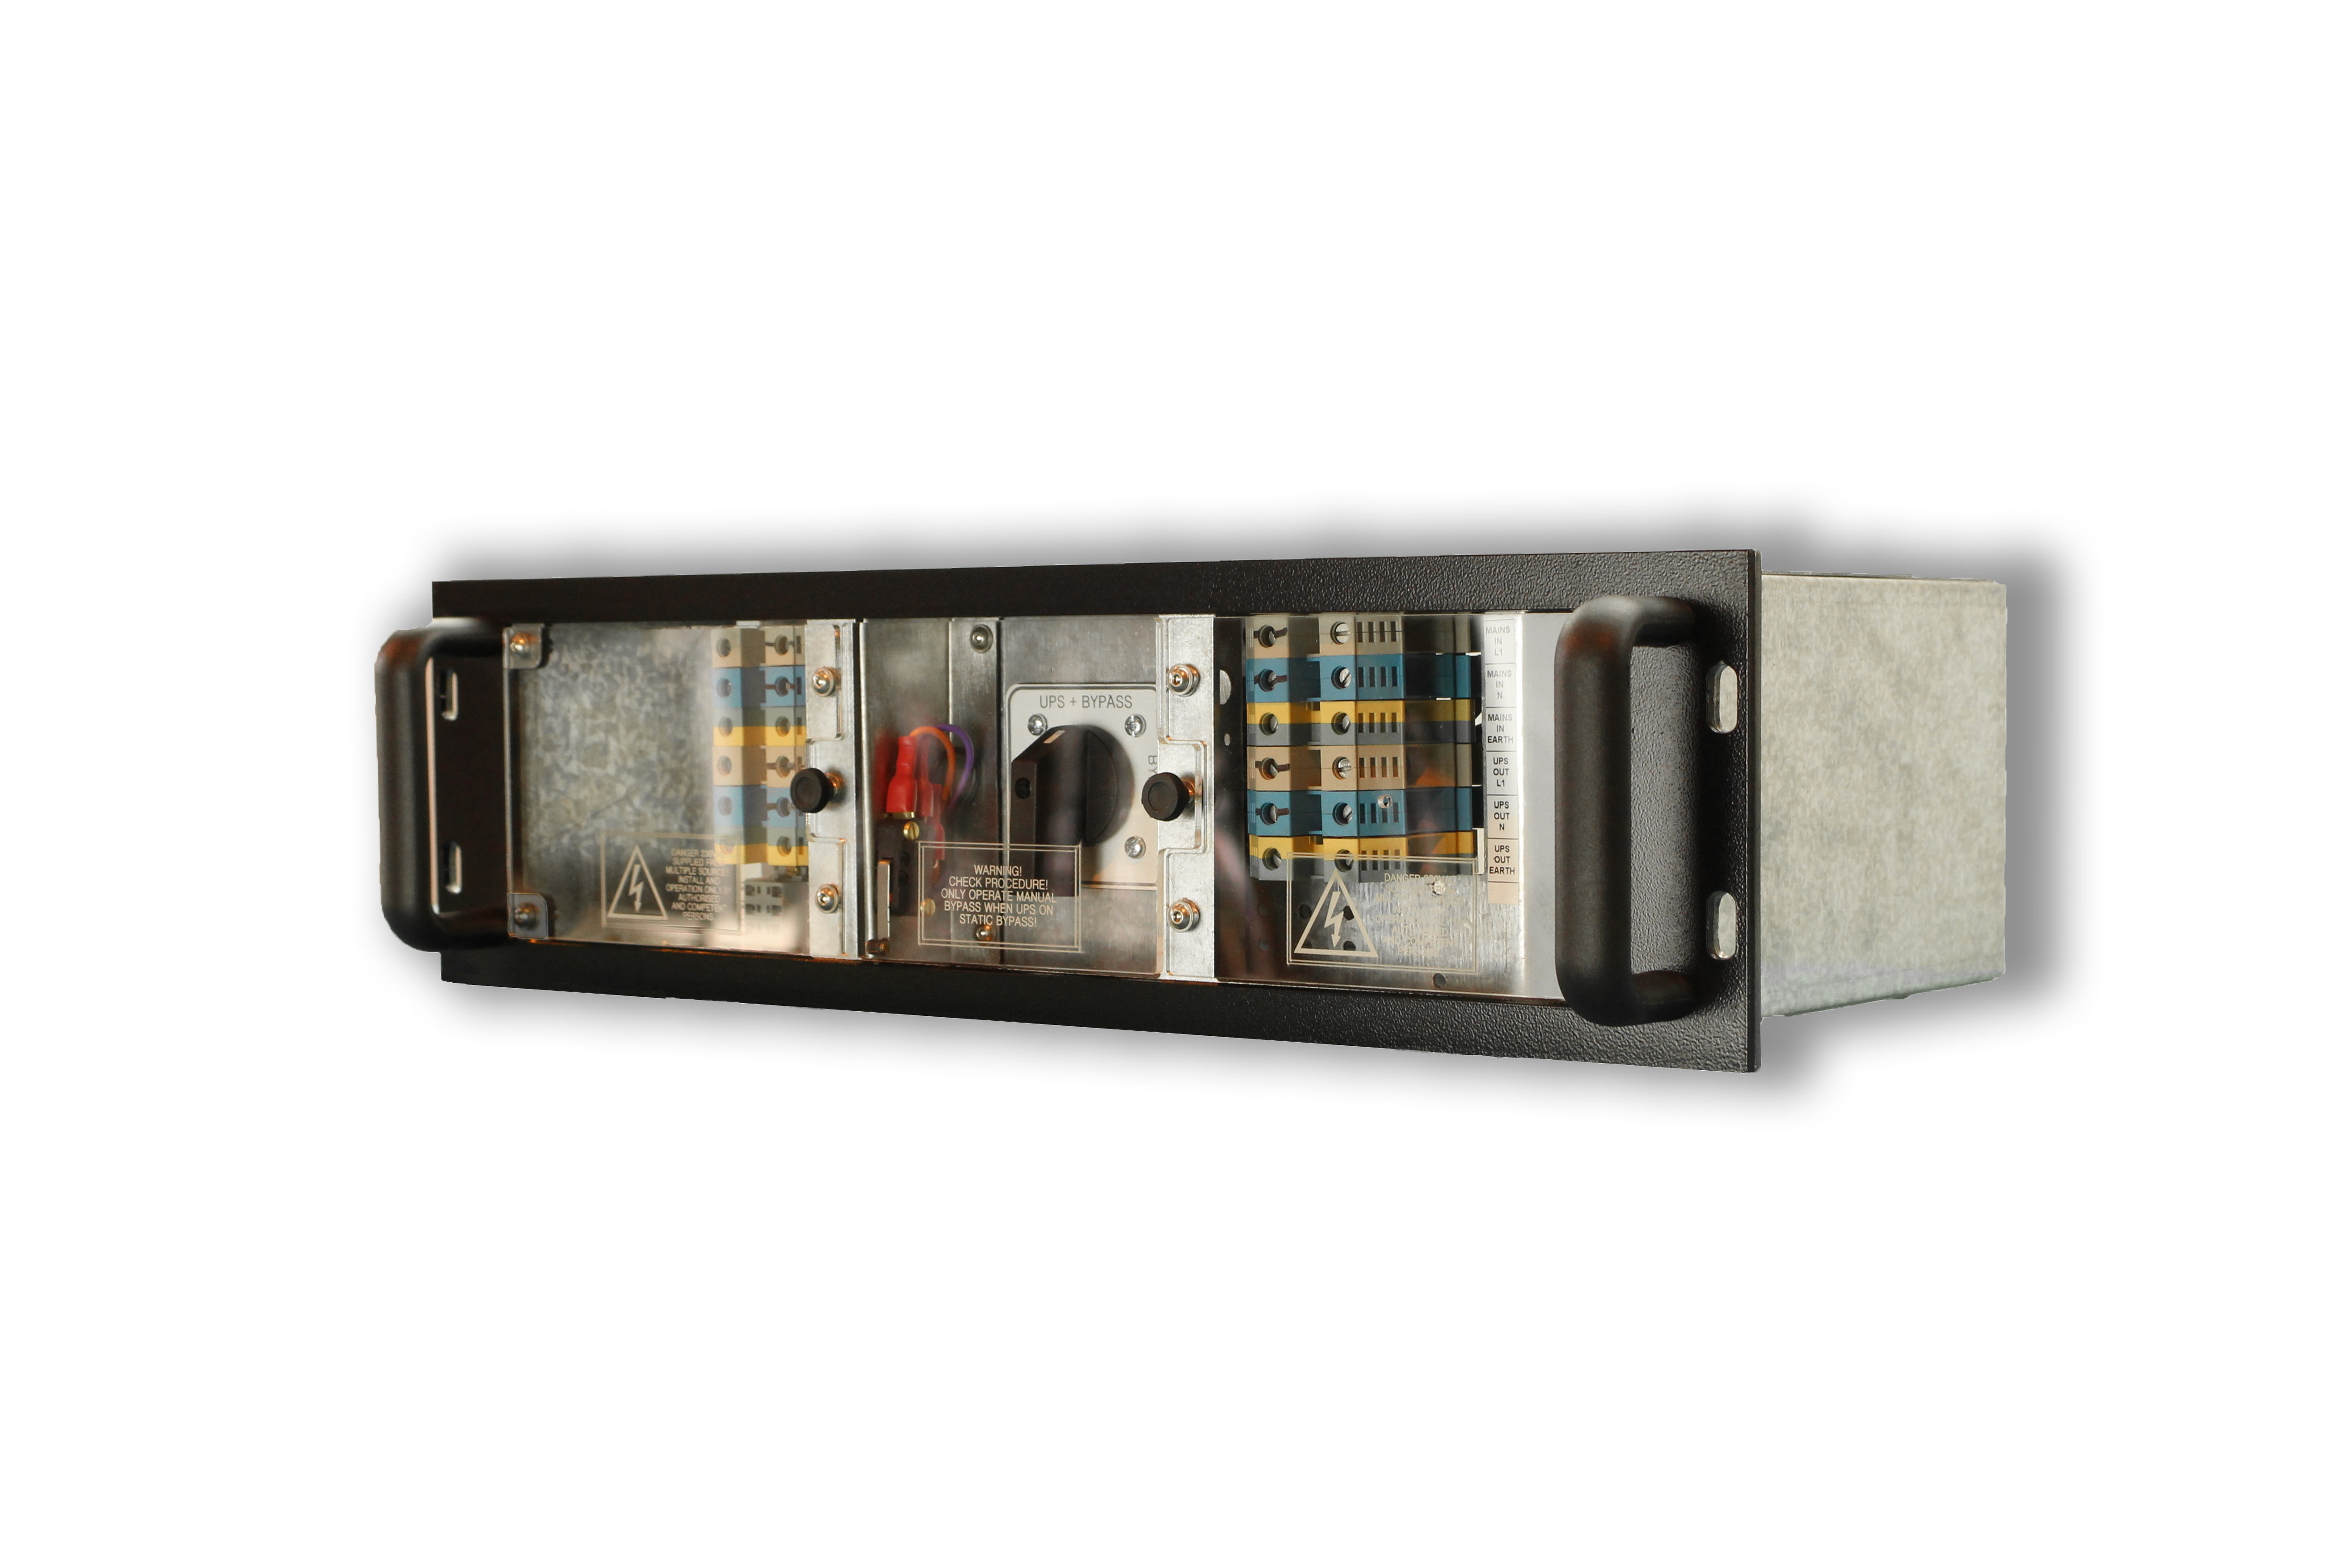 |
0
|
| RB1-R-EMBS-63A-2P-RTY | 63A 2P Rackmount Bypass | 16mm | 3U | £1,207.84 | £1,207.84 | |
0
|
| RB1 Part Number | RB1 Product Description | Max Cable Size (SWA) | Dimensions WxHxD | List Price | Buy Price | Sample Photo | Qty |
|---|---|---|---|---|---|---|---|
| RB1-R-4x10AIEC-O | 4 x Panel Mount 10A IEC C13 Sockets With Thermal Trip | £187.23 | £187.23 | No photo available |
0
| ||
| RB1-R-2X16A-O | 2 x 16A Load Fed Commando Socket 1m Cable With 16A Thermal Trip | £187.23 | £187.23 | No photo available |
0
| ||
| RB1-R-2X32A-O | 2 x 32A Load Fed Commando Socket 1m Cable With 32A Thermal Trip | £187.23 | £187.23 |  |
0
| ||
| RB1-R-4xC19-16A-O | 4 x Panel Mount C19 IEC With 16A Thermal Trip | £187.23 | £187.23 | 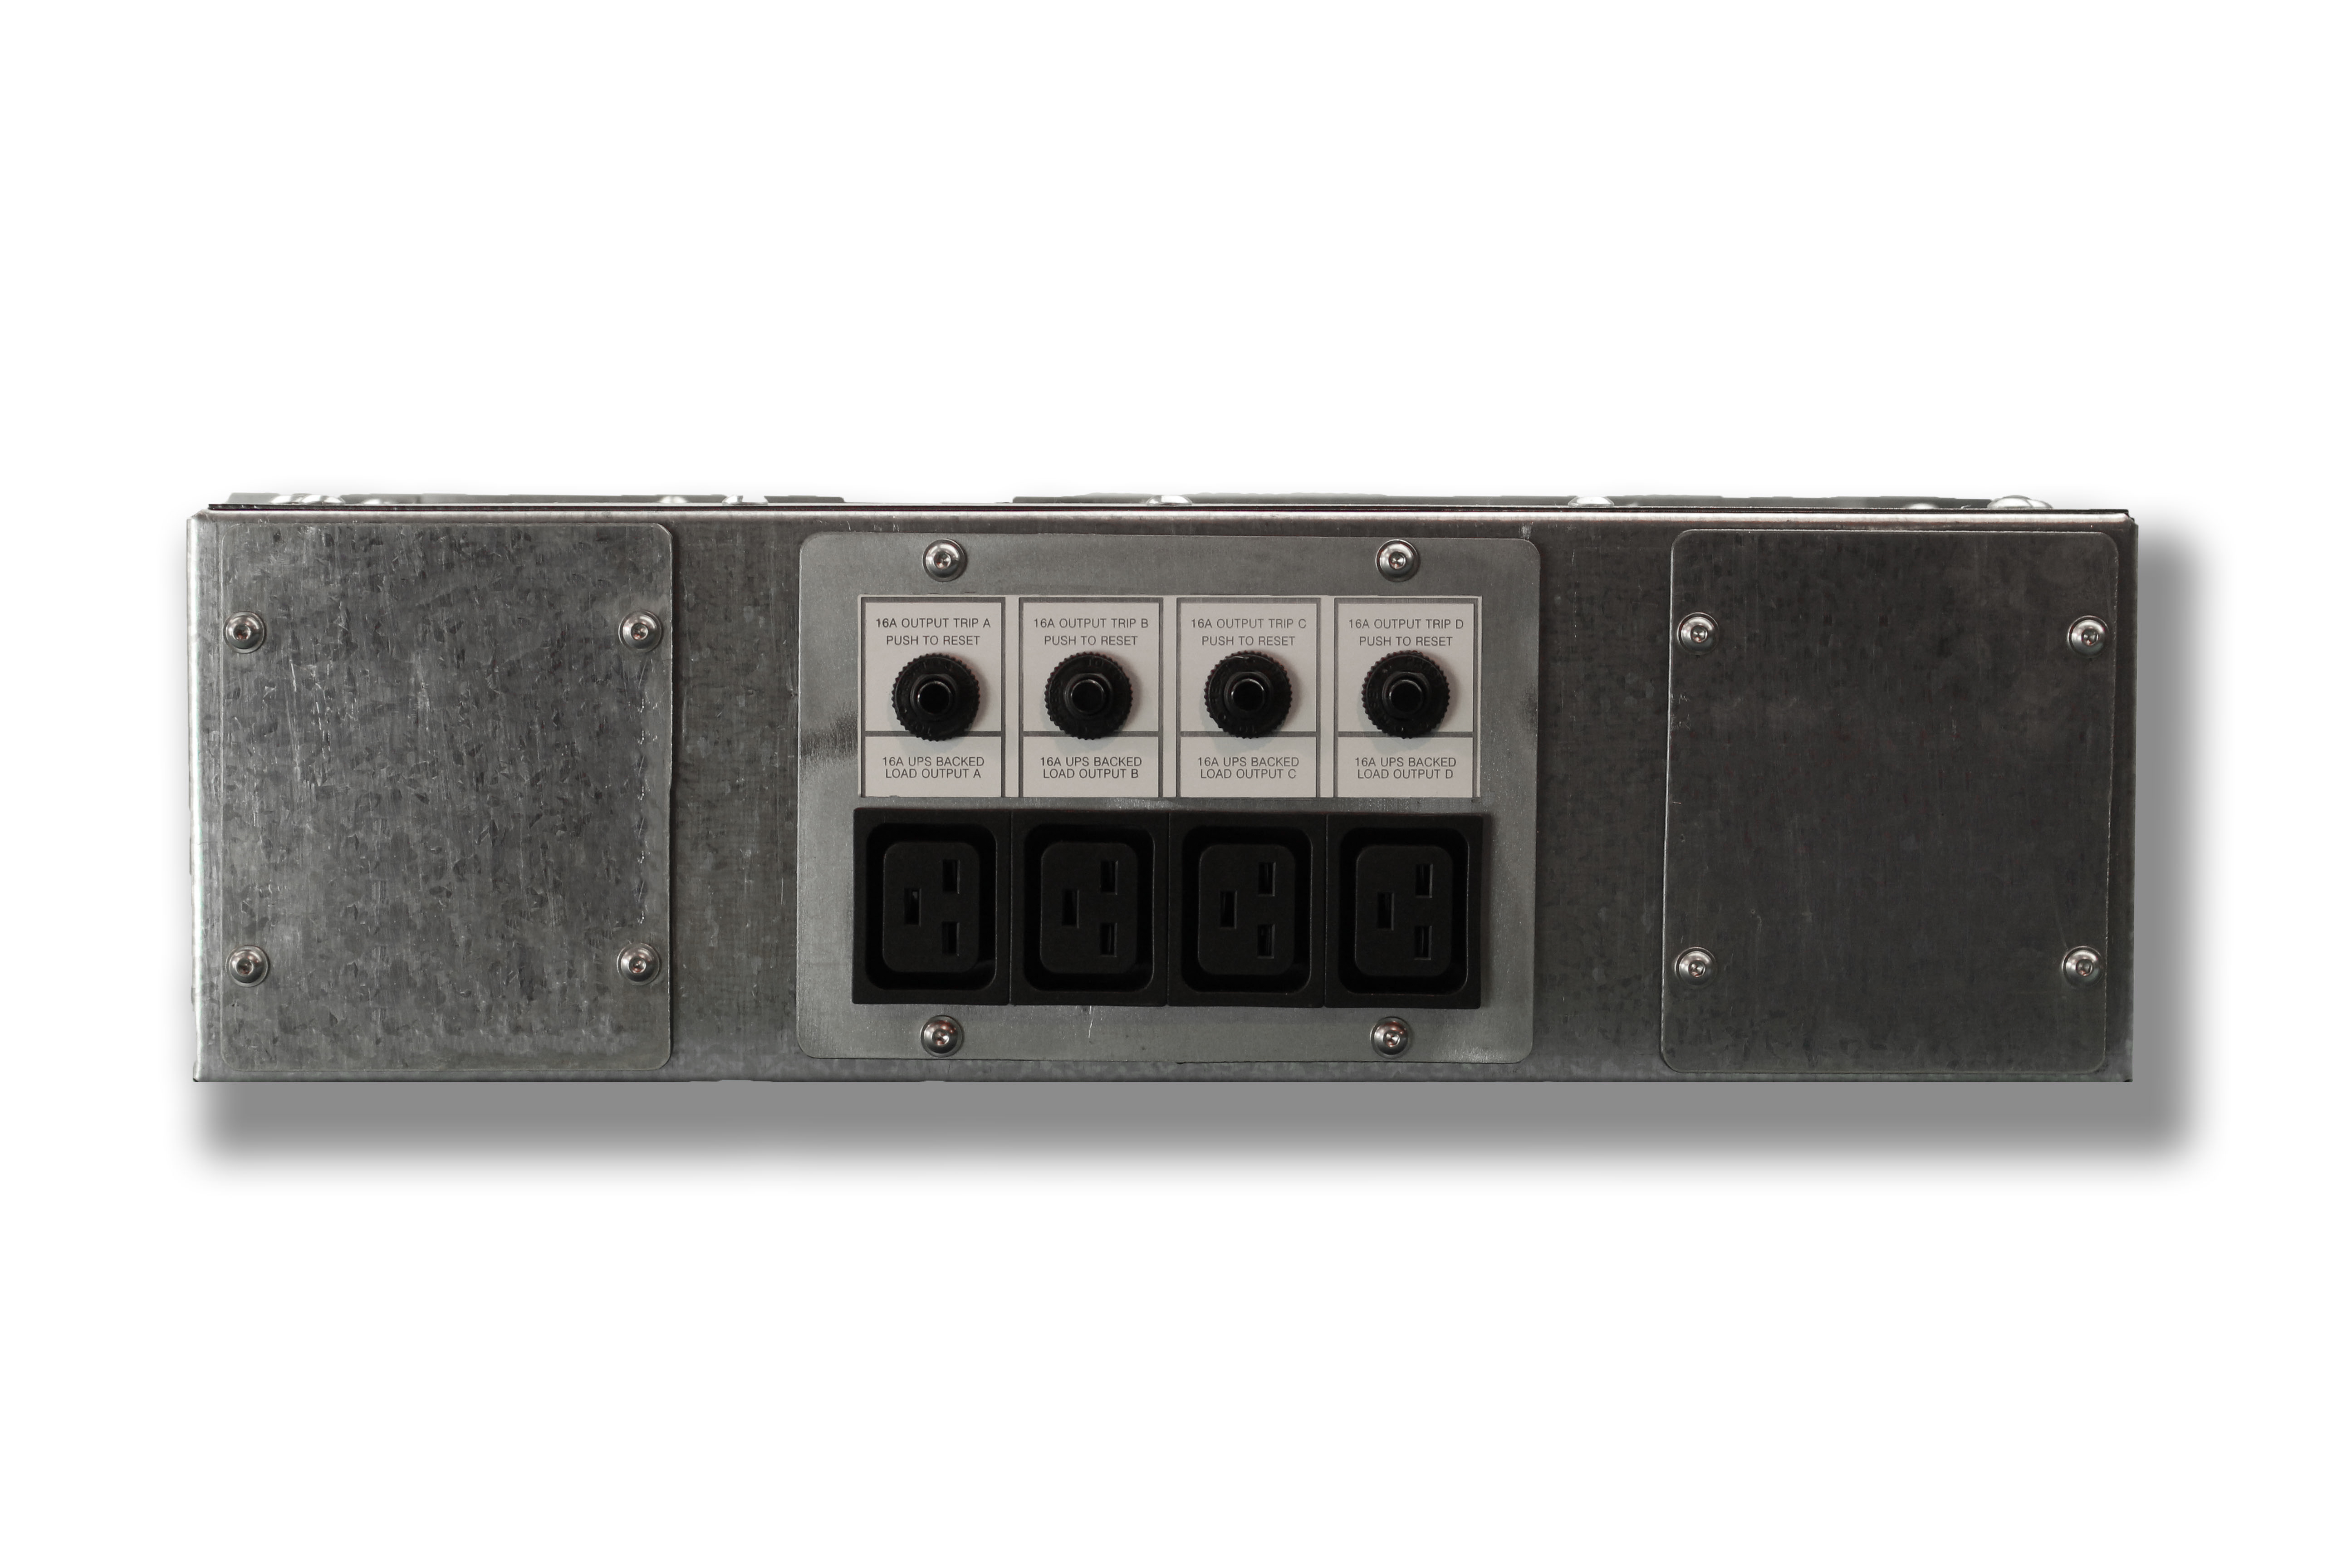 |
0
|
DC Panels▼
2P DC Switch Fuse Isolation▼
| RB1 Part Number | RB1 Product Description | Max Main Cable Size | Max Batt Cable Size | Dimensions (WxHxD) | List Price | Buy Price | Sample Photo | Qty |
|---|---|---|---|---|---|---|---|---|
| RB1-DC-ISO-100-2P-1S | Off Load Switched Fused Isolation Panel | 35mm | 35mm | 400x500x200 | £1,159.16 | £1,159.16 | No photo available |
0
|
| RB1-DC-ISO-160-2P-1S | Off Load Switched Fused Isolation Panel | 50mm | 50mm | 400x500x200 | £1,440.44 | £1,440.44 | 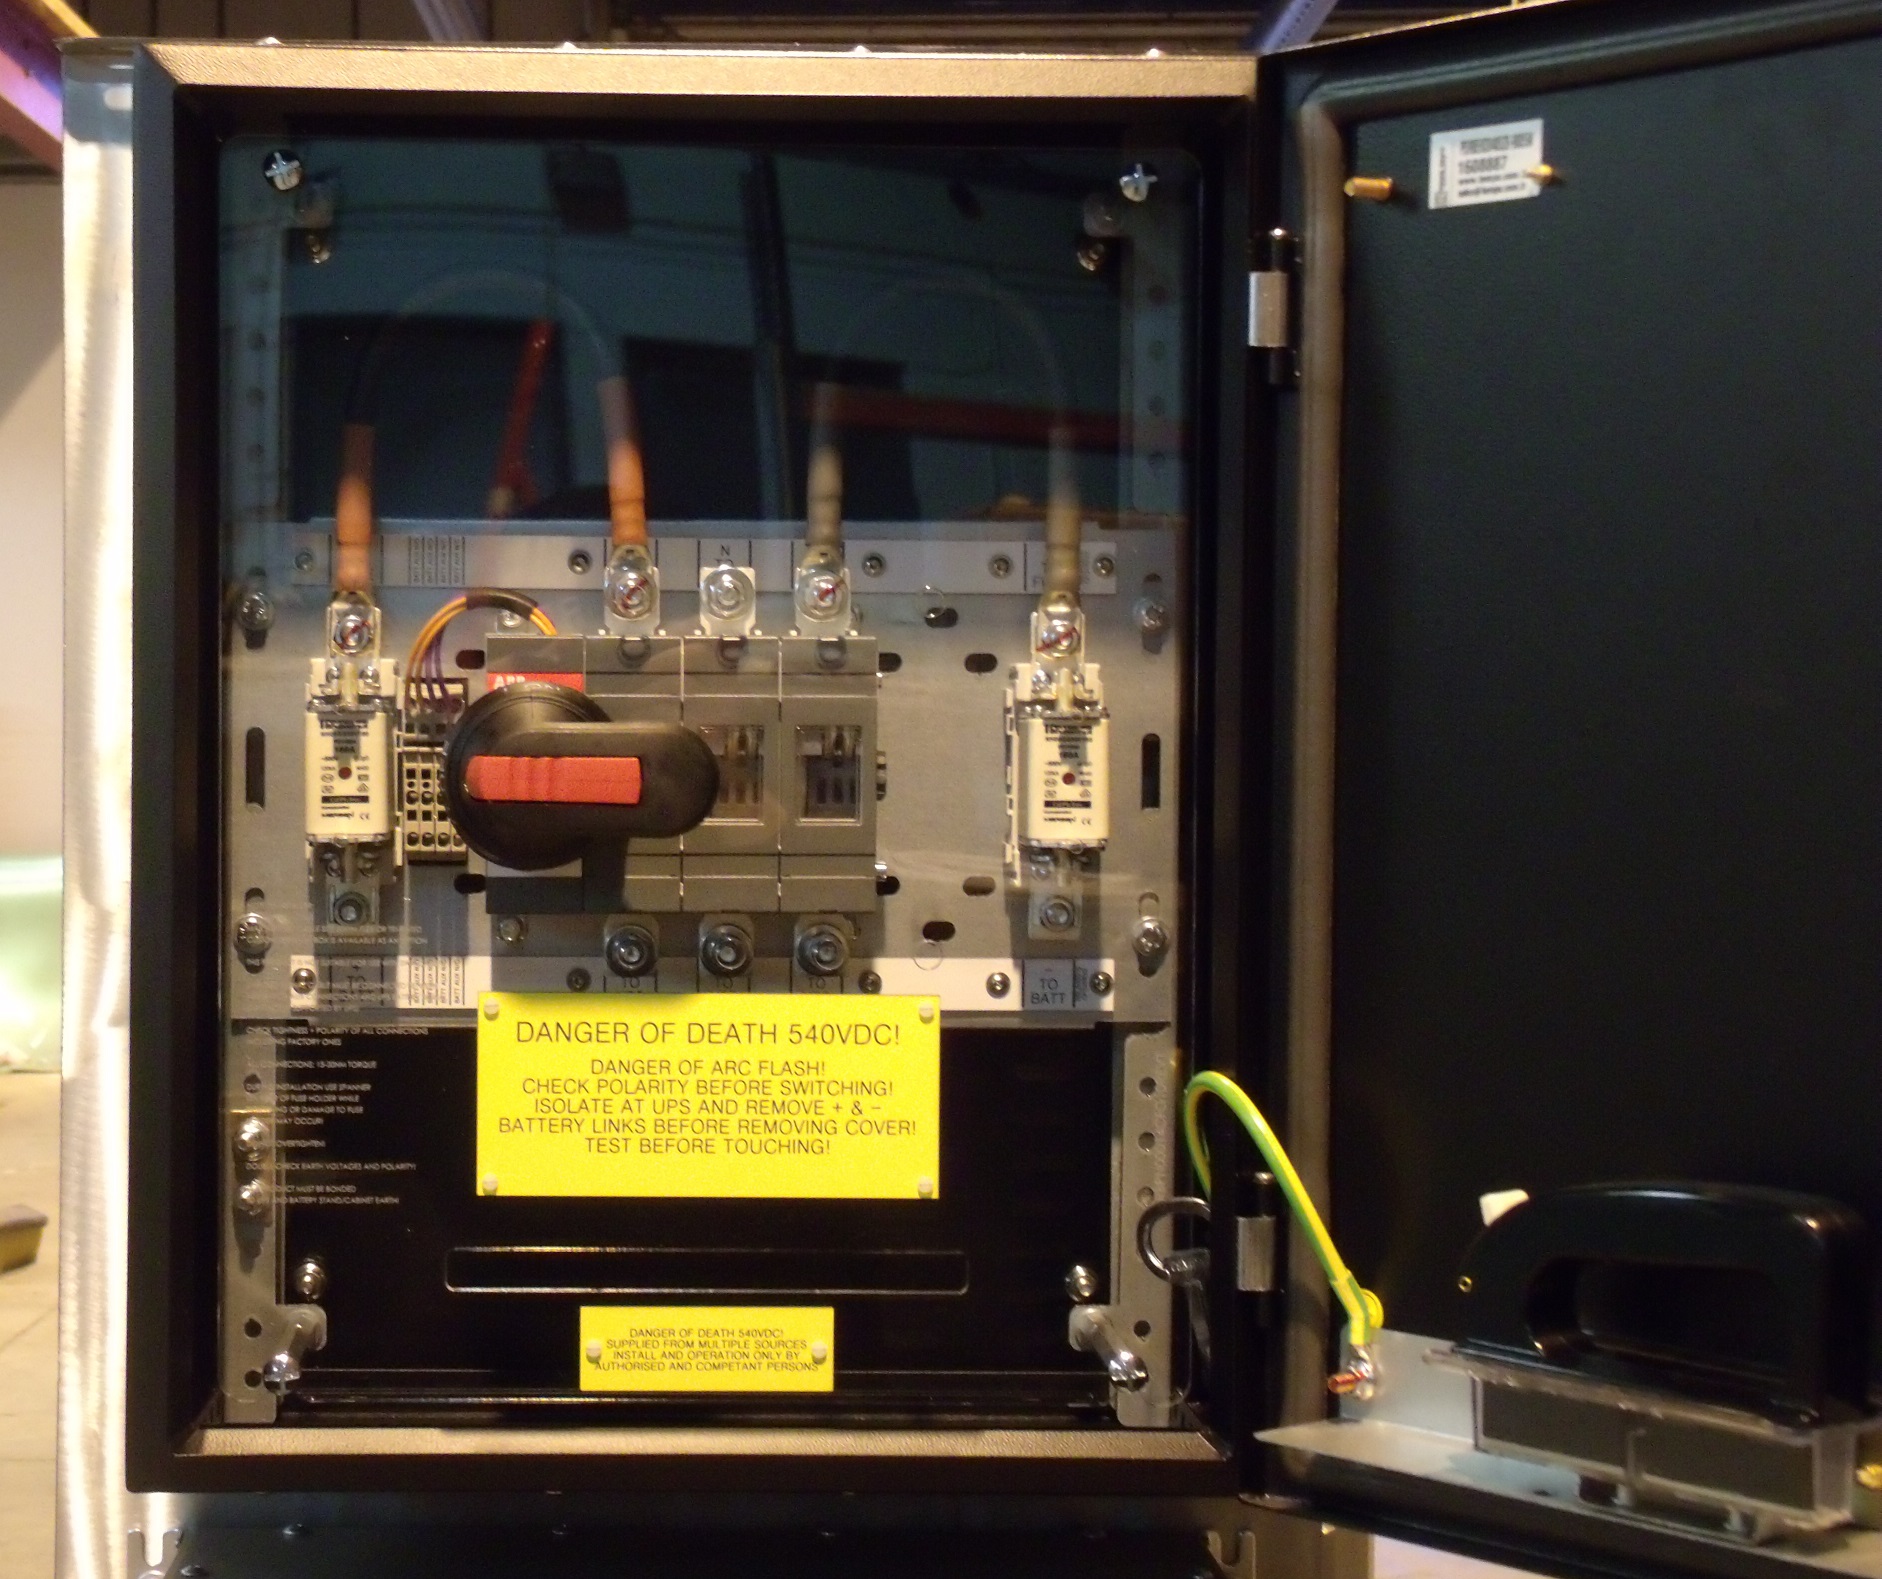 |
0
|
| RB1-DC-ISO-250-2P-1S | Off Load Switched Fused Isolation Panel | 95mm | 95mm | 600x600x300 | £1,943.73 | £1,943.73 | 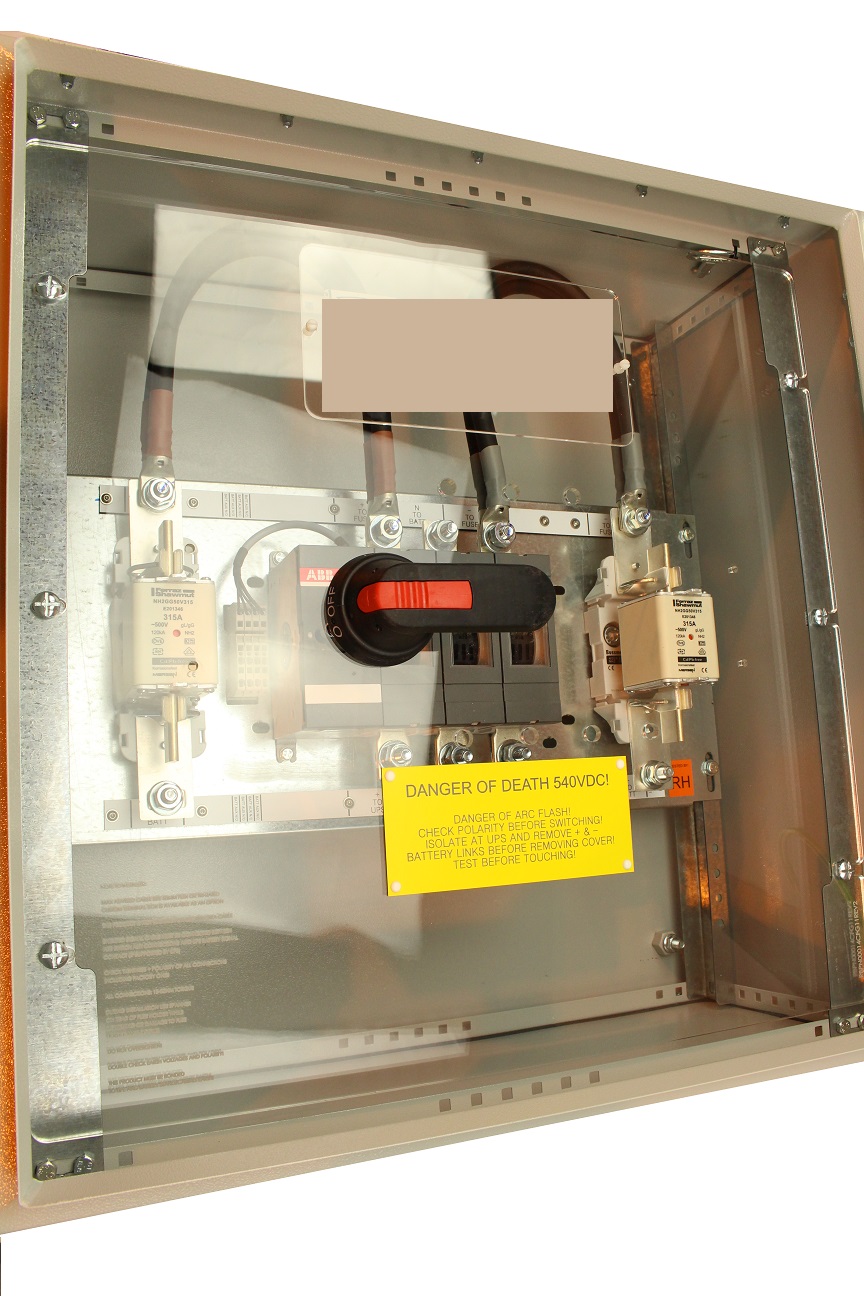 |
0
|
| RB1-DC-ISO-400-2P-1S | Off Load Switched Fused Isolation Panel | 150mm | 150mm | 600x600x300 | £2,053.27 | £2,053.27 | |
0
|
| RB1-DC-ISO-630-2P-1S | Off Load Switched Fused Isolation Panel | 240mm | 240mm | 600x600x300 | £3,799.21 | £3,799.21 | |
0
|
| RB1 Part Number | RB1 Product Description | Max Main Cable Size | Max Batt Cable Size | Dimensions (WxHxD) | List Price | Buy Price | Sample Photo | Qty |
|---|---|---|---|---|---|---|---|---|
| RB1-DC-NH-FP | NH Fuse Puller (ORDER WITH REQUIRED PANEL) | N/A | N/A | N/A | £98.65 | £98.65 | No photo available |
0
|
3P DC Switch Fuse Isolation▼
| RB1 Part Number | RB1 Product Description | Max Main Cable Size | Max Batt Cable Size | Dimensions (WxHxD) | List Price | Buy Price | Sample Photo | Qty |
|---|---|---|---|---|---|---|---|---|
| RB1-DC-ISO-100-3P-1S | Off Load Switched Fused Isolation Panel | 35mm | 35mm | 400x500x200 | £1,033.33 | £1,033.33 | No photo available |
0
|
| RB1-DC-ISO-160-3P-1S | Off Load Switched Fused Isolation Panel | 50mm | 50mm | 400x500x200 | £1,411.33 | £1,411.33 | |
0
|
| RB1-DC-ISO-250-3P-1S | Off Load Switched Fused Isolation Panel | 95mm | 95mm | 600x600x300 | £1,835.95 | £1,835.95 | |
0
|
| RB1-DC-ISO-400-3P-1S | Off Load Switched Fused Isolation Panel | 150mm | 150mm | 600x600x300 | £1,879.35 | £1,879.35 | |
0
|
| RB1-DC-ISO-630-3P-1S | Off Load Switched Fused Isolation Panel | 240mm | 150mm | 600x600x300 | £3,539.17 | £3,539.17 | |
0
|
| RB1 Part Number | RB1 Product Description | Max Main Cable Size | Max Batt Cable Size | Dimensions (WxHxD) | List Price | Buy Price | Sample Photo | Qty |
|---|---|---|---|---|---|---|---|---|
| RB1-DC-NH-FP | NH Fuse Puller (ORDER WITH REQUIRED PANEL) | N/A | N/A | N/A | £98.65 | £98.65 | No photo available |
0
|
2P DC Fused Transition▼
| RB1 Part Number | RB1 Product Description | Max Main Cable Size | Max Batt Cable Size | Dimensions (WxHxD) | List Price | Buy Price | Sample Photo | Qty |
|---|---|---|---|---|---|---|---|---|
| RB1-DC-F-100-2P-2S | Multi String UPS To Battery Fused Transition Panel | 35mm | 35mm | 400x500x200 | £848.23 | £848.23 | No photo available |
0
|
| RB1-DC-F-100-2P-3S | Multi String UPS To Battery Fused Transition Panel | 35mm | 35mm | 400x500x200 | £877.35 | £877.35 | 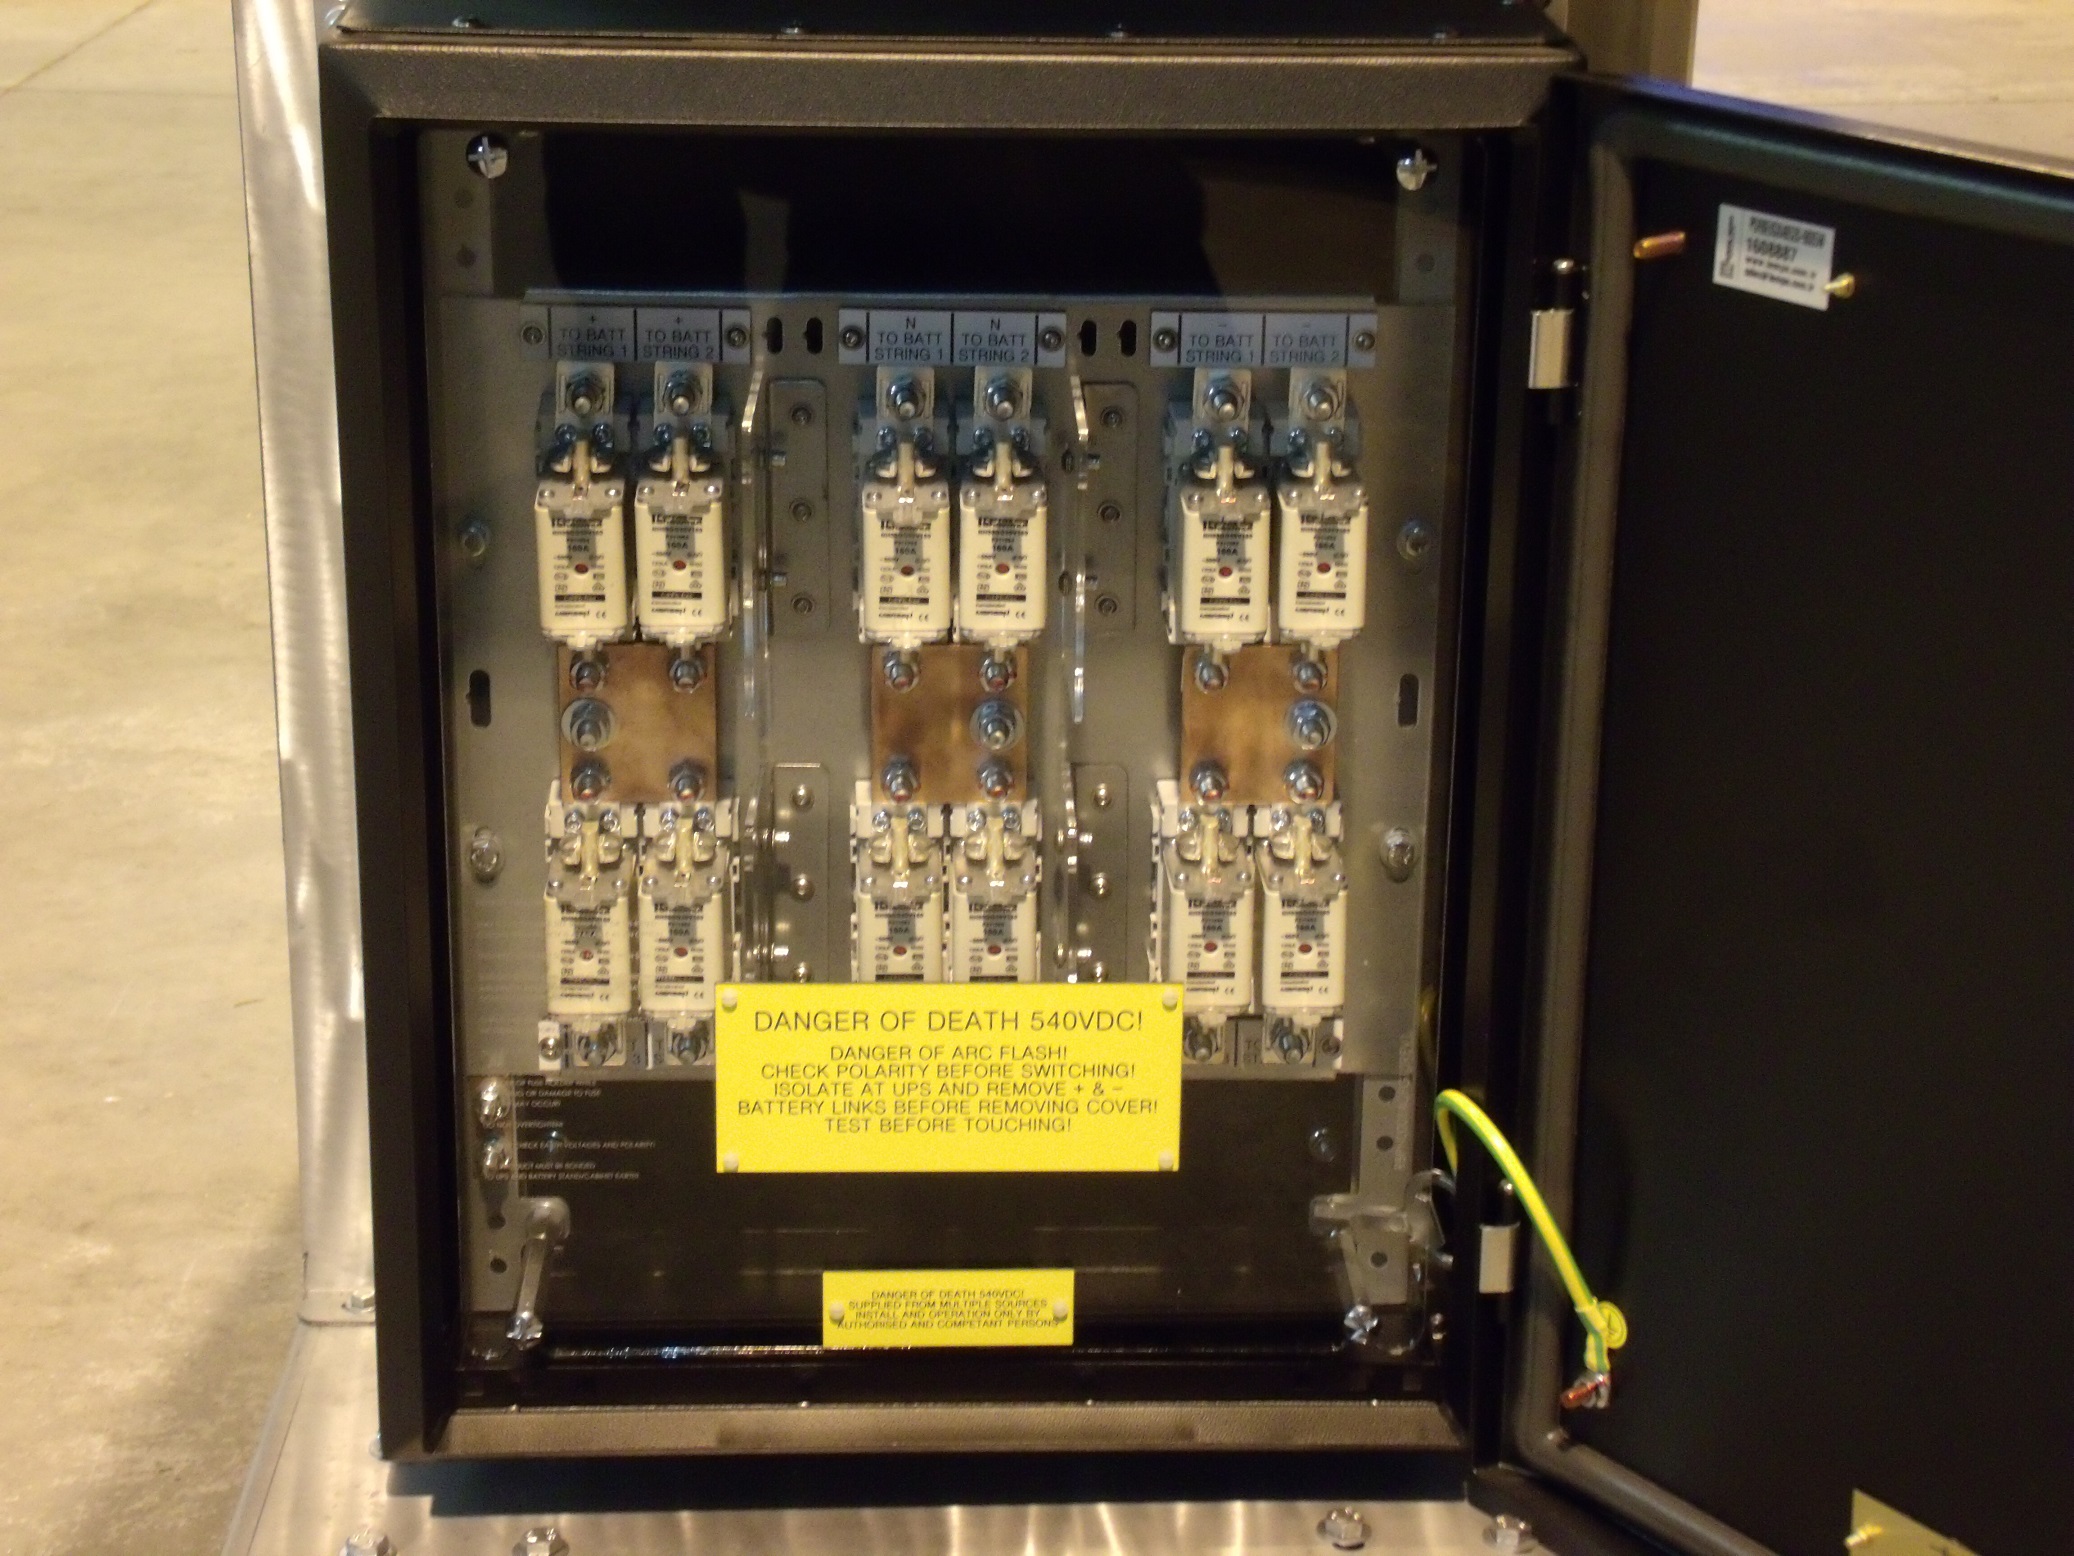 |
0
|
| RB1-DC-F-100-2P-4S | Multi String UPS To Battery Fused Transition Panel | 35mm | 35mm | 400x500x200 | £907.78 | £907.78 | |
0
|
| RB1 Part Number | RB1 Product Description | Max Main Cable Size | Max Batt Cable Size | Dimensions (WxHxD) | List Price | Buy Price | Sample Photo | Qty |
|---|---|---|---|---|---|---|---|---|
| RB1-DC-F-160-2P-2S | Multi String UPS To Battery Fused Transition Panel | 35mm | 35mm | 400x500x200 | £848.23 | £848.23 | |
0
|
| RB1-DC-F-160-2P-3S | Multi String UPS To Battery Fused Transition Panel | 35mm | 35mm | 400x500x200 | £877.35 | £877.35 | |
0
|
| RB1-DC-F-160-2P-4S | Multi String UPS To Battery Fused Transition Panel | 35mm | 35mm | 400x500x200 | £907.78 | £907.78 | |
0
|
| RB1 Part Number | RB1 Product Description | Max Main Cable Size | Max Batt Cable Size | Dimensions (WxHxD) | List Price | Buy Price | Sample Photo | Qty |
|---|---|---|---|---|---|---|---|---|
| RB1-DC-F4-160-2P-2S | Multi String UPS To Battery Fused Transition Panel | 150mm | 35mm | 600x600x300 | £1,198.23 | £1,198.23 | 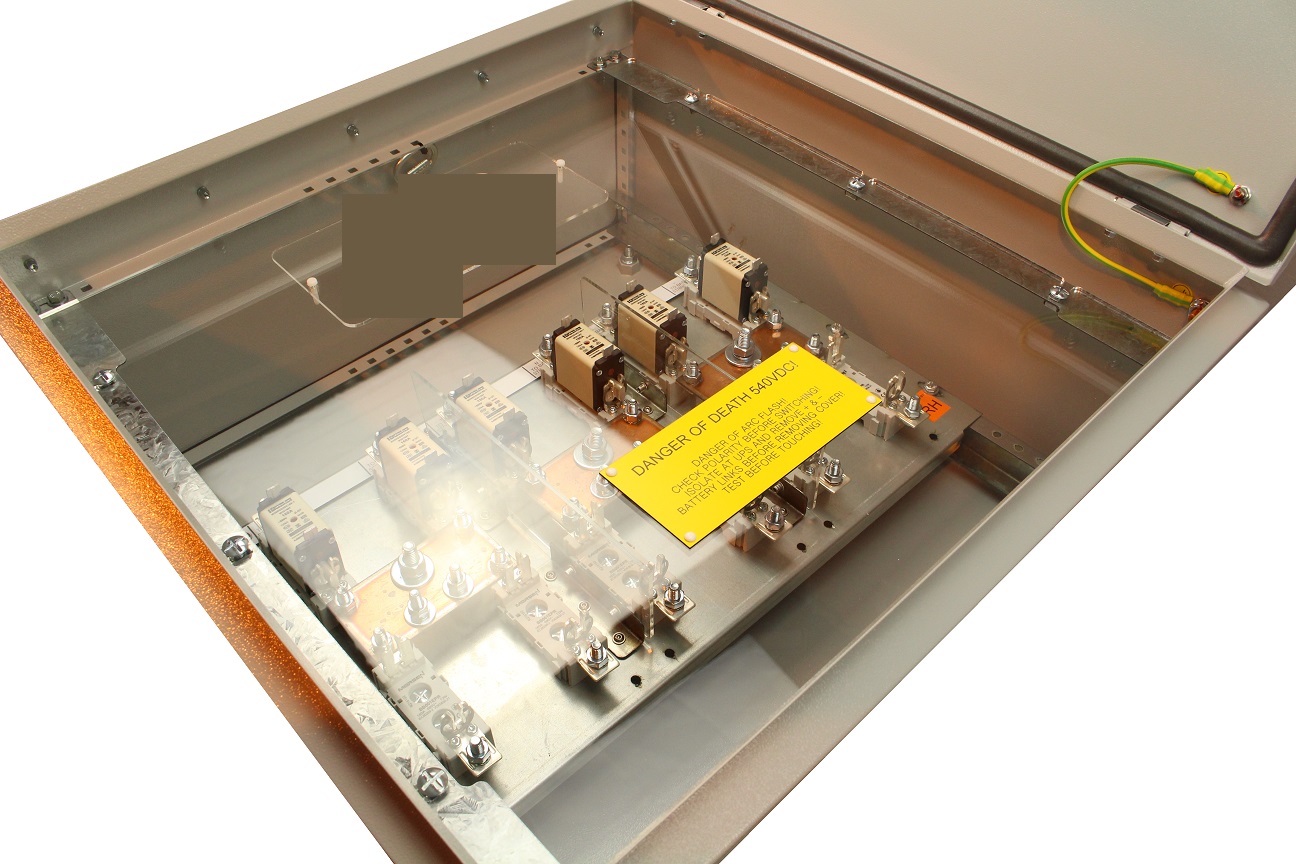 |
0
|
| RB1-DC-F4-160-2P-3S | Multi String UPS To Battery Fused Transition Panel | 150mm | 35mm | 600x600x300 | £1,229.55 | £1,229.55 | |
0
|
| RB1-DC-F4-160-2P-4S | Multi String UPS To Battery Fused Transition Panel | 150mm | 35mm | 600x600x300 | £1,260.87 | £1,260.87 | |
0
|
| RB1 Part Number | RB1 Product Description | Max Main Cable Size | Max Batt Cable Size | Dimensions (WxHxD) | List Price | Buy Price | Sample Photo | Qty |
|---|---|---|---|---|---|---|---|---|
| RB1-DC-F4-400-2P-2S | Multi String UPS To Battery Fused Transition Panel | 150mm | 150mm | 600x600x300 | £1,771.65 | £1,771.65 | 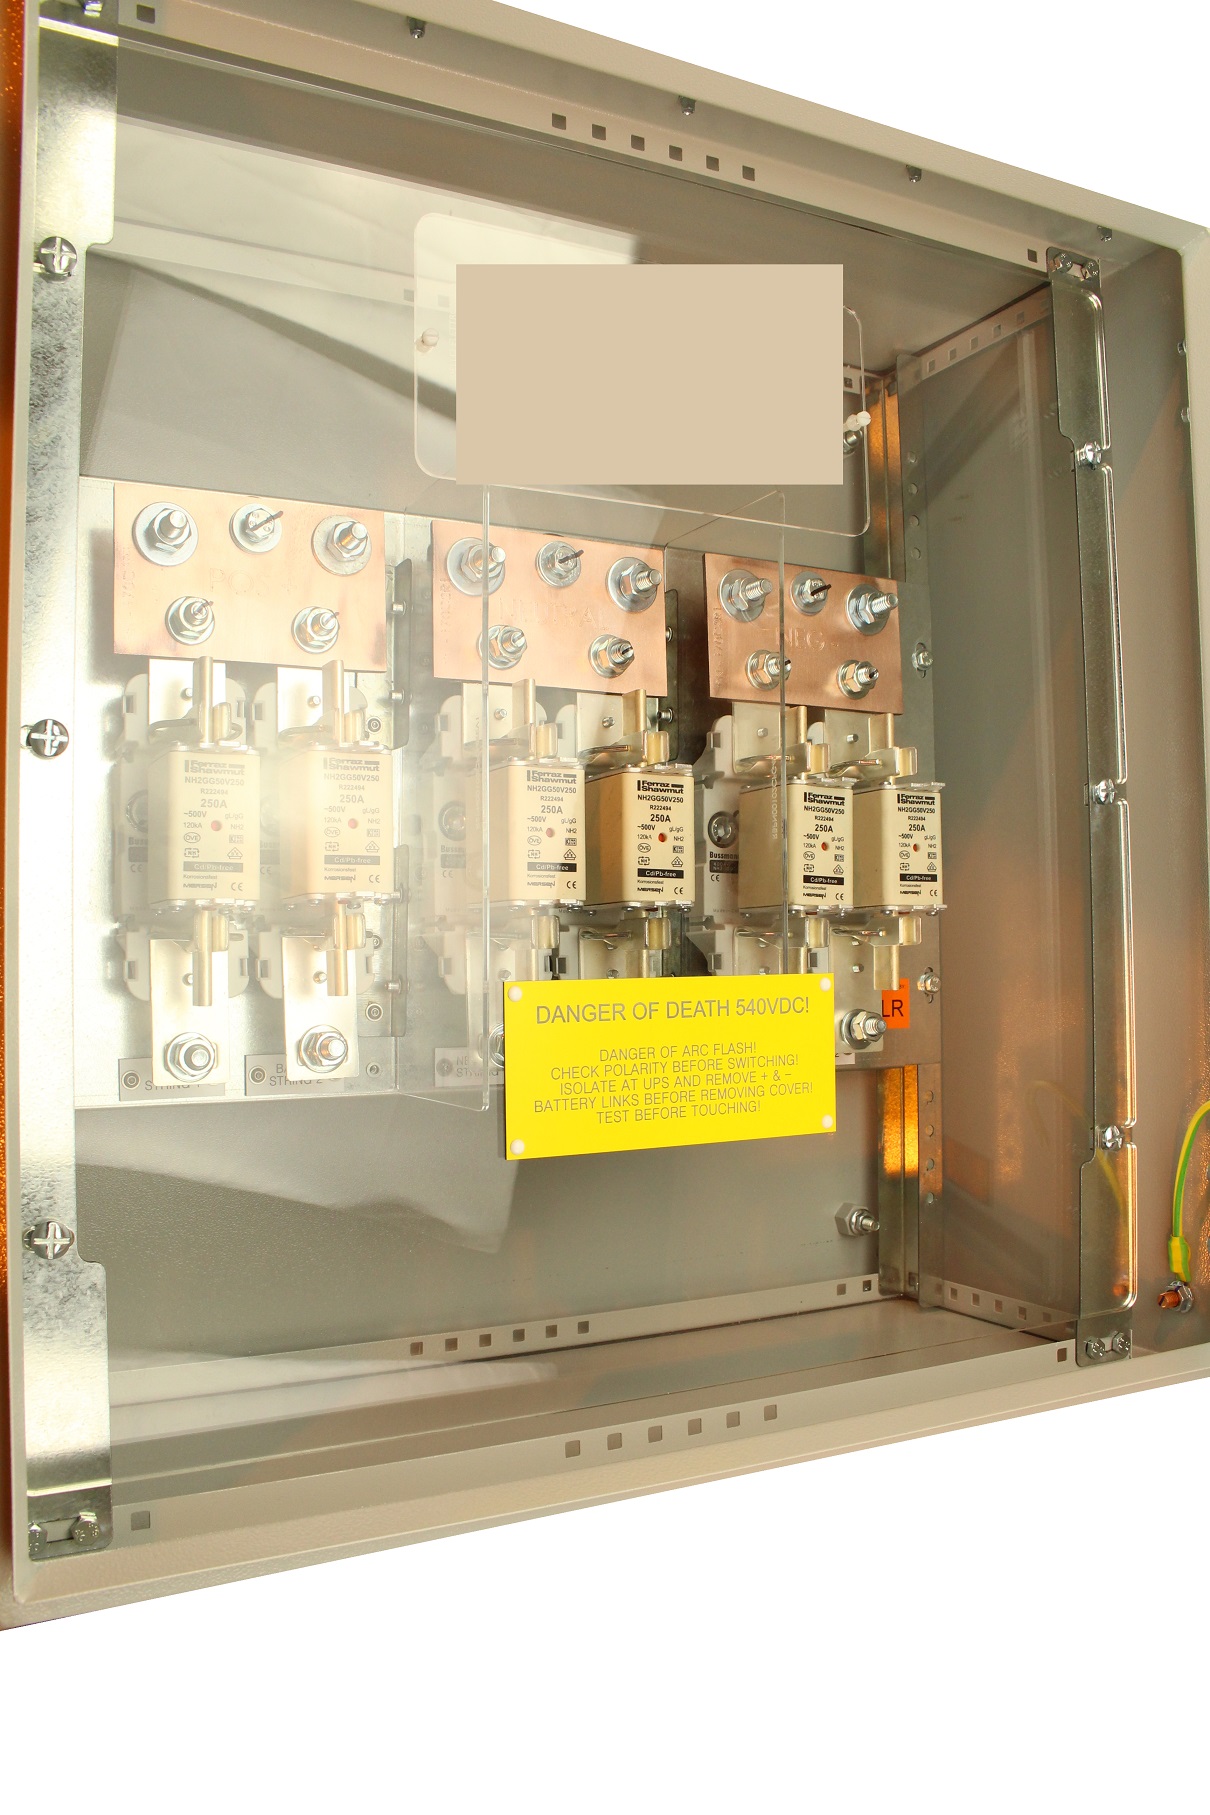 |
0
|
| RB1-DC-F4-400-2P-3S | Multi String UPS To Battery Fused Transition Panel | 150mm | 150mm | 600x600x300 | £1,863.03 | £1,863.03 | |
0
|
| RB1-DC-F4-400-2P-4S | Multi String UPS To Battery Fused Transition Panel | 150mm | 150mm | 600x1000x300 | £2,696.35 | £2,696.35 | 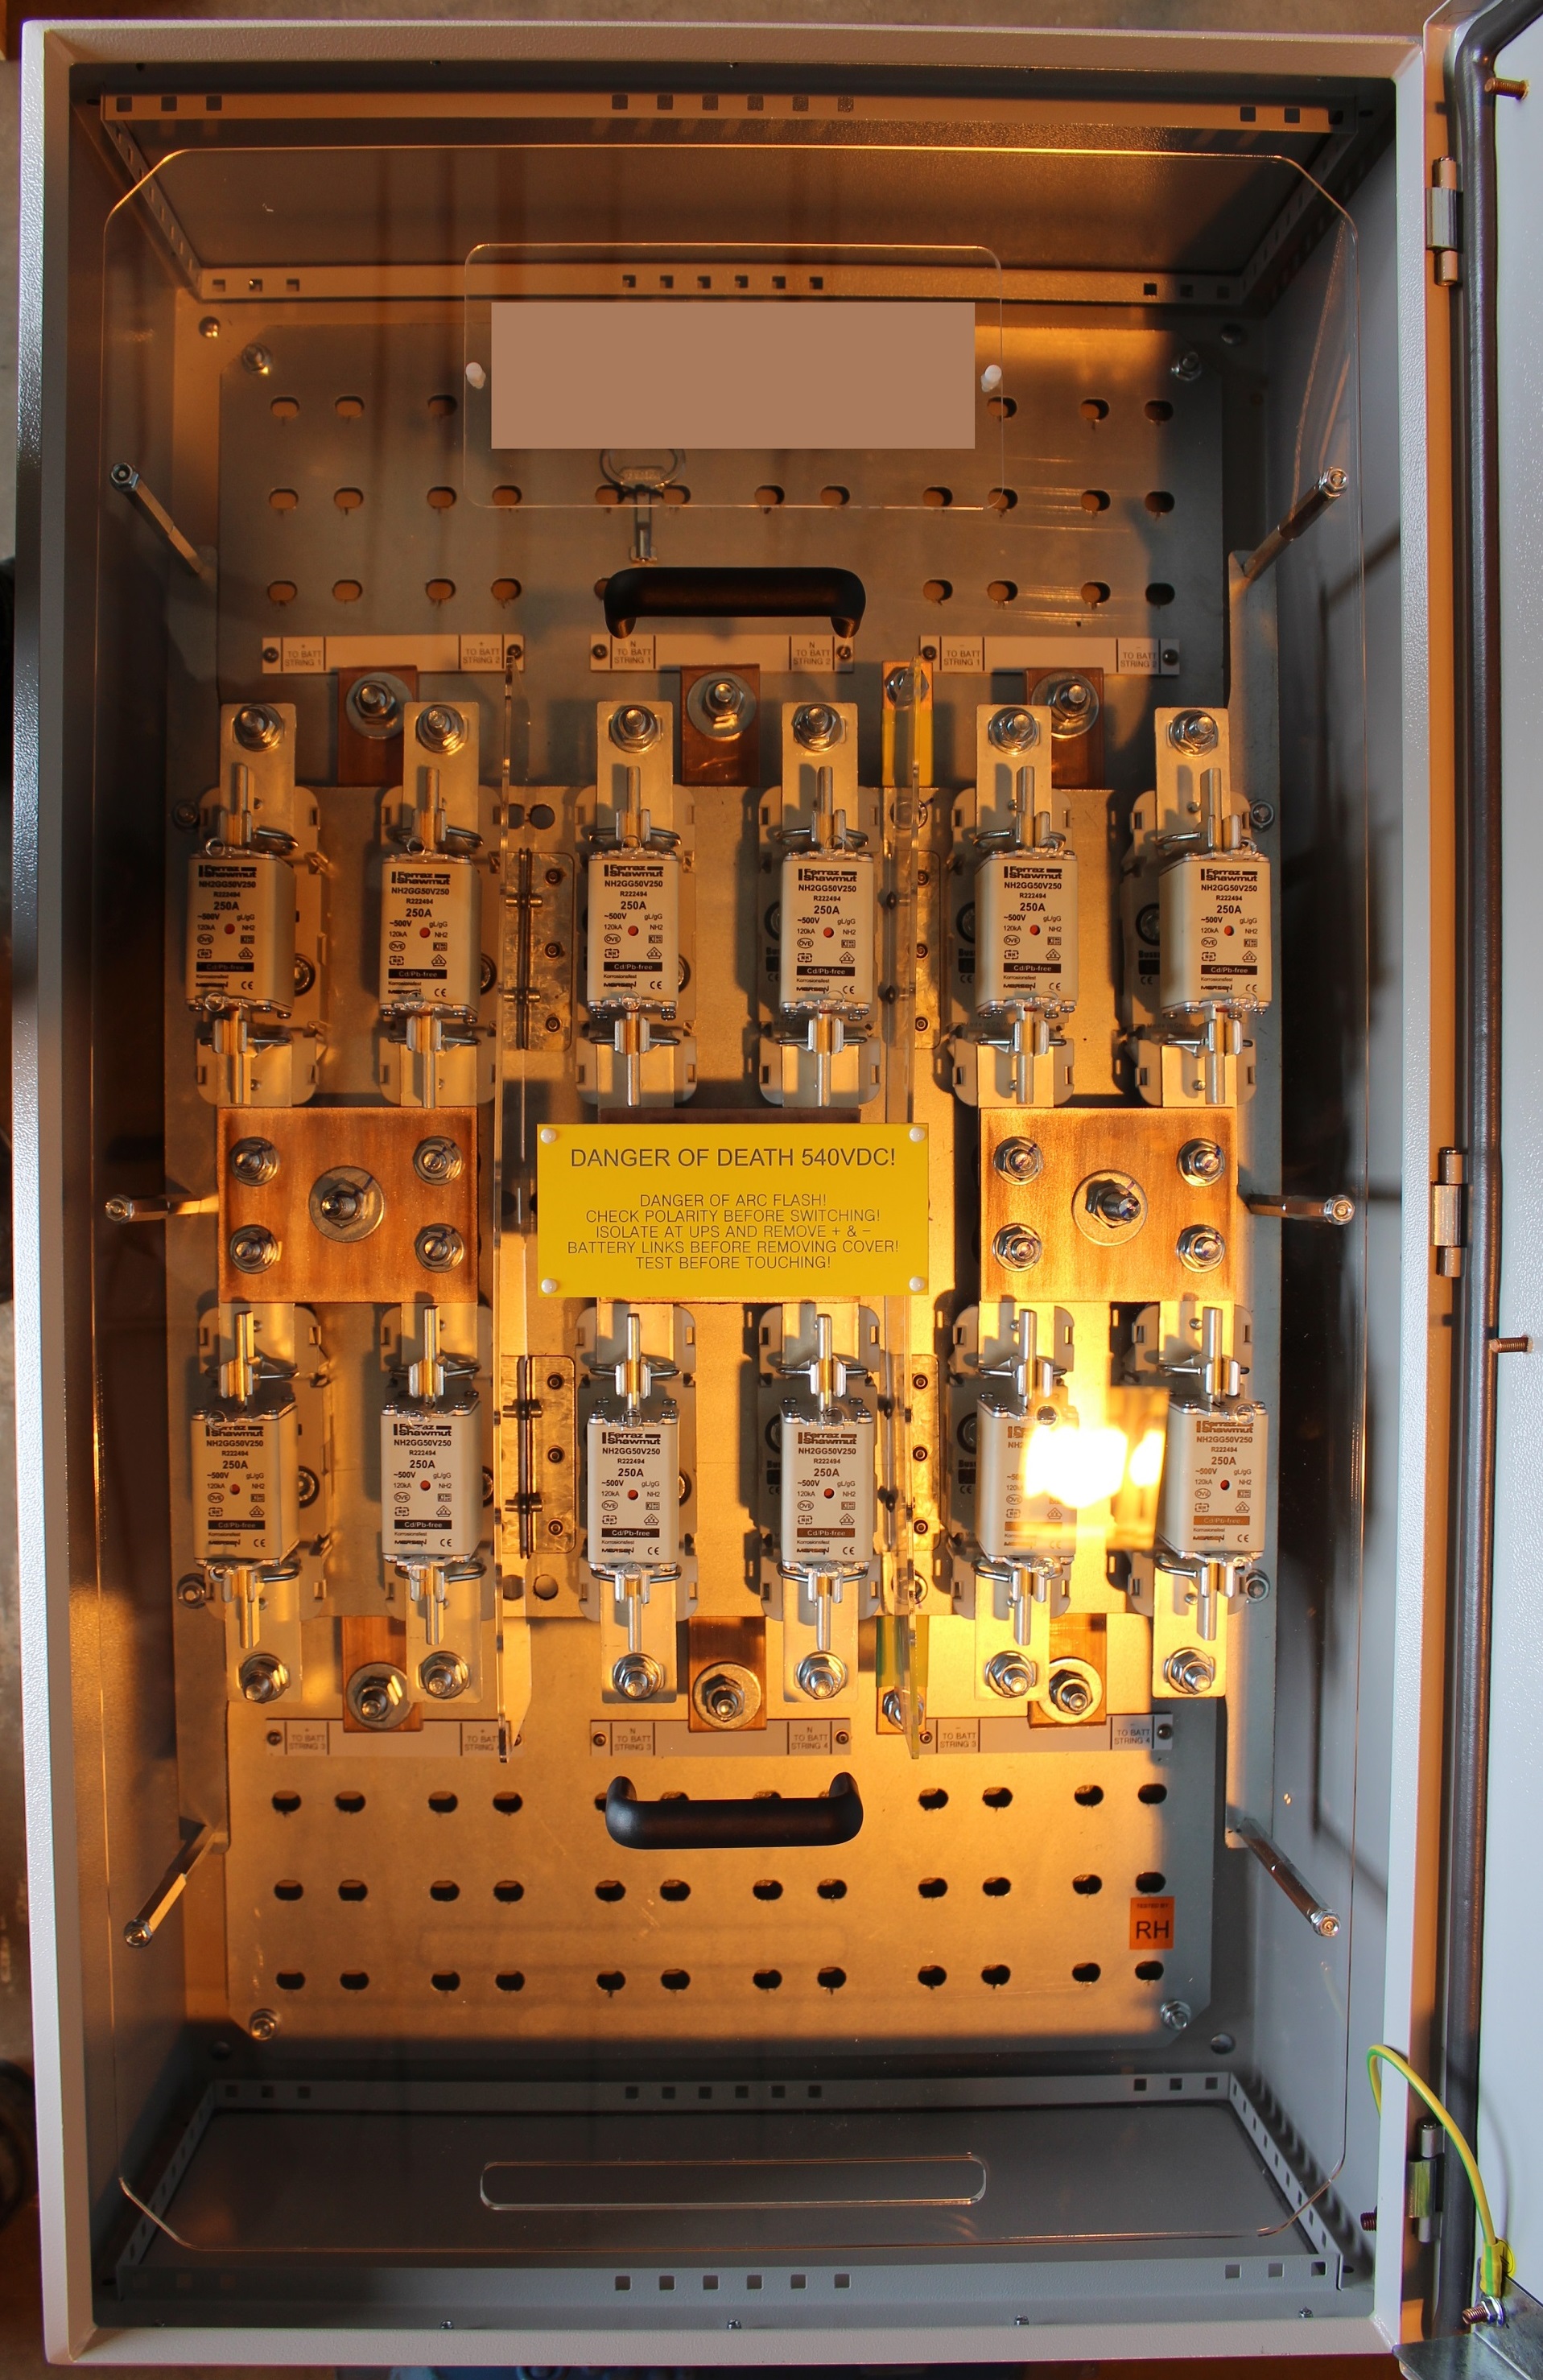 |
0
|
| RB1 Part Number | RB1 Product Description | Max Main Cable Size | Max Batt Cable Size | Dimensions (WxHxD) | List Price | Buy Price | Sample Photo | Qty |
|---|---|---|---|---|---|---|---|---|
| RB1-DC-F6-160-2P-3S | Multi String UPS To Battery Fused Transition Panel | 150mm | 35mm | 600x600x300 | £1,342.02 | £1,342.02 | |
0
|
| RB1-DC-F6-160-2P-4S | Multi String UPS To Battery Fused Transition Panel | 150mm | 35mm | 600x600x300 | £1,391.85 | £1,391.85 | |
0
|
| RB1 Part Number | RB1 Product Description | Max Main Cable Size | Max Batt Cable Size | Dimensions (WxHxD) | List Price | Buy Price | Sample Photo | Qty |
|---|---|---|---|---|---|---|---|---|
| RB1-DC-F6-400-2P-2S | Multi String UPS To Battery Fused Transition Panel | 2 x 150mm | 150mm | 600x600x300 | £1,771.65 | £1,771.65 | |
0
|
| RB1-DC-F6-400-2P-3S | Multi String UPS To Battery Fused Transition Panel | 2 x 150mm | 150mm | 600x600x300 | £1,863.03 | £1,863.03 | |
0
|
| RB1-DC-F6-400-2P-4S | Multi String UPS To Battery Fused Transition Panel | 2 x 150mm | 150mm | 600x1000x300 | £2,696.35 | £2,696.35 | |
0
|
| RB1 Part Number | RB1 Product Description | Max Main Cable Size | Max Batt Cable Size | Dimensions (WxHxD) | List Price | Buy Price | Sample Photo | Qty |
|---|---|---|---|---|---|---|---|---|
| RB1-DC-F8-400-2P-2S | Multi String UPS To Battery Fused Transition Panel | 2 x 150mm | 150mm | 600x600x300 | £1,771.65 | £1,771.65 | |
0
|
| RB1-DC-F8-400-2P-3S | Multi String UPS To Battery Fused Transition Panel | 2 x 150mm | 150mm | 600x600x300 | £1,863.03 | £1,863.03 | |
0
|
| RB1-DC-F8-400-2P-4S | Multi String UPS To Battery Fused Transition Panel | 2 x 150mm | 150mm | 600x1000x300 | £2,696.35 | £2,696.35 | |
0
|
| RB1 Part Number | RB1 Product Description | Max Main Cable Size | Max Batt Cable Size | Dimensions (WxHxD) | List Price | Buy Price | Sample Photo | Qty |
|---|---|---|---|---|---|---|---|---|
| RB1-DC-F10-400-2P-2S | Multi String UPS To Battery Fused Transition Panel | 2 x 150mm | 150mm | 600x600x300 | £1,927.13 | £1,927.13 | |
0
|
| RB1-DC-F10-400-2P-3S | Multi String UPS To Battery Fused Transition Panel | 2 x 150mm | 150mm | 600x600x300 | £2,018.51 | £2,018.51 | |
0
|
| RB1-DC-F10-400-2P-4S | Multi String UPS To Battery Fused Transition Panel | 2 x 150mm | 150mm | 600x1000x300 | £2,840.92 | £2,840.92 | |
0
|
| RB1 Part Number | RB1 Product Description | Max Main Cable Size | Max Batt Cable Size | Dimensions (WxHxD) | List Price | Buy Price | Sample Photo | Qty |
|---|---|---|---|---|---|---|---|---|
| RB1-F-NH-FP | NH Fuse Puller (ORDER WITH REQUIRED PANEL) | N/A | N/A | N/A | £98.65 | £98.65 | No photo available |
0
|
3P DC Fused Transition▼
| RB1 Part Number | RB1 Product Description | Max Main Cable Size | Max Batt Cable Size | Dimensions (WxHxD) | List Price | Buy Price | Sample Photo | Qty |
|---|---|---|---|---|---|---|---|---|
| RB1-DC-F-100-3P-2S | Multi String UPS To Battery Fused Transition Panel | 35mm | 35mm | 400x500x200 | £945.15 | £945.15 | |
0
|
| RB1-DC-F-100-3P-3S | Multi String UPS To Battery Fused Transition Panel | 35mm | 35mm | 400x500x200 | £978.02 | £978.02 | |
0
|
| RB1-DC-F-100-3P-4S | Multi String UPS To Battery Fused Transition Panel | 35mm | 35mm | 400x500x200 | £1,025.17 | £1,025.17 | |
0
|
| RB1 Part Number | RB1 Product Description | Max Main Cable Size | Max Batt Cable Size | Dimensions (WxHxD) | List Price | Buy Price | Sample Photo | Qty |
|---|---|---|---|---|---|---|---|---|
| RB1-DC-F-160-3P-2S | Multi String UPS To Battery Fused Transition Panel | 35mm | 35mm | 400x500x200 | £945.15 | £945.15 | |
0
|
| RB1-DC-F-160-3P-3S | Multi String UPS To Battery Fused Transition Panel | 35mm | 35mm | 400x500x200 | £978.02 | £978.02 | |
0
|
| RB1-DC-F-160-3P-4S | Multi String UPS To Battery Fused Transition Panel | 35mm | 35mm | 400x500x200 | £1,025.17 | £1,025.17 | |
0
|
| RB1 Part Number | RB1 Product Description | Max Main Cable Size | Max Batt Cable Size | Dimensions (WxHxD) | List Price | Buy Price | Sample Photo | Qty |
|---|---|---|---|---|---|---|---|---|
| RB1-DC-F4-160-3P-2S | Multi String UPS To Battery Fused Transition Panel | 150mm | 35mm | 600x600x300 | £1,181.10 | £1,181.10 | |
0
|
| RB1-DC-F4-160-3P-3S | Multi String UPS To Battery Fused Transition Panel | 150mm | 35mm | 600x600x300 | £1,211.10 | £1,211.10 | |
0
|
| RB1-DC-F4-160-3P-4S | Multi String UPS To Battery Fused Transition Panel | 150mm | 35mm | 600x600x300 | £1,242.47 | £1,242.47 | |
0
|
| RB1 Part Number | RB1 Product Description | Max Main Cable Size | Max Batt Cable Size | Dimensions (WxHxD) | List Price | Buy Price | Sample Photo | Qty |
|---|---|---|---|---|---|---|---|---|
| RB1-DC-F4-400-3P-2S | Multi String UPS To Battery Fused Transition Panel | 150mm | 150mm | 600x600x300 | £1,818.02 | £1,818.02 | |
0
|
| RB1-DC-F4-400-3P-3S | Multi String UPS To Battery Fused Transition Panel | 150mm | 150mm | 600x1000x300 | £2,636.34 | £2,636.34 | |
0
|
| RB1-DC-F4-400-3P-4S | Multi String UPS To Battery Fused Transition Panel | 150mm | 150mm | 600x1000x300 | £2,757.73 | £2,757.73 | |
0
|
| RB1 Part Number | RB1 Product Description | Max Main Cable Size | Max Batt Cable Size | Dimensions (WxHxD) | List Price | Buy Price | Sample Photo | Qty |
|---|---|---|---|---|---|---|---|---|
| RB1-DC-F6-160-3P-3S | Multi String UPS To Battery Fused Transition Panel | 150mm | 35mm | 600x600x300 | £1,336.57 | £1,336.57 | |
0
|
| RB1-DC-F6-160-3P-4S | Multi String UPS To Battery Fused Transition Panel | 150mm | 35mm | 600x600x300 | £1,404.77 | £1,404.77 | |
0
|
| RB1 Part Number | RB1 Product Description | Max Main Cable Size | Max Batt Cable Size | Dimensions (WxHxD) | List Price | Buy Price | Sample Photo | Qty |
|---|---|---|---|---|---|---|---|---|
| RB1-DC-F6-400-3P-2S | Multi String UPS To Battery Fused Transition Panel | 2 x 150mm | 150mm | 600x600x300 | £1,818.02 | £1,818.02 | |
0
|
| RB1-DC-F6-400-3P-3S | Multi String UPS To Battery Fused Transition Panel | 2 x 150mm | 150mm | 600x1000x300 | £2,636.34 | £2,636.34 | |
0
|
| RB1-DC-F6-400-3P-4S | Multi String UPS To Battery Fused Transition Panel | 2 x 150mm | 150mm | 600x1000x300 | £2,757.73 | £2,757.73 | |
0
|
| RB1 Part Number | RB1 Product Description | Max Main Cable Size | Max Batt Cable Size | Dimensions (WxHxD) | List Price | Buy Price | Sample Photo | Qty |
|---|---|---|---|---|---|---|---|---|
| RB1-DC-F8-400-3P-2S | Multi String UPS To Battery Fused Transition Panel | 2 x 150mm | 150mm | 600x600x300 | £1,818.02 | £1,818.02 | |
0
|
| RB1-DC-F8-400-3P-3S | Multi String UPS To Battery Fused Transition Panel | 2 x 150mm | 150mm | 600x1000x300 | £2,636.34 | £2,636.34 | |
0
|
| RB1-DC-F8-400-3P-4S | Multi String UPS To Battery Fused Transition Panel | 2 x 150mm | 150mm | 600x1000x300 | £2,757.73 | £2,757.73 | |
0
|
| RB1 Part Number | RB1 Product Description | Max Main Cable Size | Max Batt Cable Size | Dimensions (WxHxD) | List Price | Buy Price | Sample Photo | Qty |
|---|---|---|---|---|---|---|---|---|
| RB1-DC-F10-400-3P-2S | Multi String UPS To Battery Fused Transition Panel | 2 x 150mm | 150mm | 600x600x300 | £2,018.51 | £2,018.51 | |
0
|
| RB1-DC-F10-400-3P-3S | Multi String UPS To Battery Fused Transition Panel | 2 x 150mm | 150mm | 600x1000x300 | £2,748.18 | £2,748.18 | |
0
|
| RB1-DC-F10-400-3P-4S | Multi String UPS To Battery Fused Transition Panel | 2 x 150mm | 150mm | 600x1000x300 | £3,048.23 | £3,048.23 | |
0
|
| RB1 Part Number | RB1 Product Description | Max Main Cable Size | Max Batt Cable Size | Dimensions (WxHxD) | List Price | Buy Price | Sample Photo | Qty |
|---|---|---|---|---|---|---|---|---|
| RB1-DC-NH-FP | NH Fuse Puller (ORDER WITH REQUIRED PANEL) | N/A | N/A | N/A | £98.65 | £98.65 | No photo available |
0
|
Combined DC/Transition▼
| RB1 Part Number | RB1 Product Description | Max Main Cable Size | Max Batt Cable Size | Dimensions (WxHxD) | List Price | Buy Price | Sample Photo | Qty |
|---|---|---|---|---|---|---|---|---|
| RB1-DC-F-ISO-160A-2P-3S | Combined Isolator / Multi String Fused Transition Panel (Up to 3 strings) | 50mm | 50mm | 400x500x200 | £1,876.31 | £1,876.31 | No photo available |
0
|
| RB1-DC-F-ISO-160A-3P-3S | Combined Isolator / Multi String Fused Transition Panel (Up to 3 strings) | 50mm | 50mm | 700x500x200 | £2,331.76 | £2,331.76 | No photo available |
0
|
2P DC MCCBs▼
| RB1 Part Number | RB1 Product Description | Max Main Cable Size | Max Batt Cable Size | Dimensions (WxHxD) | List Price | Buy Price | Sample Photo | Qty |
|---|---|---|---|---|---|---|---|---|
| RB1-DC-MCCB-160-2P-1S | 2P DC MCCB With Aux Contacts (Adjustable to 63%) | 35mm | 35mm | 400x500x200 | £1,586.17 | £1,586.17 | No photo available |
0
|
| RB1-DC-MCCB-200-2P-1S | 2P DC MCCB With Aux Contacts (Adjustable to 63%) | 50mm | 50mm | 600x600x300 | £1,952.72 | £1,952.72 | No photo available |
0
|
| RB1-DC-MCCB-250-2P-1S | 2P DC MCCB With Aux Contacts (Adjustable to 63%) | 50mm | 50mm | 600x600x300 | £2,087.81 | £2,087.81 | No photo available |
0
|
| RB1-DC-MCCB-400-2P-1S | 2P DC MCCB With Aux Contacts (Adjustable to 63%) | 70mm | 70mm | 600x600x300 | £3,056.03 | £3,056.03 | No photo available |
0
|
| RB1-DC-MCCB-630-2P-1S | 2P DC MCCB With Aux Contacts (Adjustable to 63%) | 2 x 150mm | 2 x 150mm | 600x1000x300 | £3,988.91 | £3,988.91 | 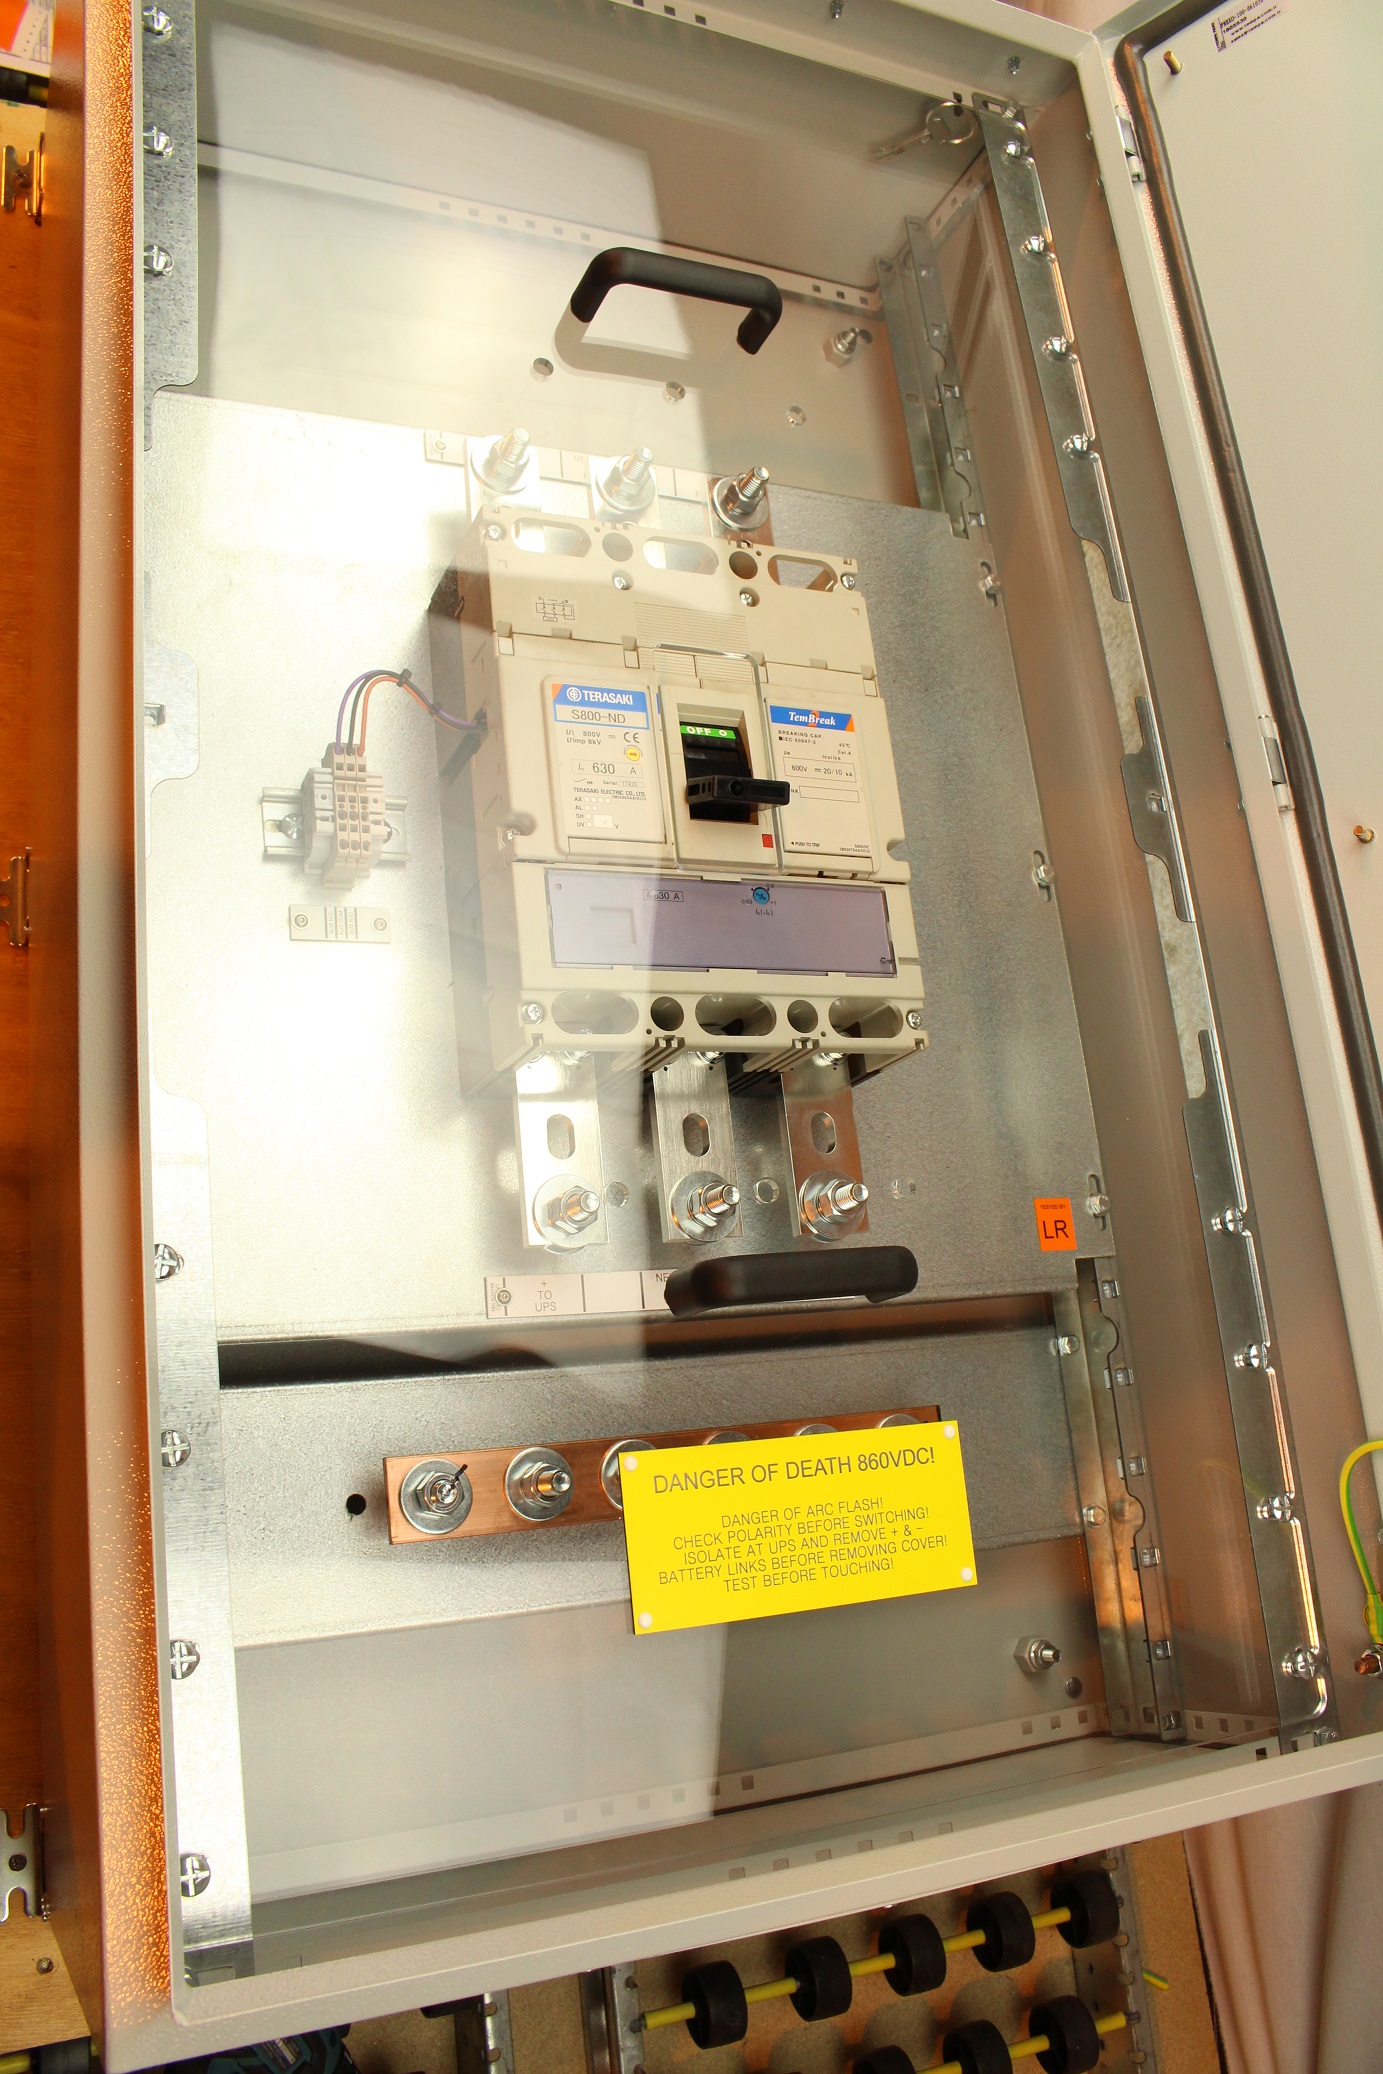 |
0
|
| RB1-DC-MCCB-800-2P-1S | 2P DC MCCB With Aux Contacts (Adjustable to 63%) | 2 x 150mm | 2 x 150mm | 600x1000x300 | £4,424.82 | £4,424.82 | |
0
|
| RB1-DC-MCCB-1000-2P-1S | 2P DC MCCB With Aux Contacts (Adjustable to 63%) | 2 x 150mm | 2 x 150mm | 600x1000x300 | £7,566.26 | £7,566.26 | No photo available |
0
|
| RB1-DC-MCCB-SHUNT-120VAC | Shunt Coil For Above Product | NA | NA | NA | £272.77 | £272.77 | No photo available |
0
|
| RB1-DC-MCCB-SHUNT-240VAC | Shunt Coil For Above Product | NA | NA | NA | £272.77 | £272.77 | No photo available |
0
|
| RB1-DC-MCCB-SHUNT-24VDC | Shunt Coil For Above Product | NA | NA | NA | £272.77 | £272.77 | No photo available |
0
|
| RB1-DC-MCCB-SHUNT-120VDC | Shunt Coil For Above Product | NA | NA | NA | £272.77 | £272.77 | No photo available |
0
|
| RB1-DC-MCCB-SHUNT-240VDC | Shunt Coil For Above Product | NA | NA | NA | £272.77 | £272.77 | No photo available |
0
|
| RB1-DC-MCCB-BAYING-630 | Cost to Fit 630A DC MCCB to an RB1 Fused Transition | NA | NA | NA | £545.55 | £545.55 | No photo available |
0
|
| RB1-DC-MCCB-BAYING-800 | Cost to Fit 800A DC MCCB to an RB1 Fused Transition | NA | NA | NA | £681.93 | £681.93 | No photo available |
0
|
| RB1-DC-MCCB-BAYING-1000 | Cost to Fit 1000A DC MCCB to an RB1 Fused Transition | NA | NA | NA | £954.71 | £954.71 | No photo available |
0
|
3P DC MCCBs▼
| RB1 Part Number | RB1 Product Description | Max Main Cable Size | Max Batt Cable Size | Dimensions (WxHxD) | List Price | Buy Price | Sample Photo | Qty |
|---|---|---|---|---|---|---|---|---|
| RB1-DC-MCCB-160-3P-1S | 3P DC MCCB With Aux Contacts (Adjustable to 63%) | 35mm | 35mm | 400x500x200 | £1,586.17 | £1,586.17 | No photo available |
0
|
| RB1-DC-MCCB-200-3P-1S | 3P DC MCCB With Aux Contacts (Adjustable to 63%) | 50mm | 50mm | 600x600x300 | £1,952.72 | £1,952.72 | No photo available |
0
|
| RB1-DC-MCCB-250-3P-1S | 3P DC MCCB With Aux Contacts (Adjustable to 63%) | 50mm | 50mm | 600x600x300 | £2,087.81 | £2,087.81 | No photo available |
0
|
| RB1-DC-MCCB-400-3P-1S | 3P DC MCCB With Aux Contacts (Adjustable to 63%) | 70mm | 70mm | 600x600x300 | £3,056.03 | £3,056.03 | No photo available |
0
|
| RB1-DC-MCCB-630-3P-1S | 3P DC MCCB With Aux Contacts (Adjustable to 63%) | 2 x 150mm | 2 x 150mm | 600x1000x300 | £3,988.91 | £3,988.91 | |
0
|
| RB1-DC-MCCB-800-3P-1S | 3P DC MCCB With Aux Contacts (Adjustable to 63%) | 2 x 150mm | 2 x 150mm | 600x1000x300 | £4,424.82 | £4,424.82 | |
0
|
| RB1-DC-MCCB-1000-3P-1S | 3P DC MCCB With Aux Contacts (Adjustable to 63%) | 2 x 150mm | 2 x 150mm | 600x1000x300 | £7,566.26 | £7,566.26 | No photo available |
0
|
| RB1-DC-MCCB-SHUNT-120VAC | Shunt Coil For Above Product | NA | NA | NA | £272.77 | £272.77 | No photo available |
0
|
| RB1-DC-MCCB-SHUNT-240VAC | Shunt Coil For Above Product | NA | NA | NA | £272.77 | £272.77 | No photo available |
0
|
| RB1-DC-MCCB-SHUNT-24VDC | Shunt Coil For Above Product | NA | NA | NA | £272.77 | £272.77 | No photo available |
0
|
| RB1-DC-MCCB-SHUNT-120VDC | Shunt Coil For Above Product | NA | NA | NA | £272.77 | £272.77 | No photo available |
0
|
| RB1-DC-MCCB-SHUNT-240VDC | Shunt Coil For Above Product | NA | NA | NA | £272.77 | £272.77 | No photo available |
0
|
| RB1-DC-MCCB-BAYING-630 | Cost to Fit 630A DC MCCB to an RB1 Fused Transition | NA | NA | NA | £654.66 | £654.66 | No photo available |
0
|
| RB1-DC-MCCB-BAYING-800 | Cost to Fit 800A DC MCCB to an RB1 Fused Transition | NA | NA | NA | £736.49 | £736.49 | No photo available |
0
|
| RB1-DC-MCCB-BAYING-1000 | Cost to Fit 1000A DC MCCB to an RB1 Fused Transition | NA | NA | NA | £954.71 | £954.71 | No photo available |
0
|
2P DC 120VDC Splitter Panel▼
| RB1 Part Number | RB1 Product Description | Max Main Cable Size | Max Batt Cable Size | No of Banks of 8 | Max No of 12V Batts | Dimensions (WxHxD) | List Price | Buy Price | Sample Photo | Qty |
|---|---|---|---|---|---|---|---|---|---|---|
| RB1-DC-ISO-100-2P-1S-2B-120V | Off Load UPS to Battery Isolator and 120vdc Splitter Panel | 35mm | 35mm | 2 | 16 | 400x500x200 | £975.25 | £975.25 | No photo available |
0
|
| RB1-DC-ISO-100-2P-1S-3B-120V | Off Load UPS to Battery Isolator and 120vdc Splitter Panel | 35mm | 35mm | 3 | 24 | 400x500x200 | £1,005.59 | £1,005.59 | No photo available |
0
|
| RB1-DC-ISO-100-2P-1S-4B-120V | Off Load UPS to Battery Isolator and 120vdc Splitter Panel | 35mm | 35mm | 4 | 32 | 400x500x200 | £1,293.84 | £1,293.84 | No photo available |
0
|
| RB1-DC-ISO-100-2P-1S-5B-120V | Off Load UPS to Battery Isolator and 120vdc Splitter Panel | 35mm | 35mm | 5 | 40 | 400x500x200 | £1,293.84 | £1,293.84 | No photo available |
0
|
| RB1-DC-ISO-100-2P-1S-6B-120V | Off Load UPS to Battery Isolator and 120vdc Splitter Panel | 35mm | 35mm | 6 | 48 | 400x500x200 | £1,390.38 | £1,390.38 | No photo available |
0
|
| RB1-DC-ISO-100-2P-1S-7B-120V | Off Load UPS to Battery Isolator and 120vdc Splitter Panel | 35mm | 35mm | 7 | 56 | 400x500x200 | £1,390.38 | £1,390.38 | No photo available |
0
|
| RB1-DC-ISO-100-2P-1S-8B-120V | Off Load UPS to Battery Isolator and 120vdc Splitter Panel | 35mm | 35mm | 8 | 64 | 500x500x200 | £1,670.53 | £1,670.53 | No photo available |
0
|
| RB1-DC-ISO-200-2P-1S-2B-120V | Off Load UPS to Battery Isolator and 120vdc Splitter Panel | 70mm | 70mm | 2 | 16 | 600x600x300 | £1,730.46 | £1,730.46 | No photo available |
0
|
| RB1-DC-ISO-200-2P-1S-3B-120V | Off Load UPS to Battery Isolator and 120vdc Splitter Panel | 70mm | 70mm | 3 | 24 | 600x600x300 | £1,797.23 | £1,797.23 | No photo available |
0
|
| RB1-DC-ISO-200-2P-1S-4B-120V | Off Load UPS to Battery Isolator and 120vdc Splitter Panel | 70mm | 70mm | 4 | 32 | 600x600x300 | £2,273.01 | £2,273.01 | No photo available |
0
|
| RB1-DC-ISO-200-2P-1S-5B-120V | Off Load UPS to Battery Isolator and 120vdc Splitter Panel | 70mm | 70mm | 5 | 40 | 600x600x300 | £2,273.01 | £2,273.01 | No photo available |
0
|
| RB1-DC-ISO-200-2P-1S-6B-120V | Off Load UPS to Battery Isolator and 120vdc Splitter Panel | 70mm | 70mm | 6 | 48 | 600x600x300 | £2,565.15 | £2,565.15 | No photo available |
0
|
| RB1-DC-ISO-200-2P-1S-7B-120V | Off Load UPS to Battery Isolator and 120vdc Splitter Panel | 70mm | 70mm | 7 | 56 | 600x600x300 | £2,565.15 | £2,565.15 | No photo available |
0
|
| RB1-DC-ISO-200-2P-1S-8B-120V | Off Load UPS to Battery Isolator and 120vdc Splitter Panel | 70mm | 70mm | 8 | 64 | TBC | £2,718.18 | £2,718.18 | No photo available |
0
|
| RB1-DC-ISO-250-2P-1S-2B-120V | Off Load UPS to Battery Isolator and 120vdc Splitter Panel | 95mm | 95mm | 2 | 16 | 600x600x300 | £1,759.68 | £1,759.68 | No photo available |
0
|
| RB1-DC-ISO-250-2P-1S-3B-120V | Off Load UPS to Battery Isolator and 120vdc Splitter Panel | 95mm | 95mm | 3 | 24 | 600x600x300 | £1,852.88 | £1,852.88 | No photo available |
0
|
| RB1-DC-ISO-250-2P-1S-4B-120V | Off Load UPS to Battery Isolator and 120vdc Splitter Panel | 95mm | 95mm | 4 | 32 | 600x600x300 | £2,690.35 | £2,690.35 | No photo available |
0
|
| RB1-DC-ISO-250-2P-1S-5B-120V | Off Load UPS to Battery Isolator and 120vdc Splitter Panel | 95mm | 95mm | 5 | 40 | 600x600x300 | £2,690.35 | £2,690.35 | No photo available |
0
|
| RB1-DC-ISO-250-2P-1S-6B-120V | Off Load UPS to Battery Isolator and 120vdc Splitter Panel | 95mm | 95mm | 6 | 48 | 600x600x300 | £3,065.96 | £3,065.96 | No photo available |
0
|
| RB1-DC-ISO-250-2P-1S-7B-120V | Off Load UPS to Battery Isolator and 120vdc Splitter Panel | 95mm | 95mm | 7 | 56 | 600x600x300 | £3,065.96 | £3,065.96 | No photo available |
0
|
| RB1-DC-ISO-250-2P-1S-8B-120V | Off Load UPS to Battery Isolator and 120vdc Splitter Panel | 95mm | 95mm | 8 | 64 | TBC | £3,093.79 | £3,093.79 | No photo available |
0
|
| RB1-DC-ISO-400-2P-1S-2B-120V | Off Load UPS to Battery Isolator and 120vdc Splitter Panel | 150mm | 150mm | 2 | 16 | 600x600x300 | £1,855.56 | £1,855.56 | No photo available |
0
|
| RB1-DC-ISO-400-2P-1S-3B-120V | Off Load UPS to Battery Isolator and 120vdc Splitter Panel | 150mm | 150mm | 3 | 24 | 600x600x300 | £1,949.13 | £1,949.13 | No photo available |
0
|
| RB1-DC-ISO-400-2P-1S-4B-120V | Off Load UPS to Battery Isolator and 120vdc Splitter Panel | 150mm | 150mm | 4 | 32 | TBC | £4,540.58 | £4,540.58 | No photo available |
0
|
| RB1-DC-ISO-400-2P-1S-5B-120V | Off Load UPS to Battery Isolator and 120vdc Splitter Panel | 150mm | 150mm | 5 | 40 | TBC | £4,540.57 | £4,540.57 | No photo available |
0
|
| RB1-DC-ISO-400-2P-1S-6B-120V | Off Load UPS to Battery Isolator and 120vdc Splitter Panel | 150mm | 150mm | 6 | 48 | TBC | £5,036.75 | £5,036.75 | No photo available |
0
|
| RB1-DC-ISO-400-2P-1S-7B-120V | Off Load UPS to Battery Isolator and 120vdc Splitter Panel | 150mm | 150mm | 7 | 56 | TBC | £5,036.75 | £5,036.75 | No photo available |
0
|
| RB1-DC-ISO-400-2P-1S-8B-120V | Off Load UPS to Battery Isolator and 120vdc Splitter Panel | 150mm | 150mm | 8 | 64 | TBC | £5,532.92 | £5,532.92 | No photo available |
0
|
3P DC 120VDC Splitter Panel▼
| RB1 Part Number | RB1 Product Description | Max Main Cable Size | Max Batt Cable Size | No of Banks of 8 | Max No of 12V Batts | Dimensions (WxHxD) | List Price | Buy Price | Sample Photo | Qty |
|---|---|---|---|---|---|---|---|---|---|---|
| RB1-DC-ISO-100-3P-1S-2B-120V | Off Load UPS to Battery Isolator and 120vdc Splitter Panel | 35mm | 35mm | 2 | 16 | 400x500x200 | £985.85 | £985.85 | No photo available |
0
|
| RB1-DC-ISO-100-3P-1S-3B-120V | Off Load UPS to Battery Isolator and 120vdc Splitter Panel | 35mm | 35mm | 3 | 24 | 400x500x200 | £1,268.28 | £1,268.28 | No photo available |
0
|
| RB1-DC-ISO-100-3P-1S-4B-120V | Off Load UPS to Battery Isolator and 120vdc Splitter Panel | 35mm | 35mm | 4 | 32 | 400x500x200 | £1,268.28 | £1,268.28 | No photo available |
0
|
| RB1-DC-ISO-100-3P-1S-5B-120V | Off Load UPS to Battery Isolator and 120vdc Splitter Panel | 35mm | 35mm | 5 | 40 | 400x500x200 | £1,362.89 | £1,362.89 | No photo available |
0
|
| RB1-DC-ISO-100-3P-1S-6B-120V | Off Load UPS to Battery Isolator and 120vdc Splitter Panel | 35mm | 35mm | 6 | 48 | 400x500x200 | £1,362.89 | £1,362.89 | No photo available |
0
|
| RB1-DC-ISO-100-3P-1S-7B-120V | Off Load UPS to Battery Isolator and 120vdc Splitter Panel | 35mm | 35mm | 7 | 56 | 500x500x200 | £1,579.11 | £1,579.11 | No photo available |
0
|
| RB1-DC-ISO-100-3P-1S-8B-120V | Off Load UPS to Battery Isolator and 120vdc Splitter Panel | 35mm | 35mm | 8 | 64 | 500x500x200 | £1,633.16 | £1,633.16 | No photo available |
0
|
| RB1-DC-ISO-200-3P-1S-2B-120V | Off Load UPS to Battery Isolator and 120vdc Splitter Panel | 70mm | 70mm | 2 | 16 | 600x600x300 | £1,780.83 | £1,780.83 | No photo available |
0
|
| RB1-DC-ISO-200-3P-1S-3B-120V | Off Load UPS to Battery Isolator and 120vdc Splitter Panel | 70mm | 70mm | 3 | 24 | 600x600x300 | £2,252.07 | £2,252.07 | No photo available |
0
|
| RB1-DC-ISO-200-3P-1S-4B-120V | Off Load UPS to Battery Isolator and 120vdc Splitter Panel | 70mm | 70mm | 4 | 32 | 600x600x300 | £2,252.07 | £2,252.07 | No photo available |
0
|
| RB1-DC-ISO-200-3P-1S-5B-120V | Off Load UPS to Battery Isolator and 120vdc Splitter Panel | 70mm | 70mm | 5 | 40 | 600x600x300 | £2,555.21 | £2,555.21 | No photo available |
0
|
| RB1-DC-ISO-200-3P-1S-6B-120V | Off Load UPS to Battery Isolator and 120vdc Splitter Panel | 70mm | 70mm | 6 | 48 | 600x600x300 | £2,555.21 | £2,555.21 | No photo available |
0
|
| RB1-DC-ISO-200-3P-1S-7B-120V | Off Load UPS to Battery Isolator and 120vdc Splitter Panel | 70mm | 70mm | 7 | 56 | 800x600x300 | £2,693.00 | £2,693.00 | No photo available |
0
|
| RB1-DC-ISO-200-3P-1S-8B-120V | Off Load UPS to Battery Isolator and 120vdc Splitter Panel | 70mm | 70mm | 8 | 64 | 800x600x300 | £2,817.01 | £2,817.01 | No photo available |
0
|
| RB1-DC-ISO-250-3P-1S-2B-120V | Off Load UPS to Battery Isolator and 120vdc Splitter Panel | 95mm | 95mm | 2 | 16 | 600x600x300 | £1,835.95 | £1,835.95 | No photo available |
0
|
| RB1-DC-ISO-250-3P-1S-3B-120V | Off Load UPS to Battery Isolator and 120vdc Splitter Panel | 95mm | 95mm | 3 | 24 | 600x600x300 | £2,665.44 | £2,665.44 | No photo available |
0
|
| RB1-DC-ISO-250-3P-1S-4B-120V | Off Load UPS to Battery Isolator and 120vdc Splitter Panel | 95mm | 95mm | 4 | 32 | 600x600x300 | £2,665.44 | £2,665.44 | No photo available |
0
|
| RB1-DC-ISO-250-3P-1S-5B-120V | Off Load UPS to Battery Isolator and 120vdc Splitter Panel | 95mm | 95mm | 5 | 40 | 600x600x300 | £3,037.48 | £3,037.48 | No photo available |
0
|
| RB1-DC-ISO-250-3P-1S-6B-120V | Off Load UPS to Battery Isolator and 120vdc Splitter Panel | 95mm | 95mm | 6 | 48 | 600x600x300 | £3,037.48 | £3,037.48 | No photo available |
0
|
| RB1-DC-ISO-250-3P-1S-7B-120V | Off Load UPS to Battery Isolator and 120vdc Splitter Panel | 95mm | 95mm | 7 | 56 | TBC | £3,065.03 | £3,065.03 | No photo available |
0
|
| RB1-DC-ISO-250-3P-1S-8B-120V | Off Load UPS to Battery Isolator and 120vdc Splitter Panel | 95mm | 95mm | 8 | 64 | TBC | £3,092.59 | £3,092.59 | No photo available |
0
|
| RB1-DC-ISO-400-3P-1S-2B-120V | Off Load UPS to Battery Isolator and 120vdc Splitter Panel | 150mm | 150mm | 2 | 16 | 600x600x300 | £1,861.55 | £1,861.55 | No photo available |
0
|
| RB1-DC-ISO-400-3P-1S-3B-120V | Off Load UPS to Battery Isolator and 120vdc Splitter Panel | 150mm | 150mm | 3 | 24 | TBC | £4,331.90 | £4,331.90 | No photo available |
0
|
| RB1-DC-ISO-400-3P-1S-4B-120V | Off Load UPS to Battery Isolator and 120vdc Splitter Panel | 150mm | 150mm | 4 | 32 | TBC | £4,331.90 | £4,331.90 | No photo available |
0
|
| RB1-DC-ISO-400-3P-1S-5B-120V | Off Load UPS to Battery Isolator and 120vdc Splitter Panel | 150mm | 150mm | 5 | 40 | TBC | £4,804.88 | £4,804.88 | No photo available |
0
|
| RB1-DC-ISO-400-3P-1S-6B-120V | Off Load UPS to Battery Isolator and 120vdc Splitter Panel | 150mm | 150mm | 6 | 48 | TBC | £4,804.88 | £4,804.88 | No photo available |
0
|
| RB1-DC-ISO-400-3P-1S-7B-120V | Off Load UPS to Battery Isolator and 120vdc Splitter Panel | 150mm | 150mm | 7 | 56 | TBC | £5,277.88 | £5,277.88 | No photo available |
0
|
| RB1-DC-ISO-400-3P-1S-8B-120V | Off Load UPS to Battery Isolator and 120vdc Splitter Panel | 150mm | 150mm | 8 | 64 | TBC | £5,413.02 | £5,413.02 | No photo available |
0
|
DC Fuse Disconnector Panel▼
| RB1 Part Number | RB1 Product Description | Max Main Cable Size | Max Batt Cable Size | Dimensions (WxHxD) | List Price | Buy Price | Sample Photo | Qty |
|---|---|---|---|---|---|---|---|---|
| RB1-DC-W-F1-1M0160-2S0160 | Off Load Fused Isolation Panel | 70mm | 70mm | 600x600x300 | £2,166.52 | £2,166.52 | No photo available |
0
|
| RB1-DC-W-F1-1M0160-3S0160 | Off Load Fused Isolation Panel | 70mm | 70mm | 600x1000x300 | £3,356.86 | £3,356.86 | No photo available |
0
|
| RB1-DC-W-F1-1M0160-4S0160 | Off Load Fused Isolation Panel | 70mm | 70mm | 600x1000x300 | £3,395.43 | £3,395.43 | No photo available |
0
|
| RB1-DC-W-F1-1M0160-5S0160 | Off Load Fused Isolation Panel | 70mm | 70mm | 600x1000x300 | £3,243.74 | £3,243.74 | No photo available |
0
|
| RB1-DC-W-F1-1M0160-6S0160 | Off Load Fused Isolation Panel | 70mm | 70mm | 600x1000x300 | £3,378.32 | £3,378.32 | No photo available |
0
|
| RB1-DC-W-F1-1M0160-8S0160 | Off Load Fused Isolation Panel | 70mm | 70mm | 800x2000x300 | POA | £0.00 | No photo available |
0
|
| RB1-DC-W-F1-1M0160-10S0160 | Off Load Fused Isolation Panel | 70mm | 70mm | 800x2000x300 | POA | £0.00 | No photo available |
0
|
| RB1 Part Number | RB1 Product Description | Max Main Cable Size | Max Batt Cable Size | Dimensions (WxHxD) | List Price | Buy Price | Sample Photo | Qty |
|---|---|---|---|---|---|---|---|---|
| RB1-DC-W-F2-1M0250-2S0250 | Off Load Fused Isolation Panel | 185mm | 185mm | 600x1000x300 | £2,814.41 | £2,814.41 | No photo available |
0
|
| RB1-DC-W-F2-1M0250-3S0250 | Off Load Fused Isolation Panel | 185mm | 185mm | 800x2000x300 | POA | £0.00 | No photo available |
0
|
| RB1-DC-W-F2-1M0250-4S0250 | Off Load Fused Isolation Panel | 185mm | 185mm | 800x2000x300 | POA | £0.00 | No photo available |
0
|
| RB1-DC-W-F2-1M0250-5S0250 | Off Load Fused Isolation Panel | 185mm | 185mm | 800x2000x300 | POA | £0.00 | No photo available |
0
|
| RB1-DC-W-F2-1M0250-6S0250 | Off Load Fused Isolation Panel | 185mm | 185mm | 1000x2000x300 | POA | £0.00 | No photo available |
0
|
| RB1-DC-W-F2-1M0250-8S0250 | Off Load Fused Isolation Panel | 185mm | 185mm | 1200x2000x300 | POA | £0.00 | No photo available |
0
|
| RB1 Part Number | RB1 Product Description | Max Main Cable Size | Max Batt Cable Size | Dimensions (WxHxD) | List Price | Buy Price | Sample Photo | Qty |
|---|---|---|---|---|---|---|---|---|
| RB1-DC-W-F4-1M0250-2S0250 | Off Load Fused Isolation Panel | 185mm | 185mm | 600x1000x300 | £3,003.57 | £3,003.57 | No photo available |
0
|
| RB1-DC-W-F4-1M0250-3S0250 | Off Load Fused Isolation Panel | 185mm | 185mm | 800x2000x600 | POA | £0.00 | No photo available |
0
|
| RB1-DC-W-F4-1M0250-4S0250 | Off Load Fused Isolation Panel | 185mm | 185mm | 800x2000x600 | POA | £0.00 | No photo available |
0
|
| RB1-DC-W-F4-1M0250-5S0250 | Off Load Fused Isolation Panel | 185mm | 185mm | 800x2000x600 | POA | £0.00 | No photo available |
0
|
| RB1-DC-W-F4-1M0250-6S0250 | Off Load Fused Isolation Panel | 185mm | 185mm | 1000x2000x600 | POA | £0.00 | No photo available |
0
|
| RB1 Part Number | RB1 Product Description | Max Main Cable Size | Max Batt Cable Size | Dimensions (WxHxD) | List Price | Buy Price | Sample Photo | Qty |
|---|---|---|---|---|---|---|---|---|
| RB1-DC-W-F4-1M0400-2S0400 | Off Load Fused Isolation Panel | 185mm | 185mm | 600x1000x300 | POA | £0.00 | No photo available |
0
|
| RB1-DC-W-F4-1M0400-3S0400 | Off Load Fused Isolation Panel | 185mm | 185mm | 600x1000x300 | POA | £0.00 | No photo available |
0
|
| RB1-DC-W-F4-1M0400-4S0400 | Off Load Fused Isolation Panel | 185mm | 185mm | 800x2000x600 | POA | £0.00 | No photo available |
0
|
| RB1-DC-W-F4-1M0400-5S0400 | Off Load Fused Isolation Panel | 185mm | 185mm | 800x2000x600 | POA | £0.00 | No photo available |
0
|
| RB1-DC-W-F4-1M0400-6S0400 | Off Load Fused Isolation Panel | 185mm | 185mm | 800x2000x600 | POA | £0.00 | No photo available |
0
|
| RB1 Part Number | RB1 Product Description | Max Main Cable Size | Max Batt Cable Size | Dimensions (WxHxD) | List Price | Buy Price | Sample Photo | Qty |
|---|---|---|---|---|---|---|---|---|
| RB1-DC-W-F6-1M0630-3S0630 | Off Load Fused Isolation Panel | 240mm | 240mm | 800X2000X600 | POA | £0.00 | No photo available |
0
|
| RB1-DC-W-F6-1M0630-4S0630 | Off Load Fused Isolation Panel | 240mm | 240mm | 800X2000X600 | POA | £0.00 | No photo available |
0
|
| RB1 Part Number | RB1 Product Description | Max Main Cable Size | Max Batt Cable Size | Dimensions (WxHxD) | List Price | Buy Price | Sample Photo | Qty |
|---|---|---|---|---|---|---|---|---|
| RB1-DC-W-F12-1M1250-2S0630 | Off Load Fused Isolation Panel | 240mm | 240mm | 800X2000X600 | POA | £0.00 | No photo available |
0
|
| RB1-DC-W-F12-1M1250-3S0630 | Off Load Fused Isolation Panel | 240mm | 240mm | 800X2000X600 | POA | £0.00 | No photo available |
0
|
| RB1-DC-W-F12-1M1250-4S0630 | Off Load Fused Isolation Panel | 240mm | 240mm | 800X2000X600 | POA | £0.00 | No photo available |
0
|
High Voltage Fusing Addon▼
| RB1 Part Number | RB1 Product Description | List Price | Buy Price | Sample Photo | Qty |
|---|---|---|---|---|---|
| NH00 – 440VDC (32-160A) | 440VDC Rated Fuse (Cost is per fuse – Add on when ordering) | £50.00 | £50.00 | No photo available |
0
|
| NH1 – 440VDC (160-280A) | 440VDC Rated Fuse (Cost is per fuse – Add on when ordering) | £70.00 | £70.00 | No photo available |
0
|
| NH2 – 440VDC (315-400A) | 440VDC Rated Fuse (Cost is per fuse – Add on when ordering) | £130.00 | £130.00 | No photo available |
0
|
| NH3 – 440VDC (500-630A) | 440VDC Rated Fuse (Cost is per fuse – Add on when ordering) | £170.00 | £170.00 | No photo available |
0
|
| Higher rating VDC fusing is available. Please contact us for pricing. | |||||
Bespoke / Custom Items▼
| Part Number | Description | Buy Price (£) | Drawing Link (Optional) | Qty |
|---|---|---|---|---|
|
0
| ||||
|
0
| ||||
|
0
| ||||
|
0
| ||||
|
0
| ||||
|
0
| ||||
|
0
| ||||
|
0
| ||||
|
0
| ||||
|
0
|
Delivery Charges▼
| Carriage Type | Carriage Description | Buy Price | Qty | |
|---|---|---|---|---|
| AM DELIVERY – UK | AM Delivery For Up To 2x 500x500x200mm Boxes | £25.00 |
0
| |
| AM DELIVERY – UK – PALLET | AM Delivery For Pallets From 500x700x200mm | £50.00 |
0
| |
| AM DELIVERY OVERSIZED PALLET – AM | AM Delivery For Oversized Pallets | £75.00 |
0
| |
|
0
|